

Why You’ll Love This Cheesy Garlic Butter Rollups
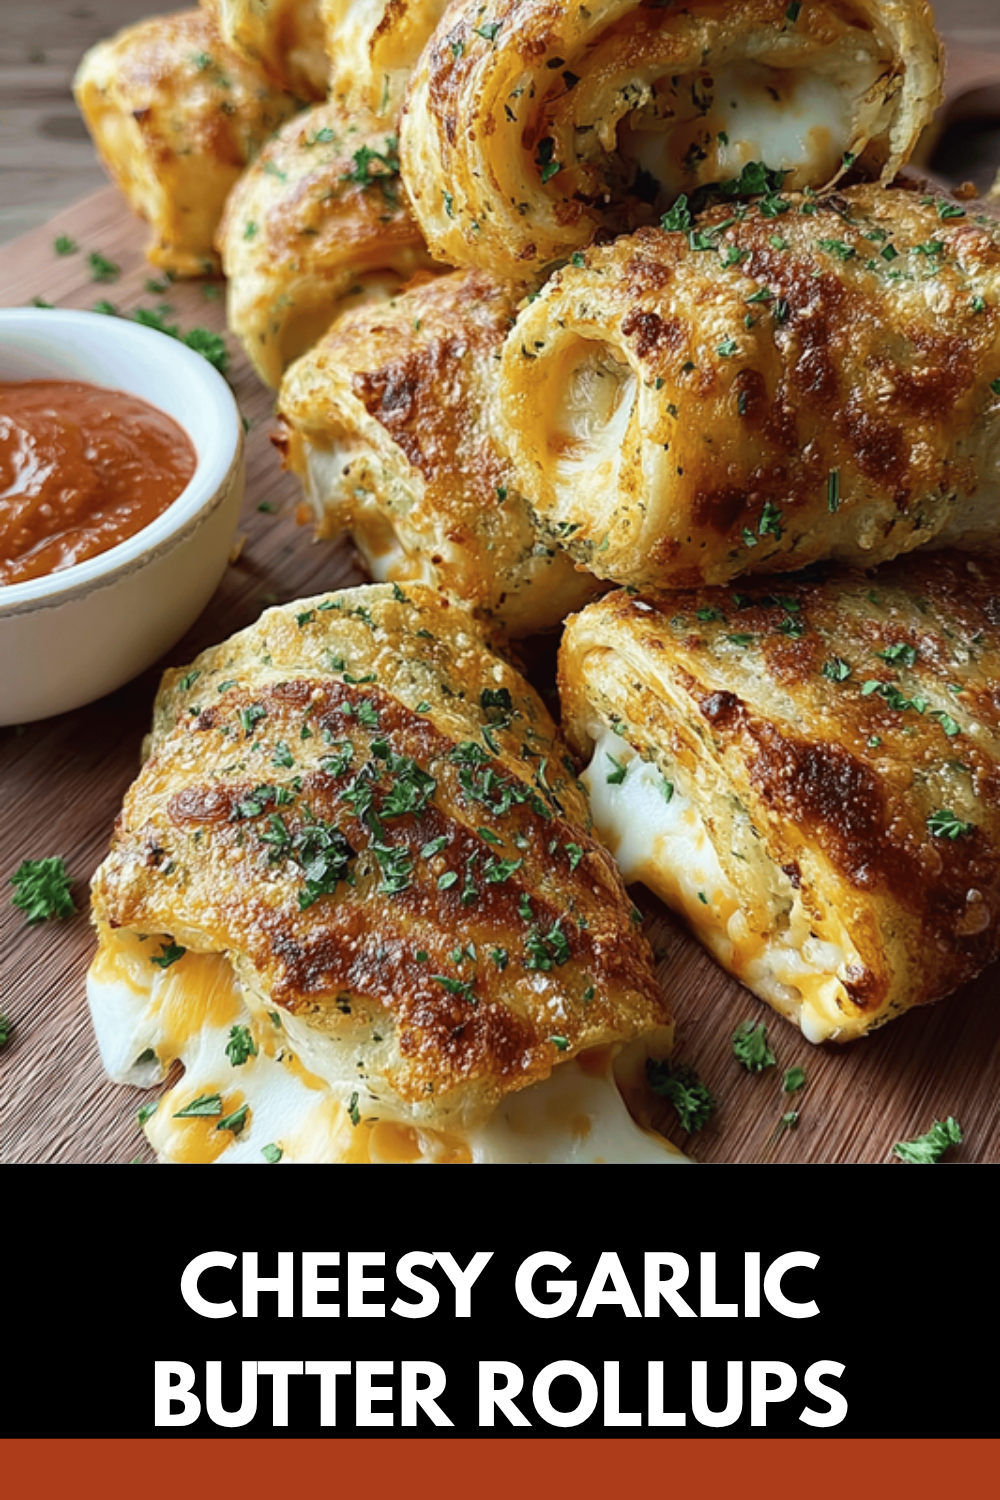
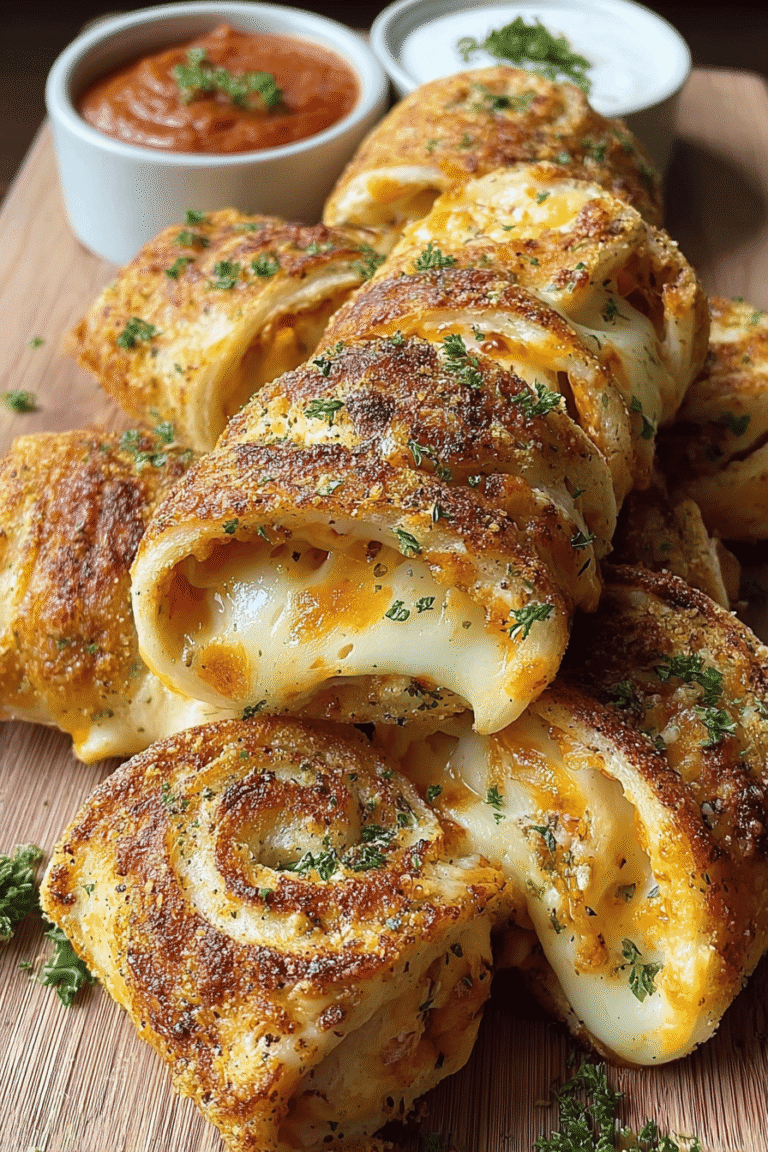
Imagine whipping up a quick snack that’s crispy on the outside and oozing with cheesy goodness on the inside. Cheesy garlic butter rollups check all the boxes for a simple recipe anyone can master, making them a hit with home cooks, busy parents, and anyone craving a comforting bite. These golden bites combine the irresistible flavors of melted cheese and garlicky butter, turning ordinary bread into something special that’s ready in just minutes.
One of the biggest perks is the ease of preparation, which fits seamlessly into tight schedules like those of students or working professionals. This recipe uses basic ingredients you likely have at hand, so it’s perfect for last-minute meals or fun family activities. Plus, with adaptations for various dietary needs, food enthusiasts and diet-conscious individuals can enjoy them without worry, showing why they’re versatile for travelers and newlyweds exploring new flavors together.
Beyond convenience, these rollups offer some health benefits that make them more than just a tasty treat. Garlic in the butter mix brings antioxidants that support your immune system, while the cheeses provide protein and calcium for a nourishing option. For baking enthusiasts or seniors seeking lighter fare, the recipe’s flexibility allows tweaks to keep it satisfying yet balanced. Whether you’re pairing it with a salad for a full meal or serving as a snack, the distinctive flavor of creamy cheese blended with savory garlic creates a memorable experience around the table.
To dive deeper into garlic’s perks, check out this resource on health benefits of garlic. It’s a great way to see how this ingredient adds more than just taste.
Health Highlights and Adaptations
When you try cheesy garlic butter rollups, you’ll notice how they adapt to different lifestyles. For instance, busy parents love that prep takes only 10 minutes, with total time under 25 minutes, making it ideal for weeknight dinners. Diet-conscious folks can appreciate the moderate cheese portions, which keep calories in check at about 190 per serving of two rollups. Variations like using whole wheat bread add fiber, supporting a wholesome approach for anyone from students to seniors.
This recipe shines with its versatility, letting you swap in gluten-free options or vegan cheeses to suit various preferences. Food enthusiasts might experiment with add-ins like vegetables, turning these into a nutrient-packed choice. In essence, it’s not just about the flavors it reflects the blog’s passion for simple, accessible cooking that brings people together.
Jump to:
- Why You’ll Love This Cheesy Garlic Butter Rollups
- Health Highlights and Adaptations
- Essential Ingredients for Cheesy Garlic Butter Rollups
- How to Prepare the Perfect Cheesy Garlic Butter Rollups: Step-by-Step Guide
- Tips for Smooth Preparation
- Dietary Substitutions to Customize Your Cheesy Garlic Butter Rollups
- Seasoning and Flavor Ideas
- Mastering Cheesy Garlic Butter Rollups: Advanced Tips and Variations
- How to Store Cheesy Garlic Butter Rollups: Best Practices
- FAQs: Frequently Asked Questions About Cheesy Garlic Butter Rollups
- What type of bread should I use for cheesy garlic butter rollups?
- Can I make cheesy garlic butter rollups in advance?
- What cheeses work well for garlic butter rollups besides mozzarella and cheddar?
- How can I make garlic butter rollups crispier?
- What are some popular dipping sauces to serve with cheesy garlic butter rollups?
- Cheesy Garlic Butter Rollups
- Ingredients
- Instructions
- Last Step:
- Notes
- Nutrition
- Did you make this recipe?
Essential Ingredients for Cheesy Garlic Butter Rollups
- 8 slices white or whole wheat sandwich bread, crusts removed
- 1 cup shredded mozzarella cheese
- 1/2 cup shredded cheddar cheese
- 2 tablespoons grated Parmesan cheese (optional)
- 4 tablespoons unsalted butter, melted
- 2 cloves garlic, minced
- 1/2 teaspoon garlic powder
- 1 tablespoon chopped fresh parsley or 1 teaspoon dried parsley
- 1/4 teaspoon salt
These ingredients come together to create the perfect balance of cheesy and garlicky flavors, making your rollups irresistible. For those wanting extra options, consider optional dipping sauces like marinara sauce, garlic herb sauce, ranch dressing, or spicy ketchup to elevate your meal.
Gathering these items shows how straightforward this recipe is, especially for home cooks building their skills. Each measurement ensures the right amount of gooey cheese and buttery goodness, so you get consistent results every time. If you’re exploring dietary swaps, like vegan alternatives, you’ll find it easy to adjust based on what’s in your kitchen.
How to Prepare the Perfect Cheesy Garlic Butter Rollups: Step-by-Step Guide
Getting started with cheesy garlic butter rollups is as simple as prepping a few basics. First, preheat the oven to 375°F (190°C) and line a baking sheet with parchment paper or a silicone mat for easy cleanup. This step sets the stage for achieving those golden, crispy edges that make the rollups so appealing.
Next, use a rolling pin to gently flatten each of the 8 slices of bread until they’re thin and even. Then, sprinkle 1 cup shredded mozzarella cheese, 1/2 cup shredded cheddar cheese, and 2 tablespoons grated Parmesan cheese (if using) evenly on the bottom third of each slice. Roll the bread tightly from the cheese side to form a log, sealing the edge with some of the melted butter if needed to keep everything in place.
In a small bowl, mix 4 tablespoons melted unsalted butter, 2 minced garlic cloves, 1/2 teaspoon garlic powder, 1 tablespoon chopped fresh parsley (or 1 teaspoon dried), and 1/4 teaspoon salt to create the garlic butter mixture. Place each rollup seam-side down on the baking sheet and brush generously with this mixture for that flavorful coating. Bake for 12 15 minutes until golden brown and crispy, or use an air fryer at 360°F (180°C) for 8 10 minutes, flipping halfway for even cooking.
Tips for Smooth Preparation
Once baked, let the rollups cool for a minute before serving warm with your favorite dipping sauce. This recipe’s total time is just 25 minutes, with 10 minutes prep and 15 minutes cooking, making it ideal for busy schedules. For those new to baking, remember to use soft bread to make rolling easier and avoid overfilling to prevent cheese from leaking.
If you’d like more ideas for fun twists on baked goods, try this recipe for zesty cheesecake lemon bars that pair well with savory snacks.

Dietary Substitutions to Customize Your Cheesy Garlic Butter Rollups
Making cheesy garlic butter rollups your own is simple with a few smart swaps. For protein boosts, try adding cooked chicken or tofu inside the rollups, which keeps them hearty for working professionals on the go. Vegan options shine by using plant-based cheeses like cashew-based alternatives in place of dairy, ensuring everyone from diet-conscious individuals to food enthusiasts can enjoy the meal.
When it comes to the base, swap regular bread for gluten-free wraps made from rice or almond flour to accommodate sensitivities. Vegetable additions, such as fresh spinach or roasted bell peppers, not only enhance texture but also add nutrients, making these a great choice for busy parents seeking balanced snacks. Experimenting with sauces like pesto or marinara can bring new flavors, turning this into a customizable favorite.
- Use vegan cheese for a plant-based twist
- Opt for gluten-free wraps to keep it inclusive
- Incorporate veggies like sun-dried tomatoes for extra taste
Seasoning and Flavor Ideas
Adjust seasonings with herbs like basil or oregano to match your preferences, which is perfect for baking enthusiasts wanting to play with tastes. These changes keep the recipe accessible while allowing seniors or newlyweds to tailor it to their needs, fostering enjoyable cooking moments.
Mastering Cheesy Garlic Butter Rollups: Advanced Tips and Variations
Taking your cheesy garlic butter rollups to the next level involves some pro techniques that enhance texture and flavor. Use a grill press or sandwich maker to crisp them evenly, avoiding any burnt spots while melting the cheese perfectly. For flavor variations, swap mozzarella for smoked gouda or add caramelized onions inside for a deeper taste that food travelers might appreciate.
Presentation matters too slice the rollups into bite-sized pinwheels and serve with dipping sauces like garlic aioli for a party-ready look. To make ahead, assemble them and store in the fridge, then reheat in an oven or air fryer to keep that fresh crispness. These tips are especially useful for baking enthusiasts experimenting with new ideas.
| Tips for Crispiness | Flavor Boosts |
|---|---|
| Brush with extra garlic butter | Add chili flakes for heat |
| Bake on a wire rack | Incorporate sun-dried tomatoes |
How to Store Cheesy Garlic Butter Rollups: Best Practices
Keeping your cheesy garlic butter rollups fresh starts with proper storage to maintain that delightful crunch. Store leftovers in an airtight container in the fridge for up to 3 days, which works well for meal prep among busy families. Freezing is another option wrap them tightly and keep for up to 2 months to enjoy later without losing quality.
When reheating, use a preheated oven at 350°F for 10-15 minutes or an air fryer for quick crispiness, making it convenient for students grabbing a fast snack. These practices ensure your rollups taste just as good the next day, supporting a joyful cooking routine.
FAQs: Frequently Asked Questions About Cheesy Garlic Butter Rollups
What type of bread should I use for cheesy garlic butter rollups?
Can I make cheesy garlic butter rollups in advance?
What cheeses work well for garlic butter rollups besides mozzarella and cheddar?
How can I make garlic butter rollups crispier?
What are some popular dipping sauces to serve with cheesy garlic butter rollups?
Cheesy Garlic Butter Rollups
🧄 Enjoy cheesy garlic butter rollups that offer easy-to-make golden bites bursting with rich flavors.
🔥 Perfect as a snack or appetizer, these rollups combine melty cheese with crispy garlic butter crust for irresistible taste.
- Total Time: 25 minutes
- Yield: 4 servings (2 rollups per serving)
Ingredients
– 8 slices white or whole wheat sandwich bread, crusts removed
– 1 cup shredded mozzarella cheese
– 1/2 cup shredded cheddar cheese
– 2 tablespoons grated Parmesan cheese (optional)
– 4 tablespoons unsalted butter, melted
– 2 cloves garlic, minced
– 1/2 teaspoon garlic powder
– 1 tablespoon chopped fresh parsley or 1 teaspoon dried parsley
– 1/4 teaspoon salt
Instructions
1-Getting started: with cheesy garlic butter rollups is as simple as prepping a few basics. First, preheat the oven to 375°F (190°C) and line a baking sheet with parchment paper or a silicone mat for easy cleanup. This step sets the stage for achieving those golden, crispy edges that make the rollups so appealing.
2-Next, use a rolling pin to gently flatten each of the 8 slices of bread until they’re thin and even. Then, sprinkle 1 cup shredded mozzarella cheese, 1/2 cup shredded cheddar cheese, and 2 tablespoons grated Parmesan cheese (if using) evenly on the bottom third of each slice. Roll the bread tightly from the cheese side to form a log, sealing the edge with some of the melted butter if needed to keep everything in place.
3-In a small bowl, mix 4 tablespoons melted unsalted butter, 2 minced garlic cloves, 1/2 teaspoon garlic powder, 1 tablespoon chopped fresh parsley (or 1 teaspoon dried), and 1/4 teaspoon salt to create the garlic butter mixture. Place each rollup seam-side down on the baking sheet and brush generously with this mixture for that flavorful coating. Bake for 12 15 minutes until golden brown and crispy, or use an air fryer at 360°F (180°C) for 8 10 minutes, flipping halfway for even cooking.
4-Once baked, let the rollups cool for a minute before serving warm with your favorite dipping sauce. This recipe’s total time is just 25 minutes, with 10 minutes prep and 15 minutes cooking, making it ideal for busy schedules. For those new to baking, remember to use soft bread to make rolling easier and avoid overfilling to prevent cheese from leaking.
Last Step:
Please leave a rating and comment letting us know how you liked this recipe! This helps our business to thrive and continue providing free, high-quality recipes for you.Notes
🍞 Use soft bread to make rolling easier and keep cheese inside.
🧈 Seal edges tightly with melted butter to prevent unrolling.
🧀 Avoid overfilling to stop cheese from leaking during baking.
🔥 For extra crispiness, brush with more garlic butter and bake on a wire rack or use an air fryer.
- Prep Time: 10 minutes
- Cook Time: 15 minutes
- Category: Appetizer
- Method: Baking or Air Frying
- Cuisine: American
Nutrition
- Serving Size: 2 rollups
- Calories: 190
- Sugar: 1 g
- Sodium: 290 mg
- Fat: 13 g
- Saturated Fat: 7 g
- Unsaturated Fat: 4 g
- Trans Fat: 0 g
- Carbohydrates: 12 g
- Fiber: 1 g
- Protein: 7 g
- Cholesterol: 30 mg





