

Why You’ll Love This Turkey Gravy Recipe
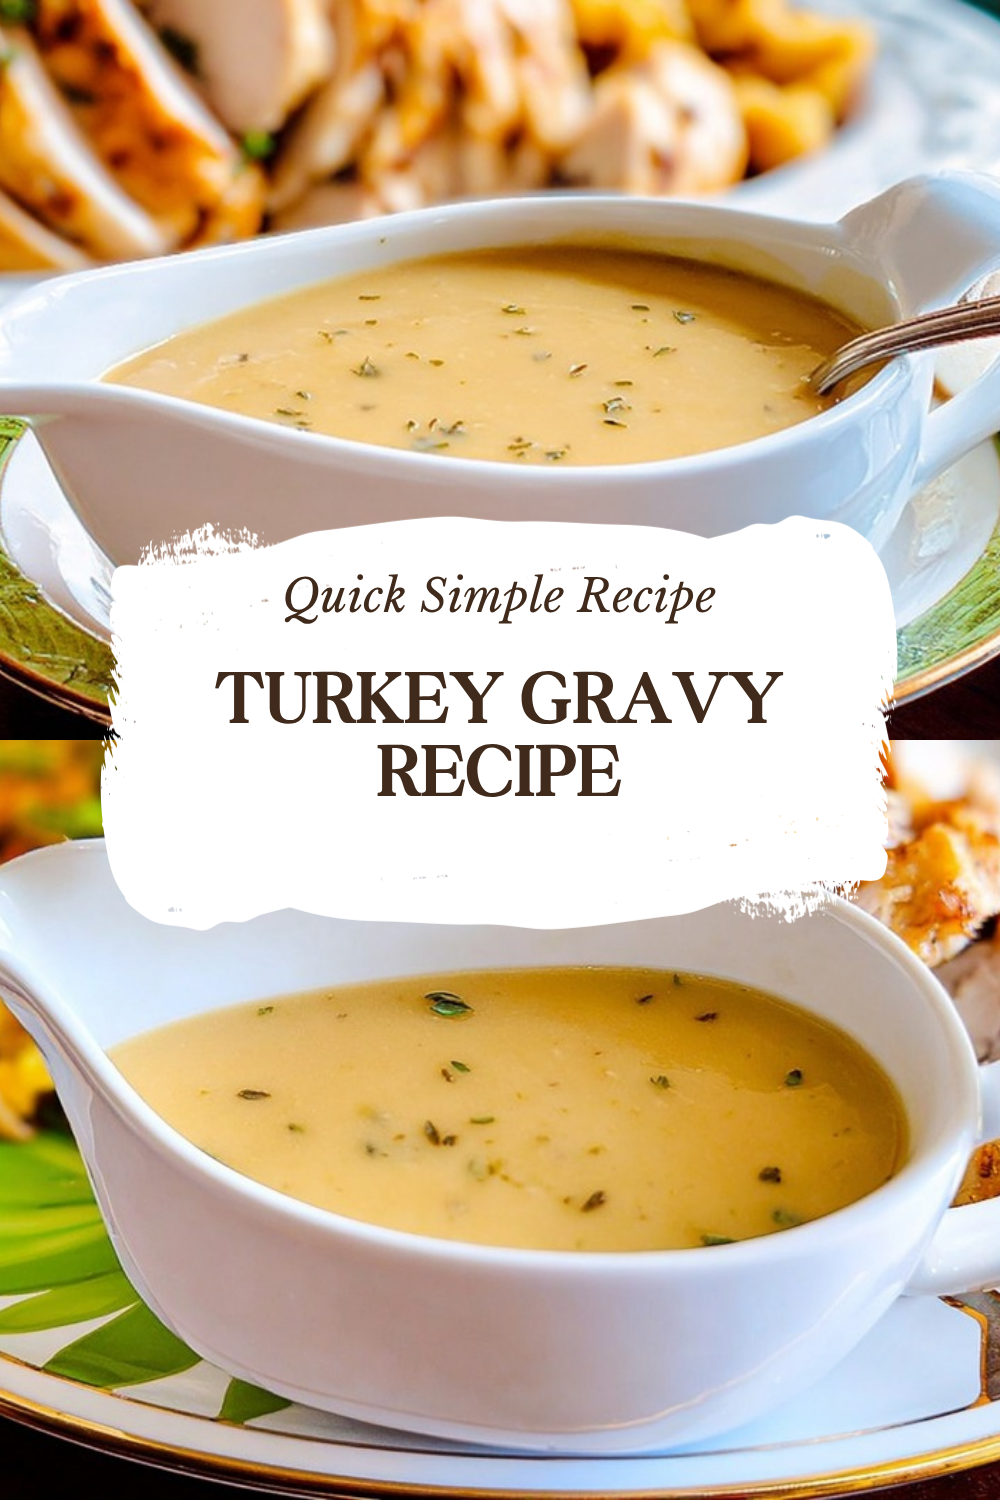
There’s something magical about a rich, silky gravy cascading over golden roasted turkey and fluffy mashed potatoes. This turkey gravy recipe delivers that restaurant-quality experience right in your home kitchen, and it comes together in just 13 minutes from start to finish. Whether you’re hosting your first Thanksgiving dinner or you’re a seasoned pro looking for a reliable go-to, this recipe checks all the boxes for busy families and food enthusiasts alike.
- Ease of preparation: With only 5 minutes of prep and 8 minutes of cook time, this turkey gravy fits perfectly into your holiday schedule. The straightforward technique of creating a roux from pan drippings and flour means you don’t need culinary school training to achieve smooth, lump-free results every single time.
- Health benefits: At just 47 calories per quarter-cup serving, this gravy delivers bold flavor without weighing down your meal. The recipe contains only 4 grams of carbohydrates and 3 grams of fat per serving, making it a sensible addition to your holiday plate when you’re watching your intake.
- Versatility: While designed for Thanksgiving turkey, this gravy recipe adapts beautifully to chicken, beef, or even vegetarian preparations with simple swaps. You can adjust the consistency, seasonings, and base ingredients to suit whatever main dish you’re serving.
- Distinctive flavor: The combination of golden-brown roux, real pan drippings, and freshly cracked black pepper creates a depth of flavor that store-bought versions simply cannot match. That nutty aroma when the flour hits the hot fat is the foundation of something truly special.
After roasting your turkey, don’t toss those flavorful drippings. They’re the secret to making a rich gravy that comes together quickly and tastes way better than anything from a jar. This turkey gravy recipe transforms what would otherwise be waste into the star of your dinner table.
Jump to:
- Why You’ll Love This Turkey Gravy Recipe
- Essential Ingredients for Turkey Gravy Recipe
- Main Ingredients
- Special Dietary Options
- Nutritional Information (Per 1/4 Cup Serving)
- How to Prepare the Perfect Turkey Gravy Recipe: Step-by-Step Guide
- Step 1: Collect and Strain Your Pan Drippings
- Step 2: Measure and Prepare Your Fat
- Step 3: Create Your Roux Foundation
- Step 4: Add Your Liquid Gradually
- Step 5: Simmer and Thicken
- Step 6: Season and Serve
- Quick Reference: Timing Breakdown
- Dietary Substitutions to Customize Your Turkey Gravy Recipe
- Protein and Main Component Alternatives
- Vegetable, Sauce, and Seasoning Modifications
- Mastering Turkey Gravy Recipe: Advanced Tips and Variations
- Pro Cooking Techniques
- Flavor Variations
- Presentation Tips
- Make-Ahead Options
- How to Store Turkey Gravy Recipe: Best Practices
- Refrigeration Guidelines
- Freezing for Longer Storage
- Reheating Without Separation
- Meal Prep Considerations
- FAQs: Frequently Asked Questions About Turkey Gravy Recipe
- How do you make turkey gravy from pan drippings?
- What if I don’t have enough turkey pan drippings for gravy?
- Can you make turkey gravy without pan drippings?
- How do you avoid lumps in turkey gravy?
- How do you store leftover turkey gravy?
- Turkey Gravy Recipe
- Ingredients
- Instructions
- Last Step:
- Notes
- Nutrition
- Did you make this recipe?
Essential Ingredients for Turkey Gravy Recipe
Every great gravy starts with understanding your ingredients and how they work together. The beauty of this recipe lies in its simplicity. You likely have most of these items in your pantry already, and each serves a specific purpose in creating that silky, flavorful sauce you crave.
Main Ingredients
- 1/2 cup turkey pan drippings – The foundation of authentic turkey flavor, collected from your roasted bird. These drippings contain concentrated juices and rendered fat that give gravy its signature taste.
- 2 tablespoons butter – Used to supplement the fat from drippings if needed, butter adds richness and helps create a smooth roux base for thickening.
- 1/4 cup all-purpose flour – The thickening agent that transforms liquid into gravy. When cooked with fat, flour creates a roux that gives gravy its body and eliminates any raw flour taste.
- 1 1/2 cups chicken broth – Extends the drippings to achieve the right volume and consistency. Use a quality broth for the best flavor foundation.
- Pinch of freshly cracked black pepper – Adds subtle warmth and complexity. Fresh cracked pepper releases more aromatic oils than pre-ground varieties.
Special Dietary Options
Gluten-free: Replace all-purpose flour with an equal amount of cornstarch or a gluten-free flour blend. For cornstarch, create a slurry by mixing 2 tablespoons cornstarch with 2 tablespoons cold water, then whisk into simmering broth until thickened.
Low-sodium: Use low-sodium chicken broth and season gradually with salt at the end, tasting as you go.
Dairy-free: The butter can be replaced with additional turkey fat or a neutral oil like avocado oil for a similar result.
Nutritional Information (Per 1/4 Cup Serving)
| Nutrient | Amount |
|---|---|
| Calories | 47 kcal |
| Carbohydrates | 4 g |
| Protein | 1 g |
| Fat | 3 g |
| Sodium | 207 mg |
| Fiber | 0.1 g |
How to Prepare the Perfect Turkey Gravy Recipe: Step-by-Step Guide
Creating silky, lump-free gravy is all about technique and timing. This turkey gravy recipe breaks down each step so you can confidently whisk your way to success, even during the chaos of Thanksgiving dinner. For more detailed guidance on gravy techniques, you can check out this helpful resource from Tastes Better From Scratch.
Step 1: Collect and Strain Your Pan Drippings
After removing your turkey from the roasting pan, carefully pour all the drippings through a fine mesh strainer into a liquid measuring cup. This catches any bits of herbs, skin, or coagulated proteins that could make your gravy grainy. Let the strained liquid sit undisturbed for 3-5 minutes so the fat naturally separates and rises to the top. You’ll see a golden layer floating above the darker juices. This separation step is crucial for measuring your fat accurately and achieving the right consistency.
Step 2: Measure and Prepare Your Fat
Using a spoon, carefully skim off about 3 tablespoons of the separated fat from the top of your drippings. If your turkey didn’t produce enough fat, simply add butter to make up the difference. The fat-to-flour ratio matters for proper thickening. Too little fat and your roux will be pasty. Too much and your gravy won’t thicken properly. Place this fat in your medium saucepan along with 2 tablespoons of butter for richness.
Step 3: Create Your Roux Foundation
Heat the turkey fat and butter in your medium saucepan over medium heat until melted and bubbling gently. Add the 1/4 cup of all-purpose flour and whisk continuously with a flat whisk or wooden spoon. Keep whisking as the mixture cooks for about 1 1/2 to 2 minutes. You’re looking for the flour to turn a light golden brown color and release a nutty, toasted aroma. This step is essential for removing any raw flour taste and building the foundation for flavorful gravy.
Pro tip: Cooking the flour and fat until lightly golden removes raw flour taste and adds a subtle depth that makes all the difference between homemade and store-bought gravy.
Step 4: Add Your Liquid Gradually
Here’s where many home cooks run into trouble with lumps. The secret is patience and constant motion. Slowly pour in the remaining pan drippings and 1 1/2 cups chicken broth while whisking constantly. Add the liquid in a thin stream rather than dumping it all at once. This gradual addition gives you control over the consistency and prevents those dreaded flour clumps. If you notice lumps forming despite your best efforts, don’t panic. Simply strain the finished gravy through a fine mesh sieve before serving.
Step 5: Simmer and Thicken
Bring your mixture to a gentle boil, then immediately reduce the heat to medium-low. Let the gravy simmer for about 5 minutes, whisking often to prevent sticking and ensure even thickening. During this time, the flour fully hydrates and the gravy develops its characteristic silky texture. You’ll notice it coating the back of your spoon when it’s ready. The gravy will continue to thicken as it cools, so pull it from the heat when it’s slightly thinner than your desired final consistency.
Step 6: Season and Serve
Taste your gravy and season with salt and freshly cracked black pepper to your liking. Remember that the drippings and broth already contain sodium, so start with a small amount of salt and adjust upward. Remove from heat and serve immediately over your roasted turkey, mashed potatoes, or whatever suits your fancy. The gravy will thicken further as it cools on the table.
Quick Reference: Timing Breakdown
- Prep time: 5 minutes
- Cook time: 8 minutes
- Total time: 13 minutes
- Yields: Approximately 2 cups of gravy

Dietary Substitutions to Customize Your Turkey Gravy Recipe
Not everyone has a roasted turkey handy, and dietary restrictions sometimes call for creative solutions. The good news is that this turkey gravy recipe adapts beautifully to various needs and ingredient availability. Understanding these substitutions gives you flexibility year-round, not just during the holidays.
Protein and Main Component Alternatives
If you’re working with a pre-cooked turkey from the grocery store or simply don’t have enough drippings, you can still create delicious gravy from scratch. Use 4 tablespoons of butter as your fat base and 2 cups of turkey or chicken broth as your liquid. To boost the flavor profile, add 1 teaspoon of minced garlic and 1/2 teaspoon of poultry seasoning to the butter before making your roux. A bay leaf simmered with the gravy adds subtle herbal notes that mimic the complexity of real pan drippings.
For beef roast applications, this same technique works wonderfully with beef drippings and beef broth. The darker, more robust flavor pairs beautifully with roast beef, meatloaf, or steak. Simply collect your beef drippings the same way and proceed with the recipe as written.
Vegetarians can create a satisfying gravy using vegetable broth and olive oil or vegan butter. Double the seasonings since vegetable broth lacks the concentrated proteins that give meat drippings their richness. A tablespoon of nutritional yeast adds savory depth and a hint of umami.
Vegetable, Sauce, and Seasoning Modifications
Seasonings transform basic gravy into something memorable. While this recipe keeps things simple with salt and pepper, consider these flavor additions based on your menu:
- Fresh herbs: Add 1/2 teaspoon of thyme, sage, or rosemary during the simmering stage for aromatic complexity that complements poultry beautifully.
- Garlic boost: Sauté 1 teaspoon of minced garlic in the fat before adding flour for a deeper savory foundation.
- Onion powder: A pinch of onion powder dissolved in the broth adds subtle sweetness and savory depth without visible particles.
- Soy sauce or Worcestershire: Just 1/2 teaspoon of either adds umami richness that makes the gravy taste like it simmered all day.
For seasonal variations, consider adding a pinch of cinnamon or nutmeg during autumn for a warming holiday twist. Spring menus might benefit from fresh chives stirred in at the very end for a pop of color and mild onion flavor.
Mastering Turkey Gravy Recipe: Advanced Tips and Variations
Once you’ve mastered the basic technique, a few professional tricks can elevate your turkey gravy recipe from good to unforgettable. These insights come from years of holiday cooking experience and plenty of trial and error in the kitchen.
Pro Cooking Techniques
Temperature control makes the difference between silky and separated gravy. Always cook your roux over medium heat, never high. High heat causes the flour to clump and creates hot spots that lead to lumpy gravy. When adding liquid, have everything measured and ready before you start. Rushing creates mistakes, especially when family is waiting at the table.
Use a flat whisk rather than a balloon whisk for better coverage across the bottom of your pan. The flat shape lets you get into the corners where flour likes to hide and scorch. If you only have a balloon whisk, use a spatula to periodically scrape the bottom edges of your pan.
Flavor Variations
Transform your gravy with these simple additions that pair beautifully with different main dishes:
- Mushroom gravy: Sauté 1 cup of sliced mushrooms in the butter before adding flour. Use beef or vegetable broth for a vegetarian option that’s rich and earthy.
- Herb-infused: Tie fresh thyme, sage, and rosemary sprigs together with kitchen twine and simmer in the gravy for 5 minutes before removing.
- Cream gravy: Replace half the broth with whole milk or heavy cream for a richer, silkier texture perfect over biscuits.
- Spicy kick: Add a pinch of cayenne pepper or a few drops of hot sauce for a Southern-inspired variation.
Presentation Tips
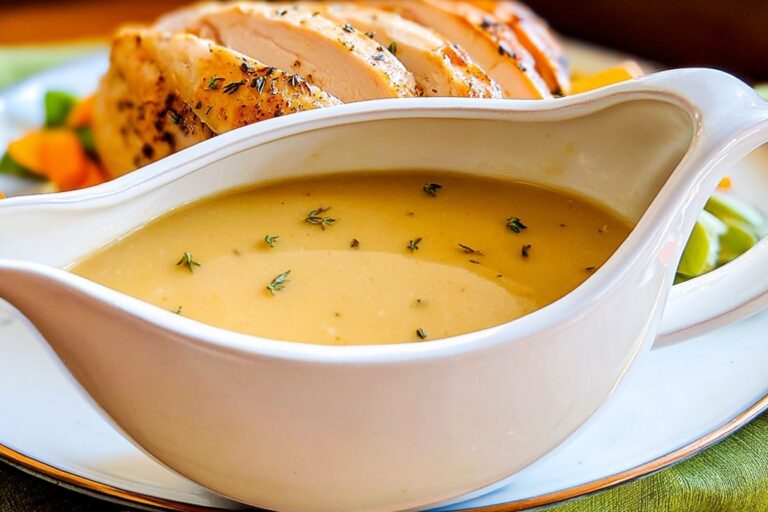
Transfer your finished gravy to a warm gravy boat or pitcher for elegant table service. A garnish of fresh parsley or chive blossoms adds color and shows you care about the details. For family-style serving, keep gravy warm in a slow cooker set to low, stirring occasionally to prevent a skin from forming.
Make-Ahead Options
Holiday cooking demands strategic timing. You can make this gravy up to 2 days ahead and refrigerate it in an airtight container. When ready to serve, reheat gently on the stovetop over low heat, whisking in a splash of broth if it’s too thick. For Thanksgiving planning, prepare your gravy the day before and focus on your turkey the day of. Looking for more make-ahead desserts? Our banana bundt cake pairs wonderfully with holiday meals and can be prepared in advance.
How to Store Turkey Gravy Recipe: Best Practices
Proper storage keeps your homemade gravy safe and delicious for future meals. Whether you’re dealing with intentional leftovers or just preparing ahead, these guidelines ensure your turkey gravy recipe maintains its quality.
Refrigeration Guidelines
Allow your gravy to cool completely before storing. Transfer to an airtight container and refrigerate for up to 4 days. The gravy will thicken considerably when chilled as the flour continues to absorb liquid. This is normal and easily remedied. When reheating, add a splash of broth or water while whisking to restore the original consistency. Never leave gravy at room temperature for more than 2 hours due to food safety concerns.
Freezing for Longer Storage
For longer storage, portion your cooled gravy into freezer-safe containers or heavy-duty freezer bags. Label with the date and freeze for up to 3 months. Individual portions in freezer bags thaw faster and let you grab just what you need for a single meal. To thaw, transfer to the refrigerator overnight. Reheat on the stovetop over low heat, whisking in additional broth if needed to achieve the desired consistency.
Reheating Without Separation
The key to reheating gravy without separation is gentle, gradual heat. Place your gravy in a saucepan over medium-low heat. Whisk constantly as it warms to redistribute any separated fats and starches. If the gravy looks broken or separated despite your efforts, whisk in 1 teaspoon of cold butter off the heat. The emulsification helps bring everything back together. Alternatively, a quick pulse with an immersion blender can rescue slightly separated gravy.
Meal Prep Considerations
For batch cooking, double or triple the recipe and freeze portions for quick weeknight meals. Gravy elevates simple dishes like roasted chicken, pork chops, or even scrambled eggs. Planning ahead saves time during busy weeks and ensures you always have something delicious ready to go. After enjoying your main meal, consider ending on a sweet note with our strawberry shortcake trifles for a complete dining experience.
FAQs: Frequently Asked Questions About Turkey Gravy Recipe
How do you make turkey gravy from pan drippings?
What if I don’t have enough turkey pan drippings for gravy?
Can you make turkey gravy without pan drippings?
How do you avoid lumps in turkey gravy?
How do you store leftover turkey gravy?
Turkey Gravy Recipe
🦃 Silky, rich turkey gravy that perfectly complements your Thanksgiving turkey and mashed potatoes!
🍽️ Quick and easy to make with pan drippings for authentic holiday flavor without the fuss!
- Total Time: 13 minutes
- Yield: 8 servings
Ingredients
– 1/2 cup turkey pan drippings for authentic turkey flavor
– 2 tablespoons butter for richness and roux base
– 1/4 cup all-purpose flour for thickening
– 1 1/2 cups chicken broth to extend drippings
– Pinch of freshly cracked black pepper for warmth and complexity
Instructions
1-Step 1: Collect and Strain Your Pan DrippingsAfter removing your turkey from the roasting pan, carefully pour all the drippings through a fine mesh strainer into a liquid measuring cup. This catches any bits of herbs, skin, or coagulated proteins that could make your gravy grainy. Let the strained liquid sit undisturbed for 3-5 minutes so the fat naturally separates and rises to the top. You’ll see a golden layer floating above the darker juices. This separation step is crucial for measuring your fat accurately and achieving the right consistency.
2-Step 2: Measure and Prepare Your FatUsing a spoon, carefully skim off about 3 tablespoons of the separated fat from the top of your drippings. If your turkey didn’t produce enough fat, simply add butter to make up the difference. The fat-to-flour ratio matters for proper thickening. Too little fat and your roux will be pasty. Too much and your gravy won’t thicken properly. Place this fat in your medium saucepan along with 2 tablespoons of butter for richness.
3-Step 3: Create Your Roux FoundationHeat the turkey fat and butter in your medium saucepan over medium heat until melted and bubbling gently. Add the 1/4 cup of all-purpose flour and whisk continuously with a flat whisk or wooden spoon. Keep whisking as the mixture cooks for about 1 1/2 to 2 minutes. You’re looking for the flour to turn a light golden brown color and release a nutty, toasted aroma. This step is essential for removing any raw flour taste and building the foundation for flavorful gravy.
4-Step 4: Add Your Liquid GraduallyHere’s where many home cooks run into trouble with lumps. The secret is patience and constant motion. Slowly pour in the remaining pan drippings and 1 1/2 cups chicken broth while whisking constantly. Add the liquid in a thin stream rather than dumping it all at once. This gradual addition gives you control over the consistency and prevents those dreaded flour clumps. If you notice lumps forming despite your best efforts, don’t panic. Simply strain the finished gravy through a fine mesh sieve before serving.
5-Step 5: Simmer and ThickenBring your mixture to a gentle boil, then immediately reduce the heat to medium-low. Let the gravy simmer for about 5 minutes, whisking often to prevent sticking and ensure even thickening. During this time, the flour fully hydrates and the gravy develops its characteristic silky texture. You’ll notice it coating the back of your spoon when it’s ready. The gravy will continue to thicken as it cools, so pull it from the heat when it’s slightly thinner than your desired final consistency.
6-Step 6: Season and ServeTaste your gravy and season with salt and freshly cracked black pepper to your liking. Remember that the drippings and broth already contain sodium, so start with a small amount of salt and adjust upward. Remove from heat and serve immediately over your roasted turkey, mashed potatoes, or whatever suits your fancy. The gravy will thicken further as it cools on the table.
Last Step:
Please leave a rating and comment letting us know how you liked this recipe! This helps our business to thrive and continue providing free, high-quality recipes for you.Notes
🔥 Cook the flour and fat until lightly golden to remove raw flour taste and add nutty flavor.
🥄 Pour liquid slowly while whisking constantly to prevent lumps.
❄️ Gravy thickens as it cools; thin with more broth if needed when reheating.
- Prep Time: 5 minutes
- Cook Time: 8 minutes
- Category: Sauce
- Method: Stovetop
- Cuisine: American
Nutrition
- Serving Size: ¼ cup
- Calories: 47 kcal
- Sugar: 0 g
- Sodium: 207 mg
- Fat: 3 g
- Saturated Fat: N/A
- Unsaturated Fat: N/A
- Trans Fat: N/A
- Carbohydrates: 4 g
- Fiber: 0.1 g
- Protein: 1 g
- Cholesterol: N/A





