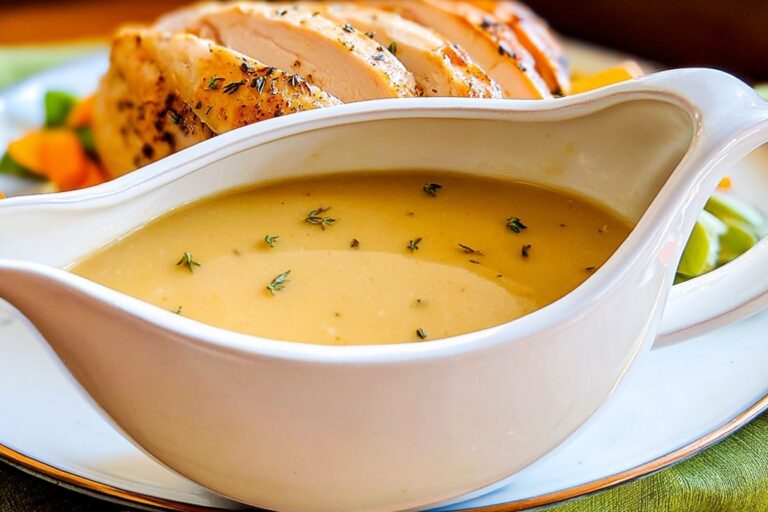
Ingredients
– 1/2 cup turkey pan drippings for authentic turkey flavor
– 2 tablespoons butter for richness and roux base
– 1/4 cup all-purpose flour for thickening
– 1 1/2 cups chicken broth to extend drippings
– Pinch of freshly cracked black pepper for warmth and complexity
Instructions
1-Step 1: Collect and Strain Your Pan DrippingsAfter removing your turkey from the roasting pan, carefully pour all the drippings through a fine mesh strainer into a liquid measuring cup. This catches any bits of herbs, skin, or coagulated proteins that could make your gravy grainy. Let the strained liquid sit undisturbed for 3-5 minutes so the fat naturally separates and rises to the top. You’ll see a golden layer floating above the darker juices. This separation step is crucial for measuring your fat accurately and achieving the right consistency.
2-Step 2: Measure and Prepare Your FatUsing a spoon, carefully skim off about 3 tablespoons of the separated fat from the top of your drippings. If your turkey didn’t produce enough fat, simply add butter to make up the difference. The fat-to-flour ratio matters for proper thickening. Too little fat and your roux will be pasty. Too much and your gravy won’t thicken properly. Place this fat in your medium saucepan along with 2 tablespoons of butter for richness.
3-Step 3: Create Your Roux FoundationHeat the turkey fat and butter in your medium saucepan over medium heat until melted and bubbling gently. Add the 1/4 cup of all-purpose flour and whisk continuously with a flat whisk or wooden spoon. Keep whisking as the mixture cooks for about 1 1/2 to 2 minutes. You’re looking for the flour to turn a light golden brown color and release a nutty, toasted aroma. This step is essential for removing any raw flour taste and building the foundation for flavorful gravy.
4-Step 4: Add Your Liquid GraduallyHere’s where many home cooks run into trouble with lumps. The secret is patience and constant motion. Slowly pour in the remaining pan drippings and 1 1/2 cups chicken broth while whisking constantly. Add the liquid in a thin stream rather than dumping it all at once. This gradual addition gives you control over the consistency and prevents those dreaded flour clumps. If you notice lumps forming despite your best efforts, don’t panic. Simply strain the finished gravy through a fine mesh sieve before serving.
5-Step 5: Simmer and ThickenBring your mixture to a gentle boil, then immediately reduce the heat to medium-low. Let the gravy simmer for about 5 minutes, whisking often to prevent sticking and ensure even thickening. During this time, the flour fully hydrates and the gravy develops its characteristic silky texture. You’ll notice it coating the back of your spoon when it’s ready. The gravy will continue to thicken as it cools, so pull it from the heat when it’s slightly thinner than your desired final consistency.
6-Step 6: Season and ServeTaste your gravy and season with salt and freshly cracked black pepper to your liking. Remember that the drippings and broth already contain sodium, so start with a small amount of salt and adjust upward. Remove from heat and serve immediately over your roasted turkey, mashed potatoes, or whatever suits your fancy. The gravy will thicken further as it cools on the table.
Last Step:
Please leave a rating and comment letting us know how you liked this recipe! This helps our business to thrive and continue providing free, high-quality recipes for you.Notes
🔥 Cook the flour and fat until lightly golden to remove raw flour taste and add nutty flavor.
🥄 Pour liquid slowly while whisking constantly to prevent lumps.
❄️ Gravy thickens as it cools; thin with more broth if needed when reheating.
- Prep Time: 5 minutes
- Cook Time: 8 minutes
- Category: Sauce
- Method: Stovetop
- Cuisine: American
Nutrition
- Serving Size: ¼ cup
- Calories: 47 kcal
- Sugar: 0 g
- Sodium: 207 mg
- Fat: 3 g
- Saturated Fat: N/A
- Unsaturated Fat: N/A
- Trans Fat: N/A
- Carbohydrates: 4 g
- Fiber: 0.1 g
- Protein: 1 g
- Cholesterol: N/A