

Why You’ll Love These Chocolate Protein Balls
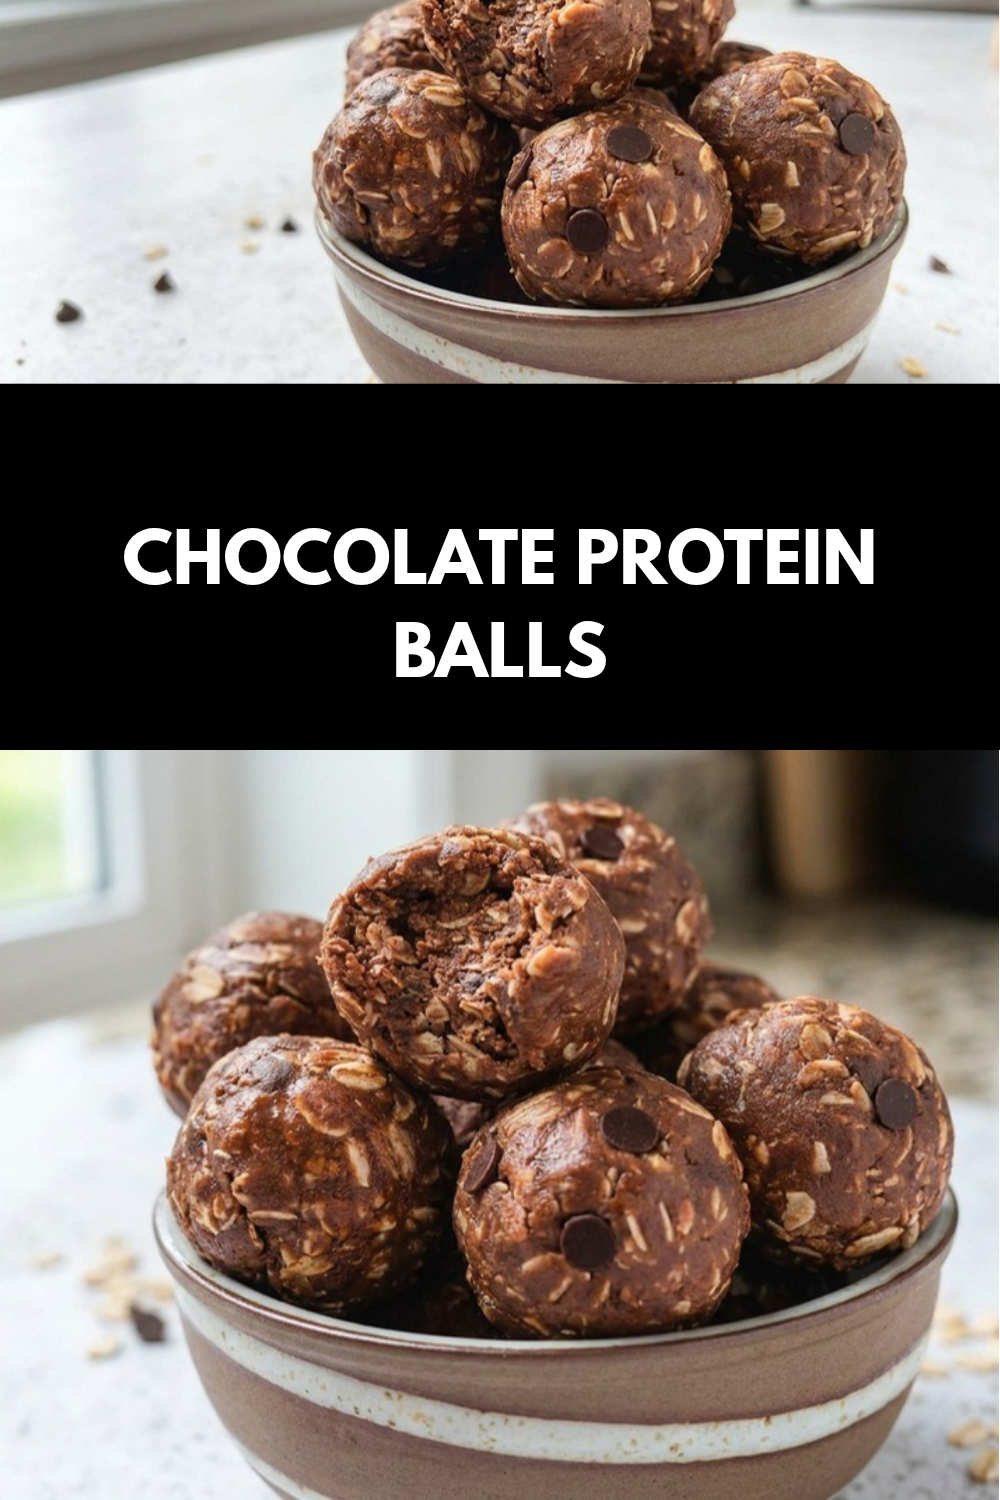
These Chocolate Protein Balls are one of those snack recipes that disappear fast in my kitchen. They taste like a sweet little treat, but they are made with simple pantry ingredients and come together in minutes. If you need a snack that feels fun, filling, and easy to make, this protein balls recipe is a total win.
- So easy to make: This is a true no bake protein balls recipe. You just mix, roll, chill, and snack. The prep time is only 5 minutes, which makes it perfect for busy parents, students, and working professionals.
- Better-for-you snacking: Each ball gives you a nice mix of oats, peanut butter, and chocolate protein powder. That means you get protein, fiber, and a little sweetness in every bite. One serving has about 100 calories and 4 grams of protein.
- Great for all kinds of eaters: These peanut butter protein balls can be adjusted for vegan, lower-carb, or higher-protein needs. That makes them handy for diet-conscious readers who still want something tasty.
- Big chocolate flavor: If you love a rich chocolate-peanut butter combo, these chocolate peanut butter protein balls hit the spot. Mini chocolate chips and chocolate protein powder give them that candy-like flavor without any baking fuss.
These little snack bites are the kind of recipe you make once, then keep on repeat all month long.
If you like quick snack ideas, you may also enjoy these easy no-bake energy bites for another grab-and-go option.
Jump to:
- Why You’ll Love These Chocolate Protein Balls
- Essential Ingredients for Chocolate Protein Balls
- Special Dietary Options
- How to Prepare the Perfect Chocolate Protein Balls: Step-by-Step Guide
- First Step: Gather and measure everything
- Second Step: Mix the base
- Third Step: Check the texture
- Fourth Step: Roll into balls
- Fifth Step: Chill to set
- Final Step: Store and serve
- Nutrition Snapshot Per Serving
- Dietary Substitutions to Customize Your Chocolate Protein Balls
- Protein and Main Component Alternatives
- Vegetable, Sauce, and Seasoning Modifications
- Mastering Chocolate Protein Balls: Advanced Tips and Variations
- Pro cooking techniques
- Flavor variations
- Presentation tips
- Make-ahead options
- How to Store Chocolate Protein Balls: Best Practices
- Refrigeration
- Freezing
- Reheating
- Meal prep considerations
- FAQs: Frequently Asked Questions About Chocolate Protein Balls
- How do I make chocolate protein balls vegan?
- How long do chocolate protein balls last in the fridge?
- Can you freeze chocolate protein balls?
- How do I make low carb chocolate protein balls?
- Are chocolate protein balls healthy?
- Chocolate Protein Balls
- Ingredients
- Instructions
- Last Step:
- Notes
- Nutrition
- Did you make this recipe?
Essential Ingredients for Chocolate Protein Balls
Here is everything you need for this chocolate protein balls recipe. Each ingredient plays a simple role in creating the perfect chewy texture and sweet chocolate flavor.
- 1 cup old-fashioned rolled oats – Adds structure, chew, and a little fiber to help keep you full.
- 1/4 cup mini chocolate chips – Brings extra chocolate flavor and little melty bites in every ball.
- 1/3 cup chocolate protein powder – Boosts the protein content and deepens the chocolate taste.
- 1/2 cup peanut butter – Acts as the main binder and adds creamy, nutty richness.
- 3 tablespoons honey – Adds sweetness and helps hold the mixture together.
- 3 teaspoons water – Softens the dough so it rolls easily.
Special Dietary Options
- Vegan: Replace honey with maple syrup or agave, and use a vegan chocolate protein powder.
- Gluten-free: Use certified gluten-free oats to keep these no bake chocolate peanut butter protein balls gluten-friendly.
- Low-calorie: Use natural peanut butter and cut back slightly on sweetener if you want a lighter snack.
| Ingredient | Amount | Why It Matters |
|---|---|---|
| Old-fashioned rolled oats | 1 cup | Creates texture and helps the balls hold shape |
| Mini chocolate chips | 1/4 cup | Adds sweet chocolate pockets |
| Chocolate protein powder | 1/3 cup | Increases protein and chocolate flavor |
| Peanut butter | 1/2 cup | Binds the mixture and adds creaminess |
| Honey | 3 tablespoons | Sweetens and helps bind |
| Water | 3 teaspoons | Loosens dry dough for easier rolling |
If you want another wholesome snack idea with a fun texture, try these mini muffin pancake bites for breakfast or after-school snacking.
How to Prepare the Perfect Chocolate Protein Balls: Step-by-Step Guide
First Step: Gather and measure everything
Before you begin, measure out the oats, mini chocolate chips, chocolate protein powder, peanut butter, honey, and water. This recipe moves quickly, so having everything ready makes the process smooth and mess-free. A medium-sized mixing bowl works best, along with a spoon or spatula for stirring.
Second Step: Mix the base
Add all of the ingredients to the bowl and mix them together until fully combined. At first, it may look a little crumbly, but keep stirring. The peanut butter and honey will help bring the easy no bake protein balls together into a thick dough.
If the mixture seems too dry, add an extra teaspoon or two of water. This is one of the most important little tricks for a successful protein balls recipe. Some protein powders absorb more liquid than others, so a small adjustment can make all the difference.
Third Step: Check the texture
The dough should be thick, sticky, and easy to press together with your hands. If it falls apart when squeezed, add another teaspoon of water and mix again. If it feels too wet, add a spoonful of oats to help firm it up. You want a texture that rolls easily without sticking all over your hands.
Think of the mixture like play dough for snacks. If it crumbles, it needs a tiny bit more moisture. If it feels sloppy, give it a little more dry ingredient.
Fourth Step: Roll into balls
Scoop out small portions of dough and roll them into 1 to 1 1/2-inch balls. That size makes them easy to pop into a lunchbox, store for meal prep, or grab after a workout. For best results, press the mixture together firmly before rolling so the balls stay compact.
If you like slightly larger bites, you can make them bigger, but keep in mind the recipe yields about 16 balls at the standard size. Smaller balls are great for kids, while bigger ones feel more like a dessert-style snack.
Fifth Step: Chill to set
Place the rolled balls on a baking sheet or plate lined with wax paper. This keeps them from sticking while they chill. Put them in the refrigerator for 20 minutes so they firm up and hold their shape.
This chilling time matters because it helps the oats soften a little and lets the peanut butter firm up. That gives the chocolate protein balls a better bite and a more satisfying texture. If you are in a hurry, a quick freezer chill works too, but 20 minutes in the fridge is usually perfect.
Final Step: Store and serve
Once the balls are set, transfer them to an airtight container. Store them in the fridge for an easy snack during the week, or keep them in the freezer for longer storage. They taste great cold, slightly softened, or packed into lunch containers for a midday boost.
These chocolate peanut butter protein balls are ideal for meal prep because they are fast, portable, and satisfying. They make a smart snack for travel days, school lunches, post-workout recovery, or that afternoon moment when you need something sweet but filling.
Nutrition Snapshot Per Serving
Each serving has about 100 calories, 11 grams of carbohydrates, 4 grams of protein, and 5 grams of fat. You also get 1 gram of fiber and 6 grams of sugar. The full nutrition estimate includes 1 gram of saturated fat, 3 mg cholesterol, 49 mg sodium, 88 mg potassium, 6 IU vitamin A, 25 mg calcium, and 1 mg iron.

Dietary Substitutions to Customize Your Chocolate Protein Balls
Protein and Main Component Alternatives
There are plenty of ways to tweak these no bake chocolate peanut butter protein balls so they fit your pantry or your dietary goals. If you want a vegan version, swap honey for maple syrup or agave and choose a plant-based chocolate protein powder. This keeps the recipe sweet, chewy, and completely dairy-free.
If you want a lower-carb version, use natural peanut butter without added sugar. You can also swap the oats for almond flour or a smaller amount of finely ground seeds, though the texture will change a bit. Another easy switch is powdered peanut butter, but you may need to add more water so the mixture holds together.
Vegetable, Sauce, and Seasoning Modifications
While this recipe does not use vegetables, you can still play with add-ins and flavor changes. Vanilla protein powder works if that is what you have, though the balls will taste less chocolatey. You can also add a pinch of sea salt to sharpen the chocolate flavor, or a little cinnamon for warmth.
Want a richer bite? Stir in more mini chocolate chips or a spoonful of cocoa powder. If you prefer a softer, sweeter snack, a little extra honey or maple syrup can help. For readers who like variety, these swaps make the protein balls recipe flexible enough for many taste buds.
Mastering Chocolate Protein Balls: Advanced Tips and Variations
Pro cooking techniques
Even though this is an easy recipe, a few small tricks can make your Chocolate Protein Balls turn out even better. Use room-temperature peanut butter if possible, since it mixes more smoothly. Stir the dough well before rolling so the oats and protein powder are evenly distributed.
If your dough is too sticky, chill it for 5 minutes before rolling. If it is too dry, add water one teaspoon at a time, just like the recipe suggests. A light coating of damp hands can also help if the mixture sticks too much while forming the balls.
Flavor variations
You can turn these into a more dessert-style treat by adding shredded coconut, chopped peanuts, or a few dark chocolate chunks. For a fun twist, try using a chocolate-cinnamon protein powder or a peanut butter cup flavored powder. Dark chocolate fans may also enjoy pairing these with a bit of cocoa nib crunch.
For a slightly different snack board, serve them beside fresh fruit or a smoothie. If you want a drink pairing idea, this mango peach strawberry smoothie makes a bright and tasty match for the rich chocolate flavor.
Presentation tips
These little bites look extra nice when rolled evenly and stored in a parchment-lined dish. You can also drizzle a small amount of melted chocolate on top if you want a bakery-style finish. For parties, pile them into a small bowl and sprinkle a few extra mini chips around the edges.
Make-ahead options
This is one of the best easy no bake protein balls recipes for batch prep. Make a double batch on Sunday and stash half in the freezer. That way, you will always have a quick snack ready for school, work, road trips, or after the gym.
Busy week? These snack bites have your back. Make them ahead and thank yourself later.
How to Store Chocolate Protein Balls: Best Practices
Refrigeration
Store the finished chocolate protein balls in an airtight container or zip-top bag in the fridge. They stay fresh for 9 to 10 days, and the cool temperature keeps the texture firm and satisfying. If you stack them, place a small piece of parchment paper between layers so they do not stick together.
Freezing
For longer storage, freeze them for 2 to 3 months. Freeze the balls on a parchment-lined tray first, then move them to a freezer-safe container or bag. This helps them keep their shape and makes it easy to grab only what you need.
Reheating
These no bake snacks do not really need reheating. If they are very cold from the fridge or freezer, let them sit at room temperature for a few minutes before eating. That softens the texture and brings back the chewy, fudgy bite.
Meal prep considerations
These peanut butter protein balls are perfect for meal prep because they are small, portable, and easy to portion out. Keep a few in lunchboxes, gym bags, or desk drawers for a quick snack option. If you make them ahead, label the container with the date so you know how long they have been stored.
FAQs: Frequently Asked Questions About Chocolate Protein Balls
How do I make chocolate protein balls vegan?
How long do chocolate protein balls last in the fridge?
Can you freeze chocolate protein balls?
How do I make low carb chocolate protein balls?
Are chocolate protein balls healthy?
Chocolate Protein Balls
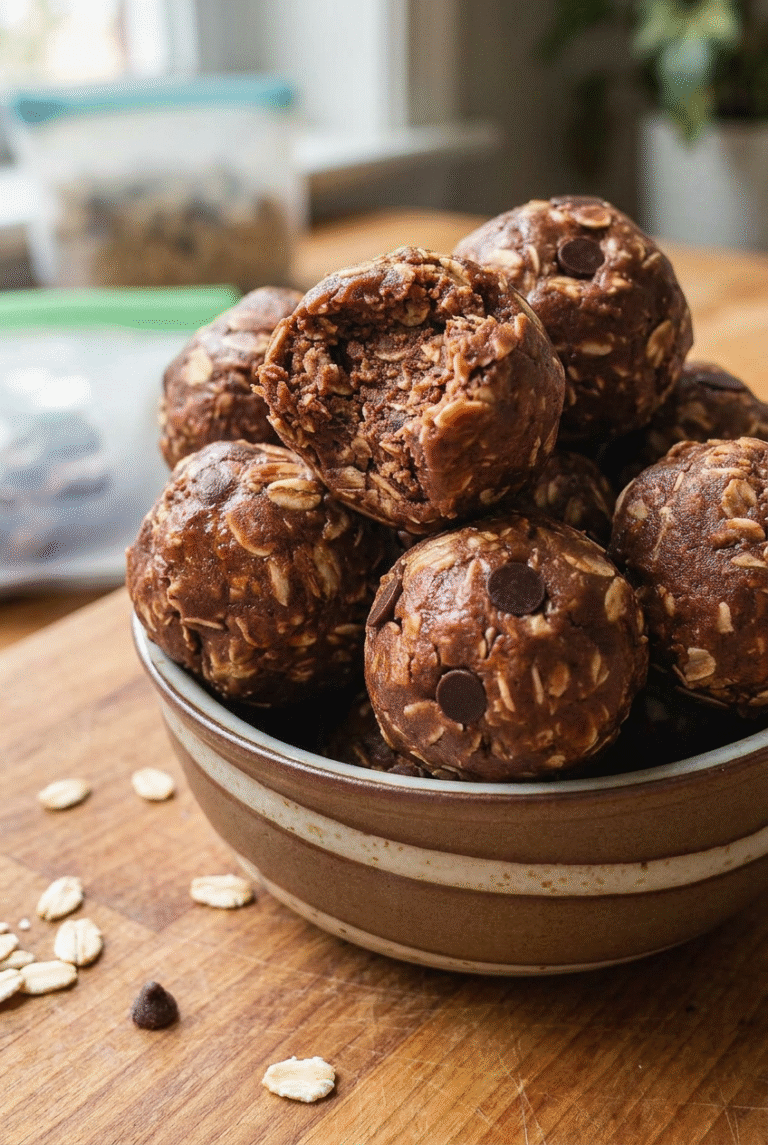
🍫🥜 Crave the irresistible chocolate peanut butter duo in these no-bake protein balls, fueling you with protein and healthy fats for all-day energy.
💪 Effortlessly made in minutes, these portable snacks are workout-friendly, kid-approved, and freezer-ready for convenience.
- Total Time: 25 minutes
- Yield: 16 balls
Ingredients
– 1 cup old-fashioned rolled oats
– 1/4 cup mini chocolate chips
– 1/3 cup chocolate protein powder
– 1/2 cup peanut butter
– 3 tablespoons honey
– 3 teaspoons water
Instructions
1-First Step: Gather and measure everything Before you begin, measure out the oats, mini chocolate chips, chocolate protein powder, peanut butter, honey, and water. This recipe moves quickly, so having everything ready makes the process smooth and mess-free. A medium-sized mixing bowl works best, along with a spoon or spatula for stirring.
2-Second Step: Mix the base Add all of the ingredients to the bowl and mix them together until fully combined. At first, it may look a little crumbly, but keep stirring. The peanut butter and honey will help bring the easy no bake protein balls together into a thick dough. If the mixture seems too dry, add an extra teaspoon or two of water. This is one of the most important little tricks for a successful protein balls recipe. Some protein powders absorb more liquid than others, so a small adjustment can make all the difference.
3-Third Step: Check the texture The dough should be thick, sticky, and easy to press together with your hands. If it falls apart when squeezed, add another teaspoon of water and mix again. If it feels too wet, add a spoonful of oats to help firm it up. You want a texture that rolls easily without sticking all over your hands. Think of the mixture like play dough for snacks. If it crumbles, it needs a tiny bit more moisture. If it feels sloppy, give it a little more dry ingredient.
4-Fourth Step: Roll into balls Scoop out small portions of dough and roll them into 1 to 1 1/2-inch balls. That size makes them easy to pop into a lunchbox, store for meal prep, or grab after a workout. For best results, press the mixture together firmly before rolling so the balls stay compact. If you like slightly larger bites, you can make them bigger, but keep in mind the recipe yields about 16 balls at the standard size. Smaller balls are great for kids, while bigger ones feel more like a dessert-style snack.
5-Fifth Step: Chill to set Place the rolled balls on a baking sheet or plate lined with wax paper. This keeps them from sticking while they chill. Put them in the refrigerator for 20 minutes so they firm up and hold their shape. This chilling time matters because it helps the oats soften a little and lets the peanut butter firm up. That gives the chocolate protein balls a better bite and a more satisfying texture. If you are in a hurry, a quick freezer chill works too, but 20 minutes in the fridge is usually perfect.
6-Final Step: Store and serve Once the balls are set, transfer them to an airtight container. Store them in the fridge for an easy snack during the week, or keep them in the freezer for longer storage. They taste great cold, slightly softened, or packed into lunch containers for a midday boost. These chocolate peanut butter protein balls are ideal for meal prep because they are fast, portable, and satisfying. They make a smart snack for travel days, school lunches, post-workout recovery, or that afternoon moment when you need something sweet but filling.
Last Step:
Please leave a rating and comment letting us know how you liked this recipe! This helps our business to thrive and continue providing free, high-quality recipes for you.Notes
💧 Add water one teaspoon at a time if the dough feels too dry and crumbly.
🌱 For vegan version, swap honey with maple syrup or agave and use vegan protein powder.
❄️ Keep in fridge for 9-10 days or freezer for 2-3 months for grab-and-go snacks.
- Prep Time: 5 minutes
- Chill Time: 20 minutes
- Category: Snacks
- Method: No Bake
- Cuisine: American
- Diet: High Protein, Vegetarian
Nutrition
- Serving Size: 1 ball
- Calories: 100 calories
- Sugar: 6g
- Sodium: 49mg
- Fat: 5g
- Saturated Fat: 1g
- Unsaturated Fat: 4g
- Trans Fat: 0g
- Carbohydrates: 11g
- Fiber: 1g
- Protein: 4g
- Cholesterol: 3mg





