

Why You’ll Love This Baked Alaska
Baked Alaska is a show-stopping ice cream cake that feels fancy but can be surprisingly doable at home. It combines a brownie base, a dome-shaped ice cream center, and a crisp, toasted meringue topping that seals in the cold. If you’re looking for an easy baked alaska recipe that still gets big “wow” energy, this one is for you.
- Ease of preparation: You’re mostly assembling frozen components and making a quick cooked meringue. Total active time is around 40 minutes, with freezing doing the heavy lifting.
- Great for parties: The dessert tastes best right after toasting, so it’s perfect for serving at gatherings. The layers also hold up well in the freezer if you need to prep ahead.
- Versatility: Use any ice cream flavor you love, and you can switch between a classic full-size dome and a mini baked alaska cupcake style.
- Distinctive flavor and texture: Warm, lightly crisp meringue meets cold, creamy ice cream and rich brownie. It’s a classic contrast that always delivers.
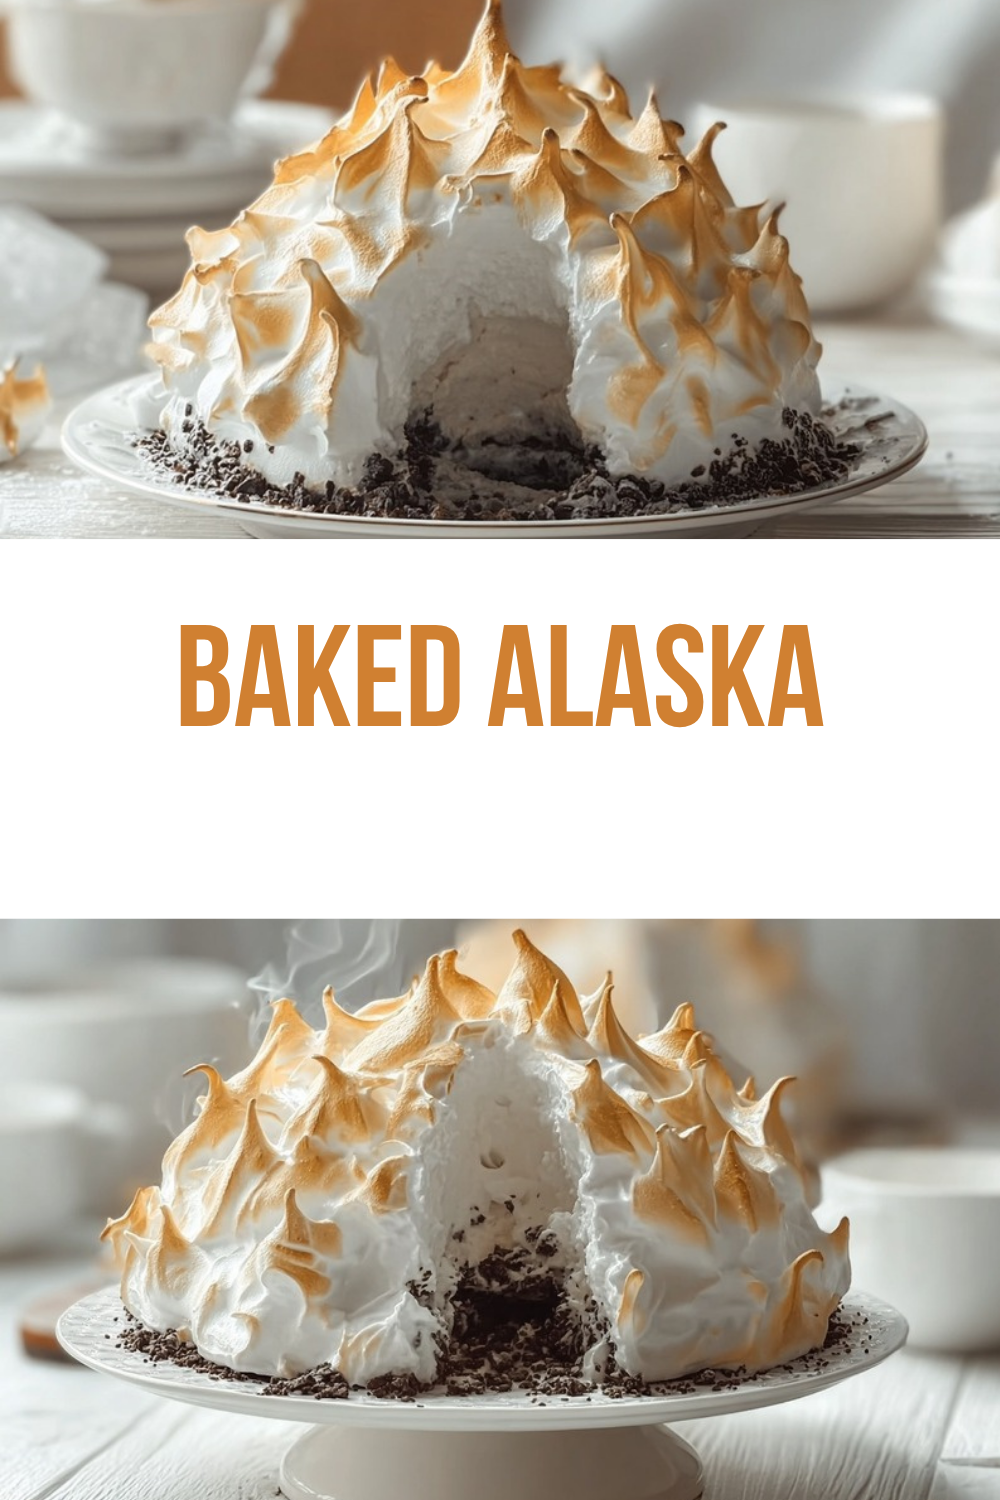
Quick picture in your head: brownie bottom, ice cream dome in the middle, and a toasted “cloud” of meringue on top.
If you want another make-ahead-friendly dessert idea, you may also like no-bake energy bites for a simpler sweet option on busy days.
Jump to:
- Why You’ll Love This Baked Alaska
- Essential Ingredients for Baked Alaska
- Meringue ingredients (classic cooked meringue)
- Special dietary options
- How to Prepare the Perfect Baked Alaska: Step-by-Step Guide
- Step-by-step directions
- Dietary Substitutions to Customize Your Baked Alaska
- Protein and main component alternatives
- Vegetable, sauce, and seasoning modifications
- Mastering Baked Alaska: Advanced Tips and Variations
- Pro cooking techniques
- Flavor variations you can try
- Presentation tips
- Make-ahead options for busy schedules
- How to Store Baked Alaska: Best Practices
- Refrigeration
- Freezing
- Reheating
- Meal prep considerations
- FAQs: Frequently Asked Questions About Baked Alaska
- What is baked Alaska?
- What ice cream flavors work best for baked Alaska?
- How do you make meringue for baked Alaska?
- Can you make baked Alaska ahead of time?
- How long can baked Alaska sit out after toasting?
- Baked Alaska
- Ingredients
- Instructions
- Last Step:
- Notes
- Nutrition
- Did you make this recipe?
Essential Ingredients for Baked Alaska
Before you start, gather ingredients and tools so the assembly goes smoothly. This recipe uses a brownie base baked in a 9-inch round cake pan and a molded ice cream dome in a 9-inch 2.5 quart bowl lined with plastic wrap.
- Two 1.5 quart containers of any flavor ice cream – choose flavors you love for a fun surprise in every bite
- Brownie batter sufficient for one 9-inch round pan – forms the rich base layer
Meringue ingredients (classic cooked meringue)
- 4 large egg whites at room temperature – whips into a stable, glossy topping
- 1 cup granulated sugar – sweetens and helps the meringue set
- 1/2 teaspoon cream of tartar – improves lift and stability
- 1/2 teaspoon pure vanilla extract – adds warm flavor to the meringue
Note on nutrition: Nutritional information is not provided for this recipe.
Special dietary options
You can adapt Baked Alaska, but it depends on what ingredients you use for the brownie and whether you choose egg-free meringue. Here are safe, common paths you can take:
- Vegan: Use egg-free, plant-based ice cream plus a vegan brownie. For meringue, you would need an egg-free replacement that can be whipped and baked or torched. Traditional Swiss meringue uses egg whites, so full vegan versions require substitutions not listed here.
- Gluten-free: Choose gluten-free brownie batter made for a 9-inch round pan. The rest of the method stays the same.
- Low-calorie: Look for lighter ice cream (or “reduced sugar” brands) and pair with a reduced-sugar brownie mix. Keep in mind that the meringue still adds sugar, so portions matter.
How to Prepare the Perfect Baked Alaska: Step-by-Step Guide
This recipe is built to be reliable. You’ll soften and mold the ice cream dome, bake the brownie, freeze the assembled layers briefly, then cover everything with cooked meringue before torching or broiling.
| Stage | What you do | Time and temperature |
|---|---|---|
| Mold ice cream dome | Soften, spread into plastic-lined bowl, freeze | 10 minutes prep, then freeze at least 8 hours |
| Bake brownie base | Grease and line pan, bake, cool fully | 350°F for 32 to 38 minutes |
| Assemble and refreeze | Top brownie with dome, freeze layers | Freeze 30 minutes |
| Cook and whip meringue | Heat egg whites and sugar, then whip stiff peaks | Heat to about 160°F, then whip 8 to 10 minutes |
| Toast meringue | Use torch or broil | Torch or broil 4 to 5 minutes at 450°F |
Step-by-step directions
- First Step: Soften the ice cream for 10 minutes and beat lightly. Spread it into a plastic-lined 9-inch bowl and freeze for at least 8 hours.
- Second Step: Preheat oven to 350°F. Grease and line a 9-inch round pan. Bake the brownie batter for 32 to 38 minutes, until a toothpick comes out mostly clean. Cool completely, then release the brownie from the pan.
- Third Step: Remove the ice cream dome from the freezer and place it on top of the brownie base. Freeze the assembled layers for 30 minutes.
- Fourth Step: Prepare meringue. Whisk 4 large egg whites at room temperature, 1 cup granulated sugar, and 1/2 teaspoon cream of tartar over simmering water until the sugar is dissolved, about 160°F. Then beat in a mixer with 1/2 teaspoon pure vanilla extract until you get stiff, glossy peaks.
- Fifth Step: Preheat oven to 450°F if you’re not using a torch.
- Sixth Step: Remove ice cream and brownie from the freezer. Invert onto a serving plate and remove the plastic wrap. Completely cover with meringue, creating peaks and swirls.
- Final Step: Torch or bake for 4 to 5 minutes until toasted. Slice with a serrated knife and serve immediately. Store leftovers in the freezer.
Total prep and freeze time: about 9 hours and 40 minutes (includes freezing). Active time: around 40 minutes.
If you enjoy desserts with bold flavor, you could also try pairing Baked Alaska with a bright drink like the flavors in mango peach strawberry smoothie for a refreshing contrast at parties.

Dietary Substitutions to Customize Your Baked Alaska
Sometimes you need to adjust ingredients without losing the magic. Baked Alaska is all about keeping the ice cream cold while the meringue toasts, so substitutions should focus on structure and temperature.
Protein and main component alternatives
The “protein” in this dessert is mostly the egg whites in the meringue, plus the structure from the brownie and ice cream. If you’re avoiding eggs, you can’t directly use the same cooked Swiss meringue technique as written.
- Egg-free meringue: Use a tested egg-free alternative that can whip into stiff peaks and brown. Many plant-based meringues do not toast the same way, so it may take testing.
- Ice cream swaps: Any firm ice cream works if it can be scooped, molded, and frozen solid again. Softer ice creams melt faster during serving.
- Brownie swaps: Use gluten-free or lighter brownie batter if needed, keeping the baked layer firm enough to support the dome.
Vegetable, sauce, and seasoning modifications
Traditional Baked Alaska does not rely on vegetables or sauces. The flavor comes from ice cream and vanilla in the meringue. Still, you can adjust seasoning in small, safe ways.
- Vanilla variations: Stick with pure vanilla extract for the written recipe, or experiment with a small amount of another extract only if you’re confident it won’t change whipping performance.
- Flavor boosters: Add a tiny pinch of salt to the ice cream base for chocolate flavors, or choose naturally flavored ice creams for holiday themes.
- Cupcake versions: For mini baked alaska cupcakes, you can match the ice cream flavor to the brownie cupcake batter. This keeps things fun and consistent.
Mastering Baked Alaska: Advanced Tips and Variations
Once you nail the basics, Baked Alaska becomes a fun “build your own” dessert. These tips help you avoid common problems like slipping layers, grainy meringue, or flat peaks.
Pro cooking techniques
- Make the meringue safely: Gentle cooking of egg whites with sugar until about 160°F helps kill bacteria. It also improves stability.
- Beat to stiff, glossy peaks: Stop only when the meringue holds shape and looks shiny. Under-whipped meringue can collapse or look dull when toasted.
- Fully enclose the dome: Cover with meringue completely and make peaks and swirls. Gaps can expose ice cream to warm air.
- Torch for even color: Kitchen torches are affordable and make it easy to toast meringue evenly.
Flavor variations you can try
Use flavors of ice cream you love. Different flavors create fun surprises, especially in cupcake versions. Here are a few directions:
- Classic chocolate: Chocolate ice cream on a brownie base feels like a dream.
- Mint or coffee: Mint chocolate chip or coffee ice cream adds a cool, grown-up twist.
- Fruit-forward: Strawberry ice cream can bring brightness to the rich brownie.
- Layer flavor variety: For mini cups, mix and match ice cream flavors to please different tastes.
Presentation tips
Right before serving, slice with a serrated knife for clean cuts through the meringue crust. To keep it neat, wipe your knife between slices if you see sticky meringue.
Make-ahead options for busy schedules
- Brownie base: Prepare up to three days in advance and store at room temperature.
- Ice cream dome: Freeze for up to three days before assembling.
- Assembled dessert: Freeze for 1 to 2 days before torching or baking. It holds up well without covering.
- Transporting: Keep the assembled dessert frozen in a cooler and toast before serving at the destination.
Serving rule: Meringue-covered Alaska should be served immediately after toasting to prevent melting.
Want a baking project that also works for small hands and quick preparation? Try mini muffin pancake bites for an easy “weeknight sweet” companion.
How to Store Baked Alaska: Best Practices
Proper storage keeps your dessert tasting fresh and helps the texture stay smooth. Because it is ice cream-based, Baked Alaska belongs in the freezer.
Refrigeration
Refrigeration is not ideal for the fully assembled, meringue-topped dessert. Once the meringue is toasted, ice cream starts melting faster in the fridge than in a freezer.
- If you need a short wait, keep it as brief as possible and aim to serve right after toasting.
- For best texture, store in the freezer for longer-term holding.
Freezing
Use the freezer for both components and the finished dessert.
- Brownie base: Stored at room temperature for up to three days (per the recipe tips).
- Ice cream dome: Freeze up to three days before assembling.
- Assembled baked Alaska: Freeze 1 to 2 days before torching or baking, holding up well without covering.
Reheating
You don’t “reheat” the dessert in the normal sense. Instead, you re-toast if needed.
- Return it to the freezer promptly after serving.
- To refresh, toast again under a broiler or with a torch for a short time.
Meal prep considerations
For the easiest party day, prep the brownie and freeze the dome ahead. Assemble, freeze briefly, then toast right before guests arrive.
FAQs: Frequently Asked Questions About Baked Alaska
What is baked Alaska?
What ice cream flavors work best for baked Alaska?
How do you make meringue for baked Alaska?
Can you make baked Alaska ahead of time?
How long can baked Alaska sit out after toasting?
Baked Alaska
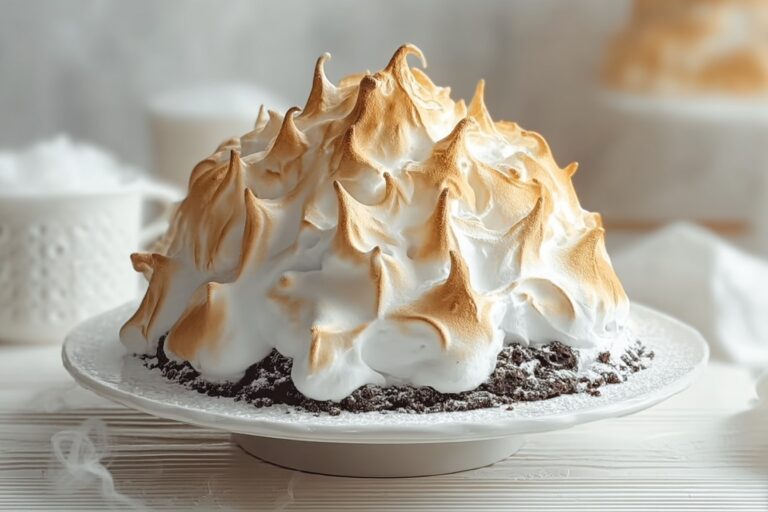
🍰 Spectacular brownie base cradles dome of softened ice cream under glossy torched meringue – ultimate wow-factor ice cream cake!
🧊 Make-ahead layers freeze perfectly, dramatic kitchen torch finish for effortless party dessert delight!
- Total Time: 9 hours 40 minutes
- Yield: 8 servings
Ingredients
– Two 1.5 quart containers of any flavor ice cream for a fun surprise in every bite
– Brownie batter sufficient for one 9-inch round pan for forming the rich base layer
– 4 large egg whites at room temperature for whipping into a stable, glossy topping
– 1 cup granulated sugar for sweetening and helping the meringue set
– 1/2 teaspoon cream of tartar for improving lift and stability
– 1/2 teaspoon pure vanilla extract for adding warm flavor to the meringue
Instructions
1-First Step: Soften the ice cream for 10 minutes and beat lightly. Spread it into a plastic-lined 9-inch bowl and freeze for at least 8 hours.
2-Second Step: Preheat oven to 350°F. Grease and line a 9-inch round pan. Bake the brownie batter for 32 to 38 minutes, until a toothpick comes out mostly clean. Cool completely, then release the brownie from the pan.
3-Third Step: Remove the ice cream dome from the freezer and place it on top of the brownie base. Freeze the assembled layers for 30 minutes.
4-Fourth Step: Prepare meringue. Whisk 4 large egg whites at room temperature, 1 cup granulated sugar, and 1/2 teaspoon cream of tartar over simmering water until the sugar is dissolved, about 160°F. Then beat in a mixer with 1/2 teaspoon pure vanilla extract until you get stiff, glossy peaks.
5-Fifth Step: Preheat oven to 450°F if you’re not using a torch.
6-Sixth Step: Remove ice cream and brownie from the freezer. Invert onto a serving plate and remove the plastic wrap. Completely cover with meringue, creating peaks and swirls.
7-Final Step: Torch or bake for 4 to 5 minutes until toasted. Slice with a serrated knife and serve immediately. Store leftovers in the freezer.
Last Step:
Please leave a rating and comment letting us know how you liked this recipe! This helps our business to thrive and continue providing free, high-quality recipes for you.Notes
🧊 Freeze ice cream dome 8+ hours solid to prevent melting during torching.
🔥 Kitchen torch gives even control; watch closely under broiler.
❄️ Assemble ahead, freeze up to 2 days; torch just before serving.
- Prep Time: 40 minutes
- Freezing: 8 hours
- Cook Time: 40 minutes
- Category: Desserts
- Method: Baked
- Cuisine: American
- Diet: Vegetarian
Nutrition
- Serving Size: 1 slice
- Calories: 450 kcal
- Sugar: 40g
- Sodium: 200mg
- Fat: 18g
- Saturated Fat: 10g
- Unsaturated Fat: 8g
- Trans Fat: 0g
- Carbohydrates: 65g
- Fiber: 2g
- Protein: 6g
- Cholesterol: 80mg





