Ingredients
– 200g flour
– 100g cold butter
– 50g sugar
– 1 egg
– 250g cream cheese
– 100g sugar
– 2 eggs
– 100ml cream
– 1 tsp vanilla extract
Instructions
1-First Step: Begin by making the shortcrust pastry, which forms the foundation of your baked cheese tarts. In a mixing bowl, combine the 200g of flour and 50g of sugar. Cut the cold 100g of butter into small cubes and add it to the flour mixture. Using your fingertips or a pastry cutter, work the butter into the flour until the mixture resembles coarse breadcrumbs. This process distributes the butter evenly, which is crucial for creating those flaky layers we love in a good tart crust.
2-Second Step: Add the 1 egg to your flour and butter mixture. Mix gently until the dough just comes together. Be careful not to overwork the dough, as this can develop gluten and make your crust tough. Once the dough forms a ball, flatten it slightly into a disk, wrap it in plastic wrap, and refrigerate for at least 30 minutes. This resting period allows the gluten to relax and the butter to firm up, both essential for a flaky crust.
3-Third Step: While the dough chills, prepare your tart molds. Lightly grease a 12-hole mini muffin tin with butter or cooking spray. This will help prevent the tarts from sticking and ensure they release easily after baking. If you don’t have a mini muffin tin, you can use individual tartlet molds or even a regular muffin tin, though the baking time may need adjustment.
4-Fourth Step: While your dough continues to chill, prepare the luscious cheese filling. Make sure your 250g of cream cheese is at room temperature this is crucial for achieving a smooth, lump-free filling. In a mixing bowl, beat the softened cream cheese with the 100g of sugar until smooth and creamy. This should take about 2-3 minutes with an electric mixer or longer by hand.
5-Fifth Step: Add the 2 eggs to the cream cheese mixture one at a time, beating well after each addition. This gradual incorporation helps prevent the eggs from curdling and ensures a smooth texture. Next, pour in the 100ml of cream and the 1 teaspoon of vanilla extract. Continue beating until all ingredients are well combined and the mixture is silky smooth. If you notice any small lumps of cream cheese, give it a little extra time to incorporate completely.
6-Sixth Step: Remove your chilled dough from the refrigerator. On a lightly floured surface, roll out the dough to about 3-4mm thickness. Using a round cutter slightly larger than your muffin tin holes, cut out circles of dough. Gently press each circle into the prepared muffin tin, ensuring the dough comes up the sides and creates a nice cup shape. Try to make the dough as even as possible throughout the tin, so all tarts bake at the same rate.
7-Seventh Step: Fill each prepared crust with the cheese mixture, about ¾ full. This allows room for the filling to expand during baking without overflowing. Be careful not to overfill, as this can cause the tarts to stick to the pan and become difficult to remove later. If you have any leftover filling, you can save it for a small ramekin-sized tart.
8-Eighth Step: Preheat your oven to 200°C (400°F). Once preheated, place the muffin tin in the center of the oven and bake for 15-20 minutes. The tarts are done when the filling has puffed up beautifully and developed a golden brown color on top. The center should still have a slight jiggle when gently shaken, as it will continue to cook slightly from residual heat after removal.
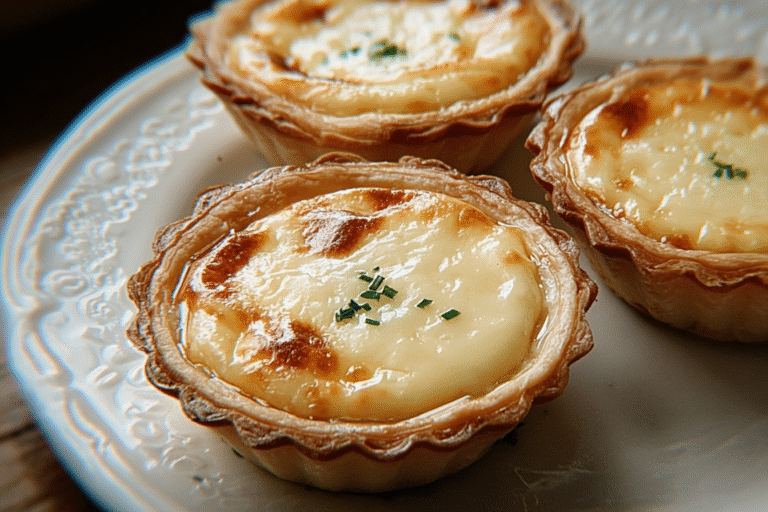
9-Final Step: Remove the tin from the oven and let the tarts cool in the pan for about 5 minutes. This brief resting period allows the filling to set slightly, making it easier to remove the tarts without breaking. Carefully run a small knife around the edges of each tart to loosen them, then gently transfer to a wire rack to cool completely. Serve your baked cheese tarts warm or at room temperature for the best texture and flavor experience.
Last Step:
Please leave a rating and comment letting us know how you liked this recipe! This helps our business to thrive and continue providing free, high-quality recipes for you.Notes
🧀 Soften cream cheese fully for silky batter—no lumps.
🔥 Low slow bake + oven cool prevents cracks/sinking.
🍋 Fresh lemon brightens flavor; sub lime for twist.
- Prep Time: 20 minutes
- Chill Time: 2 hours
- Cook Time: 15 minutes
- Category: Dessert
- Method: Baking
- Cuisine: Japanese
- Diet: Vegetarian
Nutrition
- Serving Size: 1 tart
- Calories: 220 kcal
- Sugar: 10g
- Sodium: 160mg
- Fat: 16g
- Saturated Fat: 9g
- Unsaturated Fat: 6g
- Trans Fat: 0g
- Carbohydrates: 17g
- Fiber: 0g
- Protein: 4g
- Cholesterol: 60mg