

Why You’ll Love This Berry Cobbler Recipe
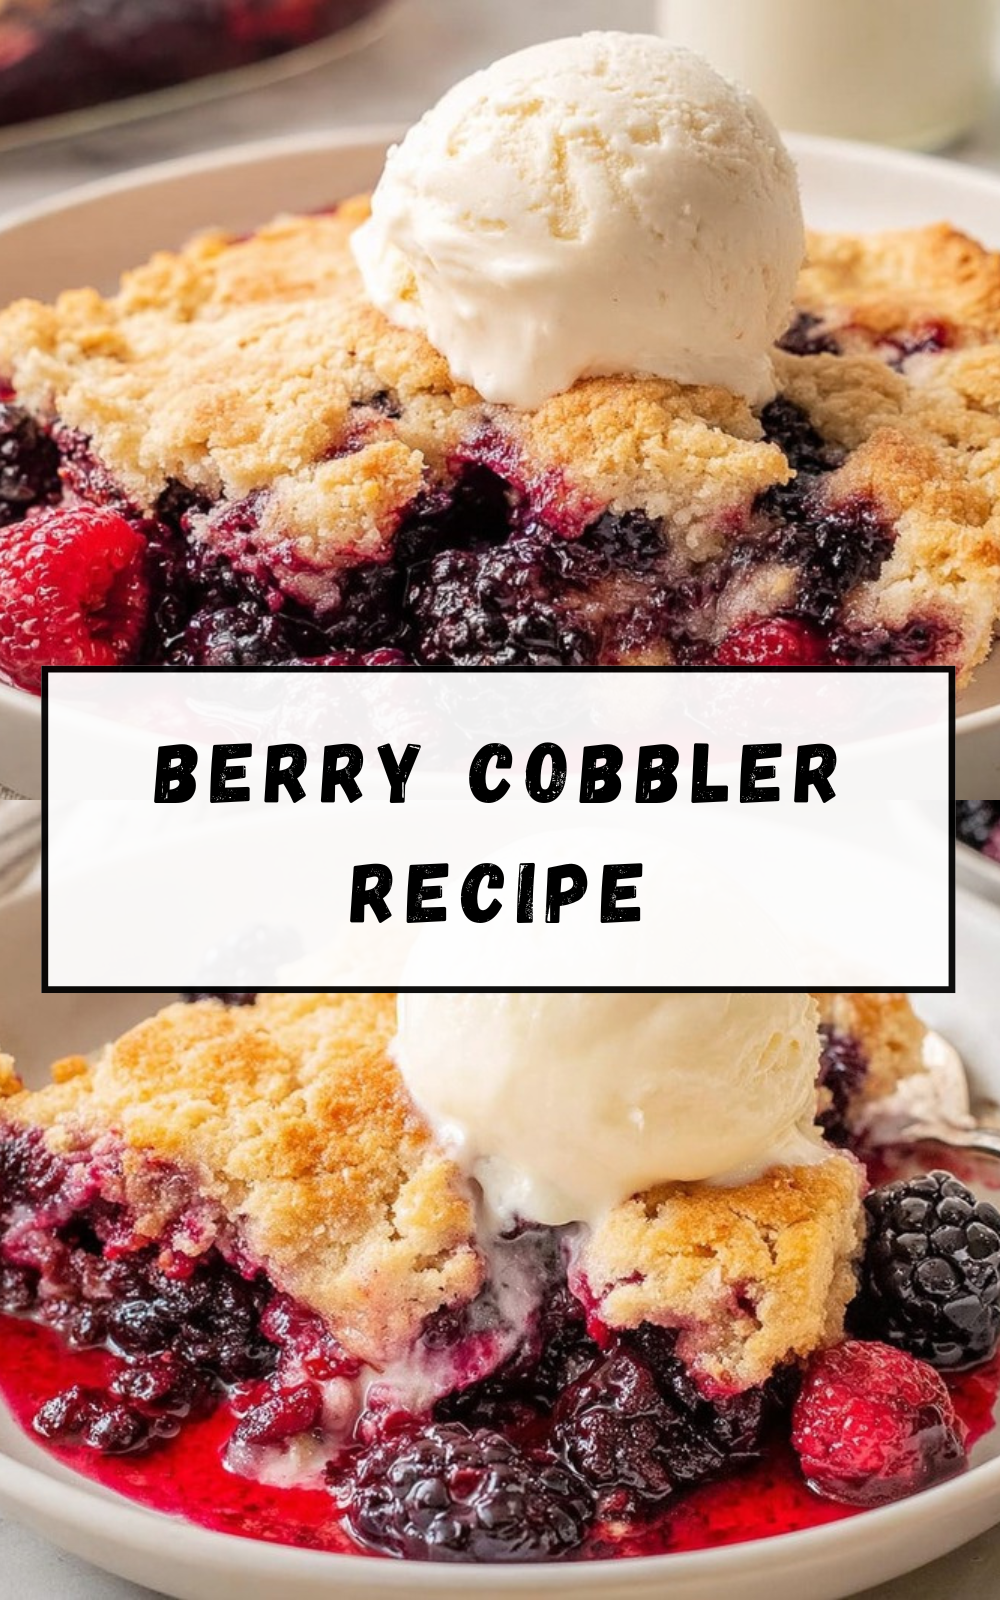
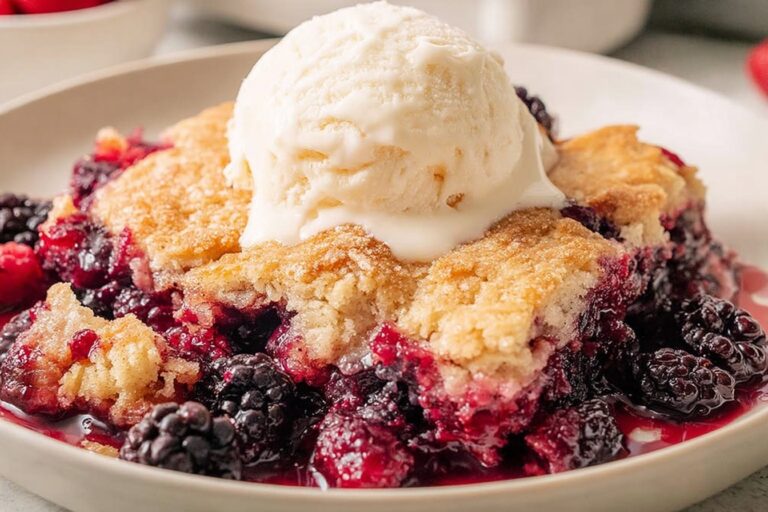
There’s nothing quite like a Berry Cobbler Recipe that turns simple fruit into a warm, spoonable dessert. It’s sweet, tangy, and comforting, with juicy berries bubbling up beneath a golden biscuit topping. If you want a homemade dessert that feels special but still fits into real-life schedules, this one is a winner.
- Ease of preparation: Prep takes about 10 minutes, then the oven does the rest while you handle everything else.
- Health benefits: Berries bring natural fiber and antioxidants, and you get fruit-forward flavor without needing fancy ingredients.
- Versatility: Use fresh or frozen berries, and make easy swaps for dietary needs like gluten-free flour (texture may vary, but it can work).
- Distinctive flavor: Lemon juice brightens the berry filling, vanilla rounds it out, and the biscuit topping bakes tender and golden.
Plus, berry cobbler is a no-fuss cousin of pie. You skip rolling dough, and you still get that classic “warm dessert for the whole table” vibe. Many people also love it because it’s great for gatherings, weeknight cravings, and meal-prep friendly leftovers.
For more berry ideas, check out 11 reasons to eat berries.
Jump to:
- Why You’ll Love This Berry Cobbler Recipe
- Essential Ingredients for Berry Cobbler Recipe
- Ingredients (Filling)
- Ingredients (Biscuit Topping)
- Dietary Options (Easy Notes)
- How to Prepare the Perfect Berry Cobbler Recipe: Step-by-Step Guide
- Step 1: Prep your oven and pan
- Step 2: Make the berry filling
- Step 3: Build the biscuit topping
- Step 4: Assemble and top the cobbler
- Step 5: Bake to golden perfection
- Step 6: Cool, serve, and enjoy
- Dietary Substitutions to Customize Your Berry Cobbler Recipe
- Protein and Main Component Alternatives
- Vegetable, Sauce, and Seasoning Modifications
- Mastering Berry Cobbler Recipe: Advanced Tips and Variations
- Pro cooking techniques
- Flavor variations you can try
- Presentation tips
- Make-ahead options
- How to Store Berry Cobbler Recipe: Best Practices
- Refrigeration
- Freezing
- Reheating
- FAQs: Frequently Asked Questions About Berry Cobbler Recipe
- What is berry cobbler?
- Can I use frozen berries in berry cobbler?
- How long do you bake berry cobbler?
- Can you make berry cobbler ahead of time?
- What can I substitute for buttermilk in berry cobbler?
- Berry Cobbler Recipe
- Ingredients
- Instructions
- Last Step:
- Notes
- Nutrition
- Did you make this recipe?
Essential Ingredients for Berry Cobbler Recipe
This Berry Cobbler Recipe uses straightforward pantry staples and lots of fruit. Below is everything you need, including the filling and the biscuit topping.
- Tip: For a thicker, scoopable filling, measure the cornstarch carefully. It’s the difference between “juicy” and “soupy.”
Ingredients (Filling)
- 8 cups mixed berries (fresh or frozen; for example 3 cups blueberries, 2 cups blackberries, 1 1/2 cups chopped strawberries, 1 1/2 cups raspberries)
- 1/2 cup granulated sugar
- 2 tablespoons cornstarch
- 1 teaspoon lemon juice
- 1/2 teaspoon pure vanilla extract
Ingredients (Biscuit Topping)
- 1 1/2 cups all-purpose flour
- 1/3 cup granulated sugar
- 1 1/2 teaspoons baking powder
- 1/4 teaspoon salt
- 6 tablespoons unsalted butter, cold and cubed
- 1/2 cup cold buttermilk
- 1 tablespoon buttermilk (for topping before baking)
- coarse sugar (for topping before baking)
Dietary Options (Easy Notes)
You can make this recipe work for more people with a few thoughtful tweaks.
- Gluten-free: Use a 1-to-1 gluten-free flour blend. Texture may be slightly different, and it’s best to bake right after assembling.
- Gluten-free (important reminder): Biscuit topping can be more tender or a bit less crisp depending on the blend.
- Vegan: This recipe isn’t vegan as written because of butter and buttermilk. You can try vegan butter and a plant-based buttermilk-style substitute, but results may vary.
- Low-calorie: Consider reducing sugar slightly and using more berries. Keep an eye on cornstarch and baking time so the filling still thickens.
Quick comparison for texture:
| Style | What You’ll Notice |
|---|---|
| Cobbler | Drop biscuit topping over fruit |
| Crisp | Oat streusel topping |
| Crumble | Crumb topping without oats |
Pro tip: Keep butter and buttermilk very cold. Cold ingredients help the biscuit topping stay flaky instead of turning dense.
How to Prepare the Perfect Berry Cobbler Recipe: Step-by-Step Guide
Let’s walk through this Berry Cobbler Recipe so it comes out golden, bubbly, and cozy. The steps are simple, but a few details (like cold butter) really matter.
Step 1: Prep your oven and pan
First Step: Preheat your oven to 350°F and grease a 9×13-inch baking pan. This prevents sticking and helps the topping brown evenly.
Step 2: Make the berry filling
Second Step: In a large bowl, gently mix 8 cups mixed berries, 1/2 cup sugar, 2 tablespoons cornstarch, 1 teaspoon lemon juice, and 1/2 teaspoon vanilla extract until combined.
Third Step: Spread the fruit mixture evenly in your prepared pan. Try not to over-stir, since you want berries to keep their shape.
What you’re looking for: The mixture should look coated and slightly thickened, not watery.
Step 3: Build the biscuit topping
Fourth Step: In another bowl, whisk 1 1/2 cups flour, 1/3 cup sugar, 1 1/2 teaspoons baking powder, and 1/4 teaspoon salt. Whisking first helps distribute the baking powder so the topping rises more evenly.
Fifth Step: Cut in 6 tablespoons cold, cubed butter until the mixture resembles pea-sized crumbs. A fork or pastry cutter works great here. Keep the butter cold for tender, flaky bites.
Sixth Step: Stir in 1/2 cup cold buttermilk until just combined. Stop mixing as soon as you don’t see dry flour. Over-mixing makes biscuits tough.
Step 4: Assemble and top the cobbler
Seventh Step: Flatten handfuls of biscuit dough and place them randomly over the berries. Cover most of the surface so you get golden pockets throughout.
Eighth Step: Brush the dough with 1 tablespoon buttermilk and sprinkle with coarse sugar for a crunchy, sparkly top.
Step 5: Bake to golden perfection
Ninth Step: Bake for 45 to 55 minutes, until the topping is golden and the berry filling is bubbling and cooked through. Start checking at 45 minutes, since ovens vary.
Step 6: Cool, serve, and enjoy
Final Step: Cool for 5 minutes before serving. Serve warm, optionally with vanilla ice cream or whipped cream.
Time breakdown: Prep: 10 minutes, Cook: 50 minutes, Total: 1 hour 5 minutes.
If you want another easy fruit-based idea for busy days, you might also like a mango peach strawberry smoothie as a refreshing side or breakfast option.

Dietary Substitutions to Customize Your Berry Cobbler Recipe
This Berry Cobbler Recipe is flexible, especially with fruit. Below are practical swap ideas for different needs and preferences.
Protein and Main Component Alternatives
Technically, cobbler is fruit-based rather than protein-based, but the “main components” here are the fruit filling and the biscuit topping fats and liquids.
- Butter swap (for different diets): Use a plant-based butter alternative if needed. Keep it very cold for best biscuit texture.
- Buttermilk substitute: Mix 1 teaspoon vinegar or lemon juice into cold milk, let sit 5 minutes, then use as your buttermilk. This is a great option if you don’t have buttermilk on hand.
Vegetable, Sauce, and Seasoning Modifications
For seasoning and fruit changes, you can play without wrecking the recipe.
- Fruit swaps: Use any mixed berries you love. Just keep the total at about 8 cups so the filling and bake time stay balanced.
- Thicker filling: If your berries are extra juicy (especially frozen), you may want slightly more cornstarch. Adjust based on the thickness you want.
- Flavor tweaks: Add extra lemon zest if you want a brighter, more “citrus pop” taste. Keep vanilla as written for classic warmth.
Note: Individual ramekins can work too. If you bake in smaller dishes, you’ll likely need a slightly longer bake time for frozen or mixed berries.
Mastering Berry Cobbler Recipe: Advanced Tips and Variations
Once you nail the basics, it becomes a dessert you can customize. Here are a few advanced tricks and variation ideas that still keep the recipe easy.
Pro cooking techniques
- Use frozen berries without thawing: It creates a more liquid filling, which is totally fine, but bake until the filling bubbles and thickens.
- Skip over-mixing: When the biscuit dough comes together, stop. You want tender topping, not tough biscuits.
- Swap for crunch: Coarse sugar gives the best “crisp top” effect. If you don’t have it, an egg wash can also help browning.
Flavor variations you can try
- Less topping, more berries: Reduce topping amounts for a fruitier dessert.
- More topping: Double the topping if you love extra biscuit coverage.
- Adjust sweetness: If your berries are very sweet, reduce sugar slightly. Keep lemon and cornstarch for structure.
Presentation tips
- Spoon cobbler into bowls and top with vanilla ice cream.
- Add a small berry pile on top for a fresh look.
- If serving for a party, place scoops on individual plates to avoid soggy transport.
Make-ahead options
- Freeze unbaked filling up to 3 months: Thaw before topping and baking.
- Freeze baked cobbler up to 3 months: Reheat covered at 350°F for 20 minutes.
- Important: Don’t prep and rest the full cobbler with topping ahead of time, since biscuits need to bake immediately after assembly.
Small detail, big payoff: Cold butter + cold buttermilk equals flakier biscuits. If your kitchen is warm, chill the bowl for a few minutes.
If you want another reference for how berry desserts work, you can also compare techniques with Sally’s berry cobbler.
How to Store Berry Cobbler Recipe: Best Practices
Storing your Berry Cobbler Recipe the right way keeps the topping tender and the fruit filling safe to eat. Here’s what to do after the cobbler cools.
Refrigeration
- Let cobbler cool to room temperature.
- Cover and refrigerate for up to 5 days.
Freezing
- Freeze unbaked filling: Up to 3 months. Thaw before assembling and baking.
- Freeze baked cobbler: Up to 3 months. Reheat covered at 350°F for 20 minutes.
Reheating
- Warm leftovers in an oven at 350°F until heated through.
- If you’re reheating just a portion, you can warm shorter, then check.
Meal prep idea: Make the filling ahead, store it, then bake fresh biscuit topping the day you want to serve.
FAQs: Frequently Asked Questions About Berry Cobbler Recipe
What is berry cobbler?
Can I use frozen berries in berry cobbler?
How long do you bake berry cobbler?
Can you make berry cobbler ahead of time?
What can I substitute for buttermilk in berry cobbler?
Berry Cobbler Recipe
🍓 Warm Berry Cobbler delights with juicy mixed berries under flaky biscuits – comforting homemade dessert bursting with fruit flavor!
🥧 Easy to make with fresh or frozen berries, ready in an hour for family dinners or summer barbecues.
- Total Time: 1 hour
- Yield: 12 servings
Ingredients
– 8 cups mixed berries (fresh or frozen; for example 3 cups blueberries, 2 cups blackberries, 1 1/2 cups chopped strawberries, 1 1/2 cups raspberries)
– 1/2 cup granulated sugar
– 2 tablespoons cornstarch
– 1 teaspoon lemon juice
– 1/2 teaspoon pure vanilla extract
– 1 1/2 cups all-purpose flour
– 1/3 cup granulated sugar
– 1 1/2 teaspoons baking powder
– 1/4 teaspoon salt
– 6 tablespoons unsalted butter, cold and cubed
– 1/2 cup cold buttermilk
– 1 tablespoon buttermilk for topping before baking
– coarse sugar for topping before baking
Instructions
1-First Step: Preheat your oven to 350°F and grease a 9×13-inch baking pan. This prevents sticking and helps the topping brown evenly.
2-Second Step: In a large bowl, gently mix 8 cups mixed berries, 1/2 cup sugar, 2 tablespoons cornstarch, 1 teaspoon lemon juice, and 1/2 teaspoon vanilla extract until combined.
3-Third Step: Spread the fruit mixture evenly in your prepared pan. Try not to over-stir, since you want berries to keep their shape.
4-Fourth Step: In another bowl, whisk 1 1/2 cups flour, 1/3 cup sugar, 1 1/2 teaspoons baking powder, and 1/4 teaspoon salt. Whisking first helps distribute the baking powder so the topping rises more evenly.
5-Fifth Step: Cut in 6 tablespoons cold, cubed butter until the mixture resembles pea-sized crumbs. A fork or pastry cutter works great here. Keep the butter cold for tender, flaky bites.
6-Sixth Step: Stir in 1/2 cup cold buttermilk until just combined. Stop mixing as soon as you don’t see dry flour. Over-mixing makes biscuits tough.
7-Seventh Step: Flatten handfuls of biscuit dough and place them randomly over the berries. Cover most of the surface so you get golden pockets throughout.
8-Eighth Step: Brush the dough with 1 tablespoon buttermilk and sprinkle with coarse sugar for a crunchy, sparkly top.
9-Ninth Step: Bake for 45 to 55 minutes, until the topping is golden and the berry filling is bubbling and cooked through. Start checking at 45 minutes, since ovens vary.
10-Final Step: Cool for 5 minutes before serving. Serve warm, optionally with vanilla ice cream or whipped cream.
Last Step:
Please leave a rating and comment letting us know how you liked this recipe! This helps our business to thrive and continue providing free, high-quality recipes for you.Notes
❄️ Use frozen berries straight from the freezer without thawing for a juicier filling.
🧈 Keep butter and buttermilk ice-cold for tender, flaky biscuit topping.
🥛 Make DIY buttermilk by mixing 1/2 tsp vinegar into milk and letting sit 5 minutes.
- Prep Time: 10 minutes
- Cook Time: 50 minutes
- Category: Dessert
- Method: Baked
- Cuisine: American
- Diet: Vegetarian
Nutrition
- Serving Size: 1/12
- Calories: 320 kcal
- Sugar: 28g
- Sodium: 150mg
- Fat: 12g
- Saturated Fat: 7g
- Unsaturated Fat: 4g
- Trans Fat: 0g
- Carbohydrates: 48g
- Fiber: 4g
- Protein: 4g
- Cholesterol: 30mg





