Ingredients
– 1/2 cup protein powder (unflavored or vanilla) for structure and protein
– 1/2 cup coconut flour for absorbing moisture and creating a rollable dough
– 3 tablespoons granulated sugar of choice (optional) for sweetness
– 4 tablespoons cream cheese (dairy or dairy-free) for creamy cheesecake taste and soft texture
– 1/4 cup blueberry puree (from fresh or frozen blueberries, mashed or blended, with optional lemon juice) for blueberry flavor, color, and moisture
Instructions
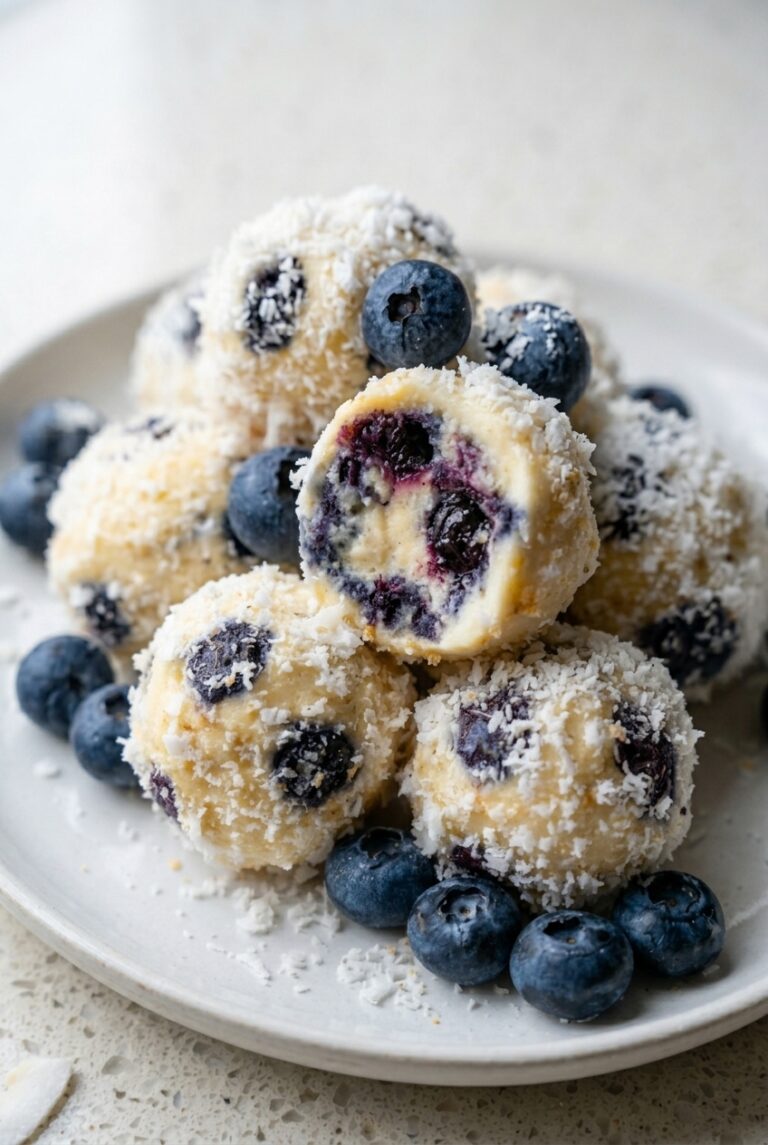
1-First step: make the blueberry puree Start by pureeing or mashing the blueberries until you have 1/4 cup blueberry puree. You can use fresh or frozen blueberries for this part. If you want a brighter flavor and a prettier color, stir in a little lemon juice while mashing. This step matters because the puree gives the balls their blueberry cheesecake flavor and also adds the moisture needed to form the dough. If you use frozen berries, let them thaw first so they mash more easily. A fork works for a rustic texture, while a blender gives you a smoother puree. Either way is fine. If the puree looks too watery, let it sit for a minute and then measure again. A thick puree is best for this recipe.
2-Second step: mix the dry ingredients In a medium bowl, add the protein powder and coconut flour. Stir them together so the dry mix is even. This helps prevent clumps later and makes the texture more consistent. If you want a sweeter snack, you can also have the granulated sugar ready now, but it is best to add it after tasting the dough. Using coconut flour in protein balls can feel tricky at first because it absorbs liquid fast. That is why this recipe works best when you mix slowly and pay attention to texture. If you have made other no bake snacks like our mini muffin pancake bites, this process will feel familiar.
3-Third step: add the wet ingredients Add the cream cheese and blueberry puree to the bowl with the dry ingredients. Use a spoon at first, then switch to clean hands when the mixture starts to come together. Mix by hand until a dough forms. This usually happens quickly, but the exact time depends on the brand of protein powder and the texture of your cream cheese. The dough should feel soft but not sticky. It should hold together when pressed. If it feels too wet, add a little more coconut flour, one teaspoon at a time. If it feels too dry or crumbly, add a splash of water, almond milk, or a bit more puree. Small changes make a big difference here.
4-Fourth step: taste and adjust Once the dough forms, taste a small bit and decide whether you want to add the optional sugar. Some protein powders are already sweet enough, especially vanilla varieties, so you may not need it. If you do want extra sweetness, stir in the sugar and mix again until it disappears into the dough. This is also the time to adjust flavor. A little more lemon juice can make the blueberry taste brighter. A vanilla protein powder can help keep the flavor balanced and the color more vibrant. If you are making these for kids or picky eaters, a slightly sweeter dough may be the best choice.
5-Fifth step: shape into balls Once the dough feels right, divide it into 12 equal portions. Roll each portion between your palms to form balls. If the dough sticks to your hands, lightly dampen your hands with water. You can also chill the mixture for a few minutes before rolling if your kitchen is warm. Try to keep the balls about the same size so they chill at the same rate and have a similar nutritional profile. Smaller bites are easier for lunchboxes, while slightly larger balls feel more filling as a snack.
6-Final step: chill until firm Place the rolled balls on a plate or tray and chill them in the refrigerator for 15 minutes. This helps them firm up and hold their shape. After chilling, they are ready to eat. The texture should be creamy, soft, and easy to bite into, with a cool cheesecake-style finish.
Last Step:
Please leave a rating and comment letting us know how you liked this recipe! This helps our business to thrive and continue providing free, high-quality recipes for you.Notes
🍋 Add lemon juice to the blueberry puree for vibrant color and zesty flavor.
💙 Use vanilla protein powder to help maintain the beautiful blue-purple hue.
❄️ Store in the fridge for 3-5 days or freeze for up to 3 months.
- Prep Time: 10 minutes
- Chill Time: 15 minutes
- Category: Snacks
- Method: No Bake
- Cuisine: American
- Diet: High Protein, Low Carb, Gluten Free
Nutrition
- Serving Size: 1 ball
- Calories: 52 calories
- Sugar: 1g
- Sodium: 41mg
- Fat: 2g
- Saturated Fat: 1g
- Unsaturated Fat: 1g
- Trans Fat: 0g
- Carbohydrates: 5g
- Fiber: 2g
- Protein: 5g
- Cholesterol: 10mg