

Why You’ll Love This Espresso Cheesecake Recipe
- Rich espresso flavor in a classic dessert: This Espresso Cheesecake Recipe uses cooled espresso or strong coffee so the coffee taste stays bold but smooth, not bitter.
- Simple steps that home cooks can follow: You build a chocolate cookie crust, mix the filling, bake with gentle heat, then chill. It is straightforward for busy weeknights and weekend baking alike.
- Better texture with smart baking and cooling: The method helps you get a creamy center and set sides. If you have ever struggled with cracks, this approach is extra forgiving.
- Optional toppings for your schedule: You can finish with ganache, add cream cheese frosting, or keep it simple. That flexibility makes the Espresso Cheesecake Recipe easy to customize.
If you like coffee desserts, this one brings real espresso flavor in every bite without making the cheesecake feel heavy.
Each serving comes out to about 628 calories (based on 12 servings), with 46g fat and 8g protein. It is an indulgent treat, but the coffee ingredient can also fit nicely into a mindful routine. For a coffee health perspective, you can reference this resource: 9 reasons the right amount of coffee is good for you.
Jump to:
- Why You’ll Love This Espresso Cheesecake Recipe
- Essential Ingredients for Espresso Cheesecake Recipe
- Ingredients (with precise measurements)
- Crust
- Filling
- Ganache Topping
- Cream Cheese Frosting (optional)
- Special Dietary Options (quick notes)
- How to Prepare the Perfect Espresso Cheesecake Recipe: Step-by-Step Guide
- Before you start (timing and pan setup)
- Step-by-step directions
- First Step: Preheat and prepare the pan
- Second Step: Make the chocolate cookie crust
- Third Step: Beat the cream cheese until smooth
- Fourth Step: Mix sugar, flour, and espresso
- Fifth Step: Add cream and vanilla
- Sixth Step: Add eggs gently to prevent cracks
- Seventh Step: Fill the crust and remove air bubbles
- Eighth Step: Bake, then reduce heat for creaminess
- Ninth Step: Cool gradually to reduce cracking
- Final Step: Cool completely, chill overnight, then top
- Dietary Substitutions to Customize Your Espresso Cheesecake Recipe
- Protein and Main Component Alternatives
- Vegetable, Sauce, and Seasoning Modifications
- Mastering Espresso Cheesecake Recipe: Advanced Tips and Variations
- Pro cooking techniques
- Flavor variations
- Presentation tips
- Make-ahead options
- How to Store Espresso Cheesecake Recipe: Best Practices
- Refrigeration
- Freezing
- Reheating and serving
- FAQs: Frequently Asked Questions About Espresso Cheesecake Recipe
- How do I store leftover espresso cheesecake?
- Can you freeze espresso cheesecake?
- How long does it take to bake espresso cheesecake?
- How do I prevent cracks in espresso cheesecake?
- What are common substitutions in an espresso cheesecake recipe?
- Espresso Cheesecake Recipe
- Ingredients
- Instructions
- Last Step:
- Notes
- Nutrition
- Did you make this recipe?
Essential Ingredients for Espresso Cheesecake Recipe
Below is everything you need for the full Espresso Cheesecake Recipe, including the crust, filling, and ganache topping. Optional cream cheese frosting is included too, so you can choose the finish you want.
- Crust: Chocolate cookie crumbs for a deep cocoa base that pairs perfectly with coffee.
- Filling: Cream cheese plus espresso for a creamy, coffee-forward cheesecake.
- Ganache: Bittersweet or dark chocolate and warm cream for a glossy topping.
- Optional frosting: A simple cream cheese frosting for a piped, bakery-style look.
Ingredients (with precise measurements)
Crust
- 2 cups chocolate cookie crumbs (about 20 cookies)
- 6 tablespoons melted butter
- 1/4 teaspoon salt
Filling
- 24 ounces softened cream cheese (3 packages)
- 3/4 cup granulated sugar
- 3 tablespoons flour
- 1/4 cup cooled espresso or strong coffee
- 1/2 cup heavy whipping cream
- 1 teaspoon vanilla extract
- 3 large eggs at room temperature
Ganache Topping
- 1/4 cup heavy whipping cream
- 4 ounces bittersweet or dark chocolate, roughly chopped (bars preferred)
Cream Cheese Frosting (optional)
- 4 ounces softened cream cheese
- 4 tablespoons softened butter
- 1/2 teaspoon vanilla extract
- 3/4 to 1 cup powdered sugar
- espresso beans for garnish (optional)
Special Dietary Options (quick notes)
You can adapt the Espresso Cheesecake Recipe, but most versions will be limited by cream cheese and eggs. Here are practical ideas that many home cooks use.
- Vegan: Use a plant-based cream cheese and coconut cream in place of heavy whipping cream. Substitute egg replacer or a thick plant yogurt option, but expect the set to be softer.
- Gluten-free: Swap flour with a gluten-free all-purpose blend. Use gluten-free chocolate cookie crumbs for the crust.
- Low-calorie: Reduce sugar slightly and choose a lighter dairy alternative. Keep in mind that changing ingredients may affect texture and doneness.
For background on cream cheese and dairy choices, this overview may be helpful: is cream cheese healthy.
How to Prepare the Perfect Espresso Cheesecake Recipe: Step-by-Step Guide
This Espresso Cheesecake Recipe is designed to be dependable and rewarding. You will bake at 350°F, then switch to 200°F for a creamy center. After that, chilling time is what makes it slice cleanly.
Before you start (timing and pan setup)
Prep time: 15 minutes. Bake time: approximately 1 hour 15 minutes including temperature adjustments. Cooling and refrigeration: at least 8 hours or overnight.
| Stage | Time | Temperature |
|---|---|---|
| Crust bake | 10 minutes | 350°F |
| Cheesecake bake (step 1) | 15 minutes | 350°F |
| Cheesecake bake (step 2) | 55 to 60 minutes | 200°F |
| In-oven cooling | 30 minutes + 15 minutes | Oven off |
| Refrigeration | At least 8 hours | Refrigerator |
Step-by-step directions
Follow these steps closely for the best texture. If you are working with substitutions (like gluten-free flour), make changes before you start so you do not pause mid-batter.
First Step: Preheat and prepare the pan
Preheat your oven to 350°F. Prepare a springform pan with non-stick spray so the crust and cheesecake release easily.
Second Step: Make the chocolate cookie crust
In a food processor, pulse 20 chocolate cookies until crumbed. Add melted butter and salt, then pulse to combine. Press the mixture into the pan and bring the crust 1 inch up the sides.
Bake the crust for 10 minutes, then let it cool. If you are using gluten-free cookies, confirm the crumbs measure the same and still press firmly.
Third Step: Beat the cream cheese until smooth
Beat the softened cream cheese for at least 5 minutes until smooth. Scrape the bowl as needed so you do not leave any lumps behind.
Tip for busy cooks: set cream cheese on the counter ahead of time so it softens well. Cold cream cheese can lead to a grainy texture.
Fourth Step: Mix sugar, flour, and espresso
Add granulated sugar and flour, then mix until combined. Add cooled espresso or strong coffee and mix just until combined.
If you want a stronger coffee flavor in your Espresso Cheesecake Recipe, taste your coffee before adding. Strong coffee should be cool, not hot.
Fifth Step: Add cream and vanilla
Beat in the heavy whipping cream and vanilla extract for 1 to 2 minutes, scraping the bowl again. This step helps the filling stay creamy and evenly mixed.
Sixth Step: Add eggs gently to prevent cracks
Add the 3 large eggs one at a time, mixing gently until each is just combined. Avoid overmixing because too much air can cause cracks during baking.
For egg-free or low-allergen preferences, see the substitutions section below. Keep in mind that egg replacements may change the set, so chill longer.
Seventh Step: Fill the crust and remove air bubbles
Pour the filling into the prepared crust. Tap the pan gently to remove air bubbles, which helps the top look smooth.
Eighth Step: Bake, then reduce heat for creaminess
Bake at 350°F for 15 minutes. Then lower oven temperature to 200°F and bake for 55 to 60 minutes.
You want the center to slightly jiggle and the sides to be set. This timing is key for an Espresso Cheesecake Recipe that cuts well.
Ninth Step: Cool gradually to reduce cracking
Turn off the oven and leave the cheesecake inside for 30 minutes. Crack the oven door and cool an additional 15 minutes.
Slow cooling is one of the easiest anti-crack tricks. Sudden temperature shifts are the main reason cheesecake tops split.
Final Step: Cool completely, chill overnight, then top
Remove the cheesecake and cool it completely on a wire rack. Refrigerate for at least 8 hours or overnight.
For the toppings, you have options:
- Ganache: Heat the 1/4 cup heavy whipping cream to a boil and pour over the chopped bittersweet or dark chocolate. Let sit 1 to 2 minutes, whisk until smooth, then pour over the chilled cheesecake.
- Optional frosting: Beat cream cheese and butter until fluffy. Mix in vanilla, then powdered sugar on low until combined. Pipe around edges and garnish with chocolate shavings and optional espresso beans.
If you want a dessert pairing idea for busy gatherings, you might also enjoy mini muffin pancake bites for a fun, coffee-friendly breakfast or brunch alongside your Espresso Cheesecake Recipe.

Dietary Substitutions to Customize Your Espresso Cheesecake Recipe
Sometimes you need to work around dietary needs or what you have in your kitchen. The good news is you can still make an Espresso Cheesecake Recipe that tastes great. Just remember: changes can affect texture, so use gentle mixing and give the cheesecake extra chill time if needed.
Protein and Main Component Alternatives
- Dairy-based option: Stick with softened cream cheese for the creamiest classic texture.
- Low-lactose idea: Use lactose-free cream cheese and lactose-free heavy cream if available.
- Dairy-free (best effort): Use a vegan cream cheese and coconut cream. The flavor will still be cheesecake-like, but baking time may vary.
- Egg substitutes: Many people use thicker plant yogurt as a replacement. For example, you can try an egg-to-yogurt style swap, but do not expect the same firm slice without a longer chill.
Vegetable, Sauce, and Seasoning Modifications
- Coffee strength: Swap between espresso and strong coffee. If you only have instant coffee, dissolve it in a small amount of hot water, then cool fully before adding.
- Crust swaps: Use different chocolate cookies for subtle flavor changes. Oreo-style crumbs work well if you want a sweeter crust.
- Chocolate choice for ganache: Keep bittersweet or dark chocolate for a richer contrast against the cheesecake.
- Vanilla: Vanilla extract is recommended, but you can add a tiny pinch of salt if your vanilla tastes mild.
To keep everything balanced, taste your coffee mixture before mixing it in. When the coffee tastes right on its own, the Espresso Cheesecake Recipe usually tastes right too.
Mastering Espresso Cheesecake Recipe: Advanced Tips and Variations
Once you master the basic Espresso Cheesecake Recipe, you can make it feel like your own. The biggest wins come from technique. Small changes in mixing, baking time, and toppings make a noticeable difference.
Pro cooking techniques
- Soften cream cheese well: Beat for at least 5 minutes for a smooth, lump-free filling.
- Mix gently after adding eggs: This helps prevent cracks and keeps the center creamy.
- Cool gradually: Turn off oven, wait 30 minutes, crack the door, wait 15 minutes. This reduces sudden temperature changes.
- Chill at least 8 hours: Texture improves as the filling sets and the coffee flavor melds.
Flavor variations
- Extra coffee punch: Add a slightly stronger espresso or let your brewed coffee reduce and cool.
- Chocolate intensity: Use higher cocoa dark chocolate in ganache for a deeper flavor.
- Vanilla-forward version: Slightly increase vanilla in frosting for a dessert that tastes like a coffee-shop treat.
Presentation tips
- Ganache finish: Pour ganache over a fully chilled cheesecake for a shiny, smooth top.
- Frosting border: Pipe the cream cheese frosting around the edges for a bakery look.
- Garnish: Add chocolate shavings and optional espresso beans for a finishing touch.
Make-ahead options
This is a great make-ahead dessert for holidays, potlucks, and busy family dinners. You can prepare the cheesecake, refrigerate it overnight, and then add ganache or frosting right before serving. If you need a plan for later, freeze the cheesecake without ganache and frosting.
Freeze is your friend for last-minute hosting. Wrap tightly, thaw in the refrigerator overnight, then top fresh.
How to Store Espresso Cheesecake Recipe: Best Practices
Storing your Espresso Cheesecake Recipe correctly helps keep the coffee flavor strong and the texture creamy. The key is airtight wrapping and proper chilling temperature.
Refrigeration
- Slice the cheesecake first for easy access.
- Place slices in an airtight container or wrap tightly with plastic wrap.
- Store at 40°F (4°C) or below.
- It stays good for 2 to 4 days.
- Avoid leaving it at room temperature for more than 2 hours.
Freezing
- Freeze up to 3 months.
- Cool fully, then skip ganache and frosting until after thawing.
- Wrap each portion tightly in parchment paper or plastic wrap to prevent freezer burn.
- Place in a freezer-safe Ziplock bag or airtight container.
Reheating and serving
Cheesecake is usually served cold. For best texture, let slices come to room temperature for 10 to 15 minutes before serving. Do not microwave because it can make the texture grainy.
FAQs: Frequently Asked Questions About Espresso Cheesecake Recipe
How do I store leftover espresso cheesecake?
Can you freeze espresso cheesecake?
How long does it take to bake espresso cheesecake?
How do I prevent cracks in espresso cheesecake?
What are common substitutions in an espresso cheesecake recipe?
Espresso Cheesecake Recipe
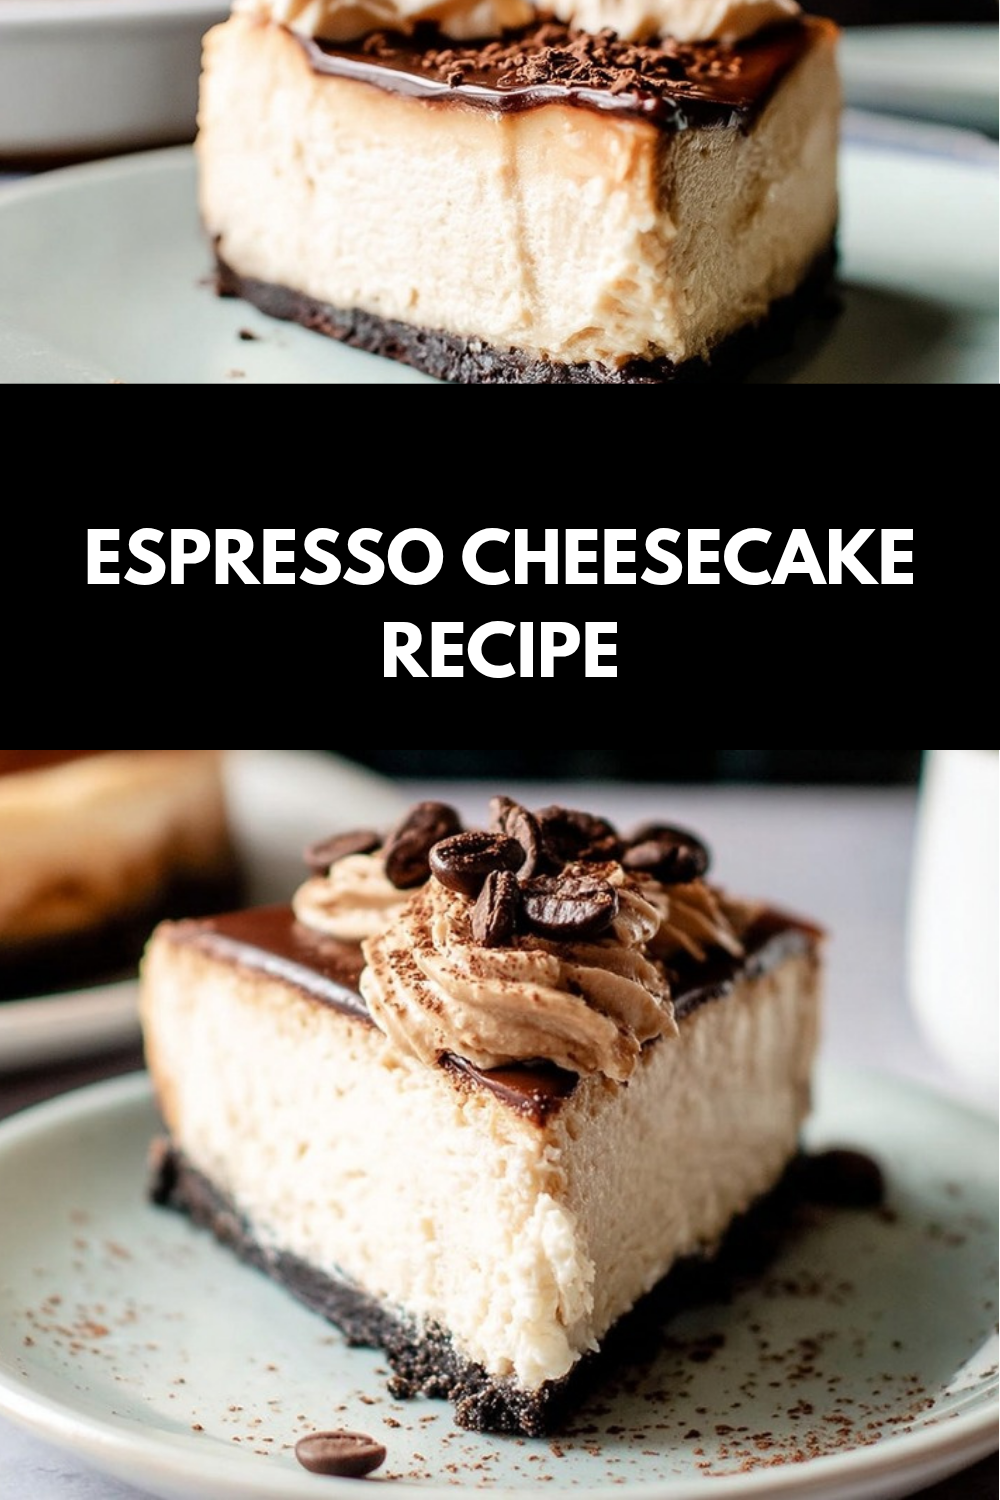
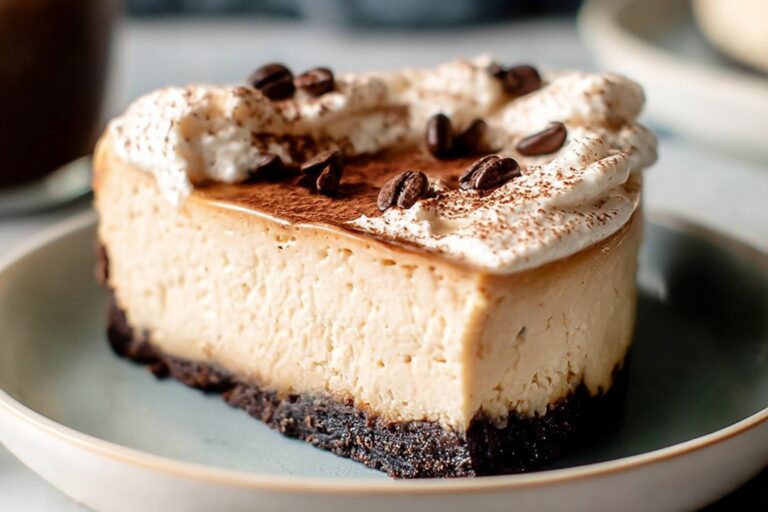
☕🍰 Dive into decadent Espresso Cheesecake – creamy coffee-infused filling over chocolate cookie crust, topped with silky ganache for coffee lovers’ ultimate indulgence!
🥧 Foolproof no-crack method, make-ahead perfection chilling overnight, optional frosting elevates it to cafe-quality dessert.
- Total Time: 9 hours 30 minutes
- Yield: 12 servings
Ingredients
– 2 cups chocolate cookie crumbs (about 20 cookies)
– 6 tablespoons melted butter
– 1/4 teaspoon salt
– 24 ounces softened cream cheese (3 packages)
– 3/4 cup granulated sugar
– 3 tablespoons flour
– 1/4 cup cooled espresso or strong coffee
– 1/2 cup heavy whipping cream
– 1 teaspoon vanilla extract
– 3 large eggs at room temperature
– 1/4 cup heavy whipping cream
– 4 ounces bittersweet or dark chocolate, roughly chopped (bars preferred)
– 4 ounces softened cream cheese
– 4 tablespoons softened butter
– 1/2 teaspoon vanilla extract
– 3/4 to 1 cup powdered sugar
– espresso beans for garnish (optional)
Instructions
1-First Step: Preheat and prepare the pan Preheat your oven to 350°F. Prepare a springform pan with non-stick spray so the crust and cheesecake release easily.
2-Second Step: Make the chocolate cookie crust In a food processor, pulse 20 chocolate cookies until crumbed. Add melted butter and salt, then pulse to combine. Press the mixture into the pan and bring the crust 1 inch up the sides. Bake the crust for 10 minutes, then let it cool.
3-Third Step: Beat the cream cheese until smooth Beat the softened cream cheese for at least 5 minutes until smooth. Scrape the bowl as needed so you do not leave any lumps behind.
4-Fourth Step: Mix sugar, flour, and espresso Add granulated sugar and flour, then mix until combined. Add cooled espresso or strong coffee and mix just until combined.
5-Fifth Step: Add cream and vanilla Beat in the heavy whipping cream and vanilla extract for 1 to 2 minutes, scraping the bowl again. This step helps the filling stay creamy and evenly mixed.
6-Sixth Step: Add eggs gently to prevent cracks Add the 3 large eggs one at a time, mixing gently until each is just combined. Avoid overmixing because too much air can cause cracks during baking.
7-Seventh Step: Fill the crust and remove air bubbles Pour the filling into the prepared crust. Tap the pan gently to remove air bubbles, which helps the top look smooth.
8-Eighth Step: Bake, then reduce heat for creaminess Bake at 350°F for 15 minutes. Then lower oven temperature to 200°F and bake for 55 to 60 minutes. You want the center to slightly jiggle and the sides to be set. This timing is key for an Espresso Cheesecake Recipe that cuts well.
9-Ninth Step: Cool gradually to reduce cracking Turn off the oven and leave the cheesecake inside for 30 minutes. Crack the oven door and cool an additional 15 minutes.
10-Final Step: Cool completely, chill overnight, then top Remove the cheesecake and cool it completely on a wire rack. Refrigerate for at least 8 hours or overnight. For the toppings, you have options: 1. Ganache: Heat the 1/4 cup heavy whipping cream to a boil and pour over the chopped bittersweet or dark chocolate. Let sit 1 to 2 minutes, whisk until smooth, then pour over the chilled cheesecake. 2. Optional frosting: Beat cream cheese and butter until fluffy. Mix in vanilla, then powdered sugar on low until combined. Pipe around edges and garnish with chocolate shavings and optional espresso beans.
Last Step:
Please leave a rating and comment letting us know how you liked this recipe! This helps our business to thrive and continue providing free, high-quality recipes for you.Notes
🧀 Soften cream cheese fully and beat thoroughly for ultra-smooth, lump-free filling.
☕ Brew fresh espresso or strong coffee for authentic bold flavor without bitterness.
❄️ Gradual oven cooling prevents cracks; chill overnight for perfect sliceable texture.
- Prep Time: 15 minutes
- Chilling: 8 hours
- Cook Time: 1 hour 15 minutes
- Category: Desserts
- Method: Baked
- Cuisine: American
- Diet: Vegetarian
Nutrition
- Serving Size: 1 slice
- Calories: 628
- Sugar: 34g
- Sodium: 460mg
- Fat: 46g
- Saturated Fat: 26g
- Unsaturated Fat: 19g
- Trans Fat: 1g
- Carbohydrates: 47g
- Fiber: 1g
- Protein: 8g
- Cholesterol: 160mg





