

Why You’ll Love These Mini Dessert Cup Ideas
These Mini Dessert Cup Ideas are perfect when you want a sweet treat that looks special but does not take much effort. If you love cheesecake cups, this no bake cheesecake recipe gives you rich flavor, creamy texture, and easy portions in every cup. It is a simple dessert that fits busy weeknights, parties, and make-ahead plans.
Ease of preparation
- These easy no bake cheesecake cups come together fast with no oven needed, which makes them ideal for home cooks, students, and busy parents.
- The crust and filling use basic pantry ingredients, so you can mix, layer, and chill with very little hands-on time.
- Because the recipe makes just 4 servings, it is easy to scale up or down for any occasion.
Health benefits
- Mini portions help with portion control, which is helpful for diet-conscious individuals who want a sweet bite without overdoing it.
- You can top the cups with fresh berries or fruit like kiwi, mango, and pomegranate for a lighter finish.
- Since this is a no bake dessert, it avoids extra heat in the kitchen, which is a nice bonus in warm weather.
Versatility
- These dessert cups work well for birthdays, date nights, potlucks, and holiday dessert tables.
- You can switch toppings based on the season, from berries in summer to citrus segments and pomegranate arils in winter.
- The recipe also fits many different serving styles, from simple ramekins to clear cups for layered mini cheesecakes.
Distinctive flavor
- The filling is creamy, lightly sweet, and full of classic cheesecake flavor.
- The graham cracker crust adds a buttery crunch that balances the soft filling.
- Chocolate, fruit, and berry toppings make each cup taste fresh and different every time.
These mini no bake dessert cups are the kind of treat people remember because they look cute, taste rich, and fit almost any gathering.
If you enjoy quick sweet recipes, you may also like these no-bake energy bites for easy snacking or a fruity smoothie for a simple breakfast or dessert pairing.
Jump to:
- Why You’ll Love These Mini Dessert Cup Ideas
- Ease of preparation
- Health benefits
- Versatility
- Distinctive flavor
- Essential Ingredients for Mini Dessert Cup Ideas
- Main ingredients
- Special dietary options
- How to Prepare the Perfect Mini Dessert Cup Ideas: Step-by-Step Guide
- First step: make the crust
- Second step: whip the filling
- Third step: assemble the cups
- Fourth step: chill until set
- Fifth step: make the chocolate topping if using
- Final step: garnish and serve
- Dietary Substitutions to Customize Your Mini Dessert Cup Ideas
- Protein and main component alternatives
- Vegetable, sauce, and seasoning modifications
- Mastering Mini Dessert Cup Ideas: Advanced Tips and Variations
- Pro cooking techniques
- Flavor variations
- Presentation tips
- Make-ahead options
- How to Store Mini Dessert Cup Ideas: Best Practices
- Refrigeration
- Freezing
- Reheating
- Meal prep considerations
- FAQs: Frequently Asked Questions About Mini Dessert Cup Ideas
- How do you make no bake mini cheesecake cups?
- Can you freeze mini cheesecake cups?
- What are easy mini dessert cup ideas for parties?
- What containers work best for mini dessert cups?
- How long do mini dessert cups last in the fridge?
- Mini Dessert Cup Ideas
- Ingredients
- Instructions
- Last Step:
- Notes
- Nutrition
- Did you make this recipe?
Essential Ingredients for Mini Dessert Cup Ideas
Here is the full ingredient list for these cheesecake cups easy recipe style desserts. Every item is measured carefully so your mini dessert cup ideas turn out smooth, balanced, and ready to serve.
Main ingredients
- 3/4 cup graham cracker crumbs, for the crust base and classic cheesecake flavor
- 2 tablespoons melted butter, to bind the crust and help it hold its shape
- 1 tablespoon powdered sugar, to lightly sweeten the crust
- 8 ounces softened full-fat cream cheese, for a rich and creamy filling
- 1/2 cup heavy whipping cream, to give the filling a light, fluffy texture
- 1 cup powdered sugar, to sweeten the cheesecake layer
- 1 teaspoon vanilla extract, for warm flavor and a classic cheesecake taste
- Fresh berries, for a bright topping and fresh finish
- 1 cup chocolate chips, for chocolate topping
- 3 tablespoons coconut oil, to melt with the chocolate chips for a smooth chocolate drizzle or topping
- Pomegranate arils, citrus segments, kiwi slices, or mango cubes, for colorful fruit garnish options
Special dietary options
- Vegan: Use dairy-free cream cheese, coconut whipping cream, plant-based butter, and dairy-free chocolate chips.
- Gluten-free: Swap graham cracker crumbs for gluten-free cookie crumbs.
- Low-calorie: Use reduced-fat cream cheese, a lighter whipped topping, and extra fresh fruit on top.
| Ingredient | Amount | Purpose |
|---|---|---|
| Graham cracker crumbs | 3/4 cup | Makes the crust |
| Melted butter | 2 tablespoons | Binds the crust |
| Powdered sugar | 1 tablespoon plus 1 cup | Sweetens crust and filling |
| Full-fat cream cheese | 8 ounces | Forms the creamy filling |
| Heavy whipping cream | 1/2 cup | Adds fluff and softness |
| Vanilla extract | 1 teaspoon | Builds flavor |
| Chocolate chips | 1 cup | Makes chocolate garnish |
| Coconut oil | 3 tablespoons | Helps chocolate melt smoothly |
How to Prepare the Perfect Mini Dessert Cup Ideas: Step-by-Step Guide
First step: make the crust
Start by mixing 3/4 cup graham cracker crumbs, 2 tablespoons melted butter, and 1 tablespoon powdered sugar in a medium bowl. Stir until the crumbs look evenly coated and feel like damp sand. This step is quick and works well for mini dessert cup ideas because the crust sets nicely in the fridge without baking.
Spoon the mixture into 4 small cups, ramekins, or mini dessert glasses. Press it down firmly with the back of a spoon or a small measuring cup. A tight crust helps keep the layers neat and gives each bite a good crunch.
Second step: whip the filling
In a separate bowl, beat 8 ounces softened full-fat cream cheese until smooth. Add 1 cup powdered sugar and 1 teaspoon vanilla extract, then beat again until the mixture looks silky and lump free. Softened cream cheese is important here because it helps create a smooth filling for your no bake cheesecake cups recipe.
Next, pour in 1/2 cup heavy whipping cream. Beat until the mixture becomes thick and fluffy. If you want a slightly sweeter version, you can add a little extra powdered sugar, but the recipe as written gives a balanced cheesecake flavor that is not too heavy.
Third step: assemble the cups
Spoon or pipe the filling over the crust layer in each cup. If you want clean layers, use a piping bag or a zip-top bag with the corner snipped off. This makes the cups look polished and party ready, which is one reason these are such popular mini no bake dessert cups.
Divide the filling evenly so each serving looks the same. Smooth the tops with the back of a spoon if needed. At this point, the cups already look lovely, but chilling helps the texture firm up.
Fourth step: chill until set
Place the filled cups in the refrigerator for at least 1 to 2 hours. Chilling gives the cheesecake layer time to firm up and helps the flavors blend together. If you are making these ahead for guests, you can chill them longer and garnish right before serving.
For a faster dessert plan, make the crust and filling in the morning, then add toppings closer to dinner time. That way the fruit stays fresh and the chocolate topping keeps its shine.
Fifth step: make the chocolate topping if using
If you want a chocolate garnish, melt 1 cup chocolate chips with 3 tablespoons coconut oil. You can do this in the microwave in short bursts or over low heat on the stovetop. Stir until smooth, then drizzle over the chilled cups. The coconut oil helps the chocolate set with a soft bite.
This topping is great for chocolate lovers and gives your easy desserts a richer finish. You can also spoon the melted chocolate over berries for a more decorative look.
Final step: garnish and serve
Top each cup with fresh berries or fruit like pomegranate arils, citrus segments, kiwi slices, or mango cubes. The fruit adds color, freshness, and a little natural sweetness. Serve the cups cold for the best texture and flavor.
These cheesecake cups are easy to serve, easy to share, and easy to adapt for guests who like fruit, chocolate, or a mix of both.

Dietary Substitutions to Customize Your Mini Dessert Cup Ideas
Protein and main component alternatives
If you want to change the filling in these cheesecake cups, there are several simple swaps. Use reduced-fat cream cheese for a lighter version, though the texture will be a little less rich. For a dairy-free option, choose plant-based cream cheese and coconut whipping cream. If you want more protein, you can blend part of the filling with Greek yogurt, though the result will be slightly tangier.
Vegetable, sauce, and seasoning modifications
Since this recipe uses fruit and sweet toppings instead of vegetables, your best changes come from the garnish and flavor layer. Try strawberry slices, blueberry compote, lemon curd, or a spoonful of raspberry sauce. You can also swap vanilla extract for almond extract if you want a deeper flavor. For a lower sugar version, use less powdered sugar in the filling and rely on naturally sweet fruit on top. These changes keep the dessert cups flexible for different tastes and seasons.
Mastering Mini Dessert Cup Ideas: Advanced Tips and Variations
Pro cooking techniques
For the smoothest no bake cheesecake filling, make sure the cream cheese is truly softened before beating. Cold cream cheese can leave lumps that are hard to fix later. Also, whip the filling until it is fluffy but not overbeaten, because too much mixing can make it loose. If you want very neat layers, chill the crust for 10 minutes before adding the filling.
Flavor variations
You can turn these mini cheesecake cups into many different flavor combinations. Add lemon zest for a bright citrus note, swirl in strawberry sauce, or top with crushed cookies for extra crunch. If you like richer desserts, use the chocolate topping made from chocolate chips and coconut oil, then finish with raspberries or cherries. Seasonal toppings keep this recipe fresh all year.
Presentation tips
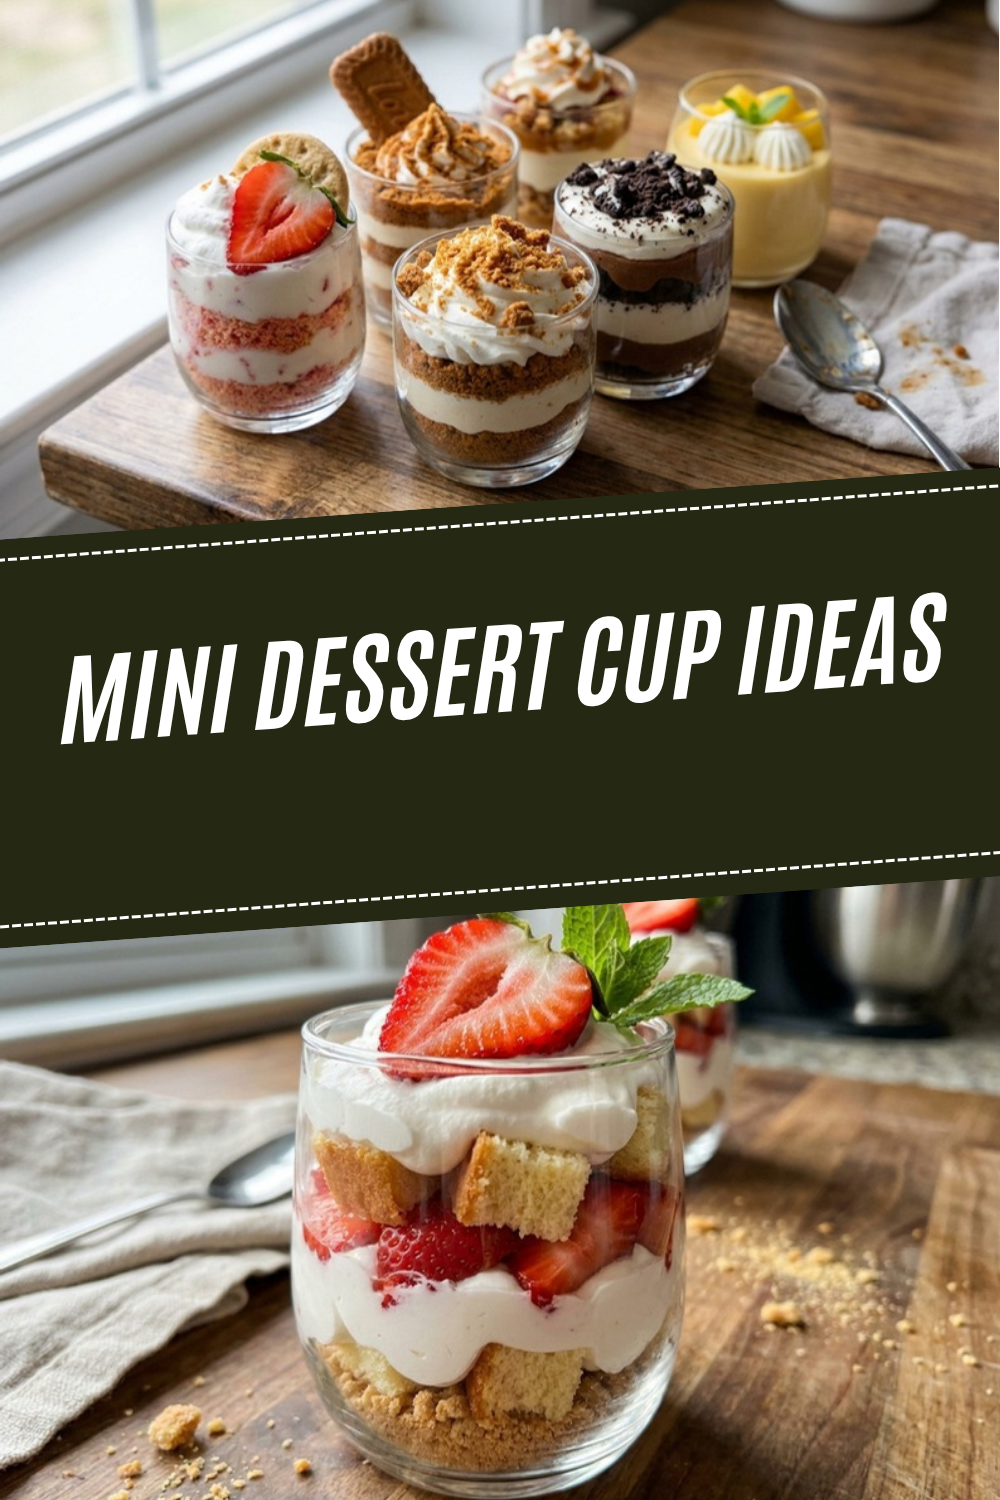
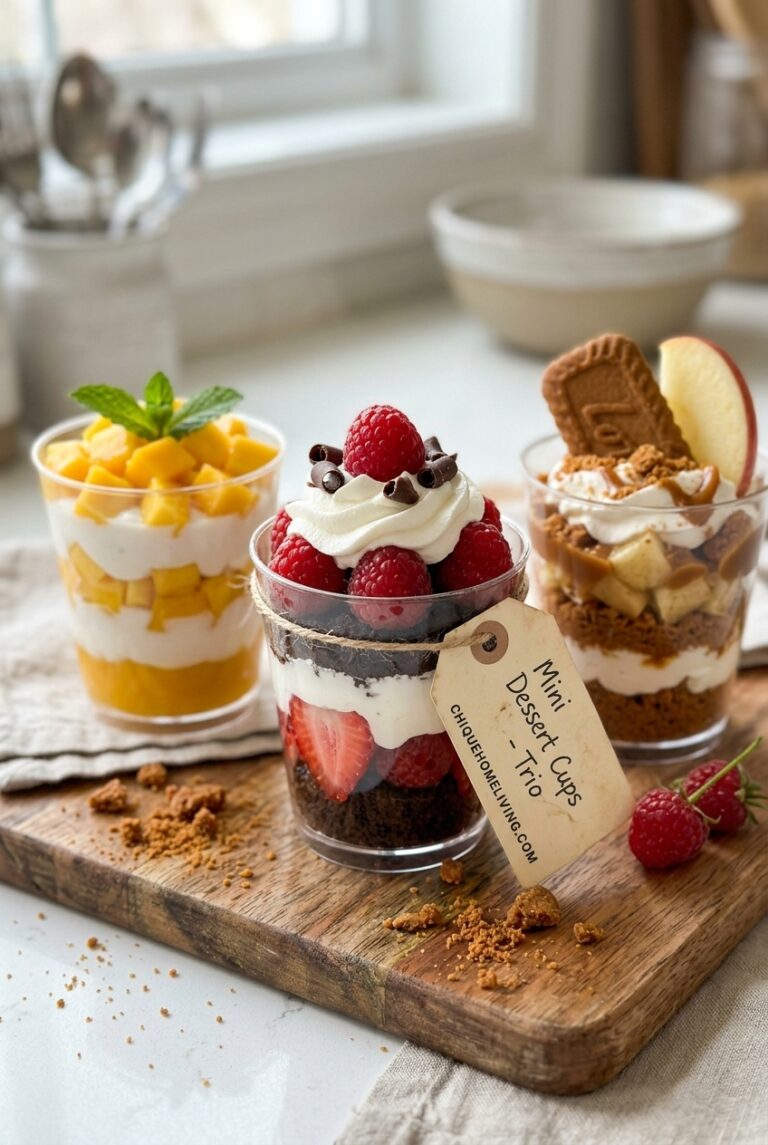
Clear cups show off the crust, filling, and toppings beautifully, which makes them ideal for parties. Add a small mint leaf, a few berry halves, or a light drizzle of chocolate for a bakery-style finish. If you are serving them at a dinner table, place each cup on a small plate with a spoon for a neat look.
Make-ahead options
These mini dessert cup ideas work very well for planning ahead. You can make the crust and filling the day before, then add toppings just before serving. If you are hosting a larger event, double or triple the recipe and line the cups on a tray for easy transport. This is especially helpful for holidays, school events, and family gatherings.
For another easy make-ahead snack idea, try these mini muffin pancake bites for a fun breakfast or brunch spread.
How to Store Mini Dessert Cup Ideas: Best Practices
Proper storage helps keep these mini no bake dessert cups fresh and tasty. Since they are made with dairy, they should stay cold until serving. A little planning goes a long way if you want to prep them in advance.
Refrigeration
Store the cups in the refrigerator for up to 3 days. Cover them loosely with lids or plastic wrap to prevent them from drying out. If possible, keep the toppings separate and add them right before serving so the fruit stays fresh and the crust stays crisp.
Freezing
Yes, you can freeze these cups for longer storage. Place them in airtight containers or cover them tightly and freeze for up to 2 months. For best results, freeze without fresh fruit toppings. Thaw overnight in the fridge before serving.
Reheating
These are no bake cheesecake cups, so reheating is not needed. In fact, warming them would soften the texture too much. Always serve them chilled for the best flavor and structure.
Meal prep considerations
If you like weekly meal prep, make a double batch and portion the cups into individual containers. This makes them easy to grab for parties, school lunches, or after dinner treats. For the best results, keep garnishes separate until the day you serve them.
FAQs: Frequently Asked Questions About Mini Dessert Cup Ideas
How do you make no bake mini cheesecake cups?
Can you freeze mini cheesecake cups?
What are easy mini dessert cup ideas for parties?
What containers work best for mini dessert cups?
How long do mini dessert cups last in the fridge?
Mini Dessert Cup Ideas
🍰 Enjoy creamy, dreamy no-bake cheesecake in perfect portion-sized cups with a buttery graham crust—effortless indulgence without the oven!
🫐 Customizable with fresh fruits or chocolate toppings, these quick treats are ideal for parties, snacks, or anytime cravings.
- Total Time: 2 hours 15 minutes
- Yield: 4 servings
Ingredients
– 3/4 cup graham cracker crumbs for the crust base and classic cheesecake flavor
– 2 tablespoons melted butter to bind the crust and help it hold its shape
– 1 tablespoon powdered sugar to lightly sweeten the crust
– 8 ounces softened full-fat cream cheese for a rich and creamy filling
– 1/2 cup heavy whipping cream to give the filling a light, fluffy texture
– 1 cup powdered sugar to sweeten the cheesecake layer
– 1 teaspoon vanilla extract for warm flavor and a classic cheesecake taste
– Fresh berries for a bright topping and fresh finish
– 1 cup chocolate chips for chocolate topping
– 3 tablespoons coconut oil to melt with the chocolate chips for a smooth chocolate drizzle or topping
– Pomegranate arils, citrus segments, kiwi slices, or mango cubes for colorful fruit garnish options
Instructions
1-First step: make the crust Start by mixing 3/4 cup graham cracker crumbs, 2 tablespoons melted butter, and 1 tablespoon powdered sugar in a medium bowl. Stir until the crumbs look evenly coated and feel like damp sand. This step is quick and works well for mini dessert cup ideas because the crust sets nicely in the fridge without baking. Spoon the mixture into 4 small cups, ramekins, or mini dessert glasses. Press it down firmly with the back of a spoon or a small measuring cup. A tight crust helps keep the layers neat and gives each bite a good crunch.
2-Second step: whip the filling In a separate bowl, beat 8 ounces softened full-fat cream cheese until smooth. Add 1 cup powdered sugar and 1 teaspoon vanilla extract, then beat again until the mixture looks silky and lump free. Softened cream cheese is important here because it helps create a smooth filling for your no bake cheesecake cups recipe. Next, pour in 1/2 cup heavy whipping cream. Beat until the mixture becomes thick and fluffy. If you want a slightly sweeter version, you can add a little extra powdered sugar, but the recipe as written gives a balanced cheesecake flavor that is not too heavy.
3-Third step: assemble the cups Spoon or pipe the filling over the crust layer in each cup. If you want clean layers, use a piping bag or a zip-top bag with the corner snipped off. This makes the cups look polished and party ready, which is one reason these are such popular mini no bake dessert cups. Divide the filling evenly so each serving looks the same. Smooth the tops with the back of a spoon if needed. At this point, the cups already look lovely, but chilling helps the texture firm up.
4-Fourth step: chill until set Place the filled cups in the refrigerator for at least 1 to 2 hours. Chilling gives the cheesecake layer time to firm up and helps the flavors blend together. If you are making these ahead for guests, you can chill them longer and garnish right before serving. For a faster dessert plan, make the crust and filling in the morning, then add toppings closer to dinner time. That way the fruit stays fresh and the chocolate topping keeps its shine.
5-Fifth step: make the chocolate topping if using If you want a chocolate garnish, melt 1 cup chocolate chips with 3 tablespoons coconut oil. You can do this in the microwave in short bursts or over low heat on the stovetop. Stir until smooth, then drizzle over the chilled cups. The coconut oil helps the chocolate set with a soft bite. This topping is great for chocolate lovers and gives your easy desserts a richer finish. You can also spoon the melted chocolate over berries for a more decorative look.
6-Final step: garnish and serve Top each cup with fresh berries or fruit like pomegranate arils, citrus segments, kiwi slices, or mango cubes. The fruit adds color, freshness, and a little natural sweetness. Serve the cups cold for the best texture and flavor.
Last Step:
Please leave a rating and comment letting us know how you liked this recipe! This helps our business to thrive and continue providing free, high-quality recipes for you.Notes
🧀 Always use full-fat cream cheese and cold heavy cream for the creamiest, most stable filling that holds its shape.
❄️ Chill the assembled cups for a minimum of 2 hours to ensure the perfect firm yet creamy texture.
🍓 Get creative with seasonal garnishes like fresh fruits or chocolate drizzle for endless flavor variations.
- Prep Time: 15 minutes
- Chill: 2 hours
- Category: Dessert
- Method: No-Bake
- Cuisine: American
- Diet: Vegetarian
Nutrition
- Serving Size: 1 cup
- Calories: 380 kcal
- Sugar: 28 g
- Sodium: 250 mg
- Fat: 28 g
- Saturated Fat: 16 g
- Unsaturated Fat: 10 g
- Trans Fat: 0 g
- Carbohydrates: 28 g
- Fiber: 0.5 g
- Protein: 5 g
- Cholesterol: 95 mg





