

Why You’ll Love This Mini Pavlovas With Fresh Fruit And Cream Recipe
If you are looking for a pretty dessert that feels special but still fits into a busy schedule, this Mini Pavlovas With Fresh Fruit And Cream Recipe is a wonderful pick. These little meringue nests are crisp on the outside, soft in the middle, and topped with fluffy cream and juicy berries for a dessert that looks bakery-made with very little fuss. It is a lovely pavlova recipe for home cooks who want something sweet without a long ingredient list or complicated steps.
- Easy to make: This easy pavlova comes together with just one egg white, a few pantry staples, and a short list of fresh toppings. The oven does most of the work, which makes it ideal for busy parents, students, and working professionals.
- Light and satisfying: Each mini pavlova has a crisp shell, creamy topping, and fresh fruit, so it feels indulgent without being overly heavy. The berries add fiber and bright flavor, while the meringue keeps the dessert airy.
- Flexible for different diets: This bite size pavlova can be adjusted for different needs. Use coconut cream for a vegan version, or switch up the fruit based on what is in season.
- Pretty and crowd-pleasing: These mini pavlovas with fresh fruit and cream recipe servings are perfect for holidays, birthdays, showers, or a simple family dinner. Every shell looks like a tiny dessert masterpiece.
These mini pavlova shells turn out crisp, soft, and just sweet enough, which makes them a fun dessert for almost any occasion.
For more fruit inspiration, you may also like this fresh fruit smoothie recipe from my kitchen. If you want to learn more about berries and their benefits, this guide to berry nutrition is a helpful read.
Jump to:
- Why You’ll Love This Mini Pavlovas With Fresh Fruit And Cream Recipe
- Essential Ingredients for Mini Pavlovas With Fresh Fruit And Cream Recipe
- Main Ingredients
- Special Dietary Options
- How to Prepare the Perfect Mini Pavlovas With Fresh Fruit And Cream Recipe: Step-by-Step Guide
- First Step: Get your pan and oven ready
- Second Step: Whip the egg white until foamy
- Third Step: Add the sugar slowly
- Fourth Step: Shape the mini nests
- Fifth Step: Bake low and slow
- Sixth Step: Make the whipped cream
- Final Step: Assemble and serve
- Dietary Substitutions to Customize Your Mini Pavlovas With Fresh Fruit And Cream Recipe
- Protein and Main Component Alternatives
- Vegetable, Sauce, and Seasoning Modifications
- Mastering Mini Pavlovas With Fresh Fruit And Cream Recipe: Advanced Tips and Variations
- Pro cooking techniques
- Flavor variations
- Presentation tips
- Make-ahead options
- How to Store Mini Pavlovas With Fresh Fruit And Cream Recipe: Best Practices
- FAQs: Frequently Asked Questions About Mini Pavlovas With Fresh Fruit And Cream Recipe
- How do you store mini pavlovas with fruit and cream?
- Can you make mini pavlovas ahead of time?
- What fresh fruits go best on mini pavlovas?
- How do you get perfect meringue for mini pavlovas?
- Are mini pavlovas gluten-free?
- Mini Pavlovas With Fresh Fruit And Cream Recipe
- Ingredients
- Instructions
- Last Step:
- Notes
- Nutrition
- Did you make this recipe?
Essential Ingredients for Mini Pavlovas With Fresh Fruit And Cream Recipe
This mini pavlovas recipe uses simple ingredients, but each one plays an important role. The meringue needs the egg white and sugar for structure, the cream of tartar helps stabilize the foam, and the topping brings everything together with a soft, sweet finish. You can keep the recipe classic or switch the fruit depending on the season.
Main Ingredients
- 1 cold egg white – The base of the meringue pavlova and the key to that light, airy texture.
- 1/8 teaspoon cream of tartar – Helps the egg white whip up more steadily and hold its shape.
- 1/4 cup granulated sugar – Sweetens the meringue and creates a glossy, stable shell.
- 1/4 cup cold heavy cream – Whips into a fluffy topping for the center of each mini pavlova.
- 2 tablespoons powdered sugar – Sweetens the whipped cream and helps it stay soft and smooth.
- 1/4 teaspoon vanilla extract – Adds warm flavor to the cream topping.
- 1 cup mixed berries, washed and chopped – Brings color, freshness, and a juicy bite to each dessert.
Special Dietary Options
- Vegan: Swap the heavy cream for coconut cream to make the topping plant-based.
- Gluten-free: This easy bite size meringue pavlova is naturally gluten-free when made with pure ingredients and no wheat-based add-ins.
- Low-calorie: Use a smaller amount of whipped cream and load up on berries for a lighter finish.
| Ingredient | Purpose | Helpful Note |
|---|---|---|
| Egg white | Creates the meringue structure | Best when cold before whipping |
| Sugar | Sweetens and stabilizes | Add gradually for best texture |
| Heavy cream | Makes the topping fluffy | Can be replaced with coconut cream |
| Mixed berries | Adds freshness and color | Use strawberries, blueberries, or seasonal fruit |
How to Prepare the Perfect Mini Pavlovas With Fresh Fruit And Cream Recipe: Step-by-Step Guide
First Step: Get your pan and oven ready
Start by preheating the oven to 200°F. Line a baking sheet with parchment paper so the meringue pavlova shells release easily after baking. This low and slow temperature is important because it dries the meringue without browning it too quickly.
If you are making this as part of a busy day, this is a good time to measure everything out before you begin. Having the sugar, cream of tartar, and toppings ready makes the process smoother and less stressful.
Second Step: Whip the egg white until foamy
Place the cold egg white and cream of tartar in a clean bowl. Beat them until the mixture turns foamy and soft peaks form. A spotless bowl matters here because even a little grease can keep the egg white from whipping properly.
This is the stage where the mini pavlova starts to take shape. Soft peaks mean the mixture will hold a little curve when the beaters are lifted. If you are skipping cream of tartar, you can still make the recipe, but you may need to beat the egg white a bit longer for the same fluffy result.
Third Step: Add the sugar slowly
Gradually add the granulated sugar while beating on medium speed. Keep going until stiff peaks form and the mixture looks glossy and thick. This step is what gives the easy pavlova its structure, so do not rush it.
Stiff peaks should stand straight when you lift the beaters. If the mixture looks grainy, keep beating a little longer so the sugar has time to dissolve. A smooth meringue gives you a better shell and a nicer bite in the end.
Fourth Step: Shape the mini nests
Spoon or pipe the meringue into four circles on the prepared baking sheet. Shape each one into a small nest with a slight divot in the center. That little dip gives the whipped cream and berries a place to sit later.
Try to keep the circles about the same size so they bake evenly. This recipe makes 4 servings, and the shape of each shell helps create a tidy, cute bite size pavlova that is easy to serve.
Fifth Step: Bake low and slow
Bake the shells for 45 minutes at 200°F. Then turn off the oven and leave the meringues inside for 1 hour without opening the door. This gentle cooling step helps the shells dry out while staying crisp on the outside and soft in the center.
It may be tempting to peek, but opening the door too soon can let in cool air and cause cracks. Patience pays off here. A slow cool gives you a better texture and keeps the shells from collapsing.
Sixth Step: Make the whipped cream
Once the shells have cooled, beat the cold heavy cream, powdered sugar, and vanilla extract until fluffy. The cream should be soft and billowy, not runny. Stop as soon as it holds shape so it stays smooth and spoonable.
If you want a vegan version, use coconut cream instead of heavy cream. For a lighter twist, you can also use less cream and let the berries do more of the work. The topping should feel fresh, not heavy.
Final Step: Assemble and serve
Top each meringue shell with whipped cream and mixed berries right before serving. This is the best time to assemble the mini pavlovas with fresh fruit and cream recipe because the shells stay crisp and the berries stay bright. If you wait too long, the meringue can soften.
Use your favorite fruit mix, such as strawberries, blueberries, raspberries, or chopped seasonal fruit. For more inspiration on simple brunch and dessert-friendly recipes, you might also enjoy these mini muffin pancake bites for another fun handheld treat.
For the best texture, always build the pavlovas at the last minute so the shells keep their crisp bite.

Dietary Substitutions to Customize Your Mini Pavlovas With Fresh Fruit And Cream Recipe
Protein and Main Component Alternatives
Although this recipe is already simple, you can still make it fit your needs or what you have on hand. The egg white is the heart of the meringue, so if you need a different path, look for a pasteurized egg white product that whips well. That can be helpful for seniors, students, or anyone who wants a little extra peace of mind with raw egg recipes.
If you need a dairy-free option, coconut cream works well in place of heavy cream. Chill it before whipping so it becomes thick and fluffy. This keeps the mini pavlova creamy while making it suitable for a vegan dessert table.
Vegetable, Sauce, and Seasoning Modifications
While this dessert does not use vegetables, you can still swap in different fruits and flavor accents. Strawberries are great in spring, blueberries are lovely in summer, and pomegranate seeds bring a pop of color in winter. Kiwi, raspberries, blackberries, and chopped mango also work beautifully.
If you want a little extra flavor, try a small drizzle of fruit sauce or a pinch of citrus zest on top. Just keep wetter toppings light so they do not soak the meringue. For more savory meal ideas on a similar home-cook friendly level, you may want to bookmark this baked Denver omelet recipe for breakfast or brunch days.
Mastering Mini Pavlovas With Fresh Fruit And Cream Recipe: Advanced Tips and Variations
Pro cooking techniques
For the best meringue pavlova texture, keep your bowl completely clean and dry before whipping. Even a tiny bit of grease can stop the egg white from building volume. Using a cold egg white can also help, especially if your kitchen is warm.
Beat the sugar in slowly so the meringue turns glossy instead of grainy. If your kitchen is humid, try baking on a drier day. Humidity can make meringues sticky, which is one of the most common reasons a mini pavlova loses its crisp shell.
Flavor variations
One of the nicest things about this easy pavlova is how easy it is to change the fruit and flavor profile. Mixed berries are classic, but you can also try sliced peaches, kiwi, pomegranate seeds, or mango chunks. A little lemon zest in the cream can brighten the whole dessert without overpowering it.
For a deeper flavor, use vanilla bean paste in place of vanilla extract. You can also add a tiny spoonful of berry coulis under the cream for a more colorful finish. These small changes make every bite size pavlova feel a little different while keeping the recipe simple.
Presentation tips
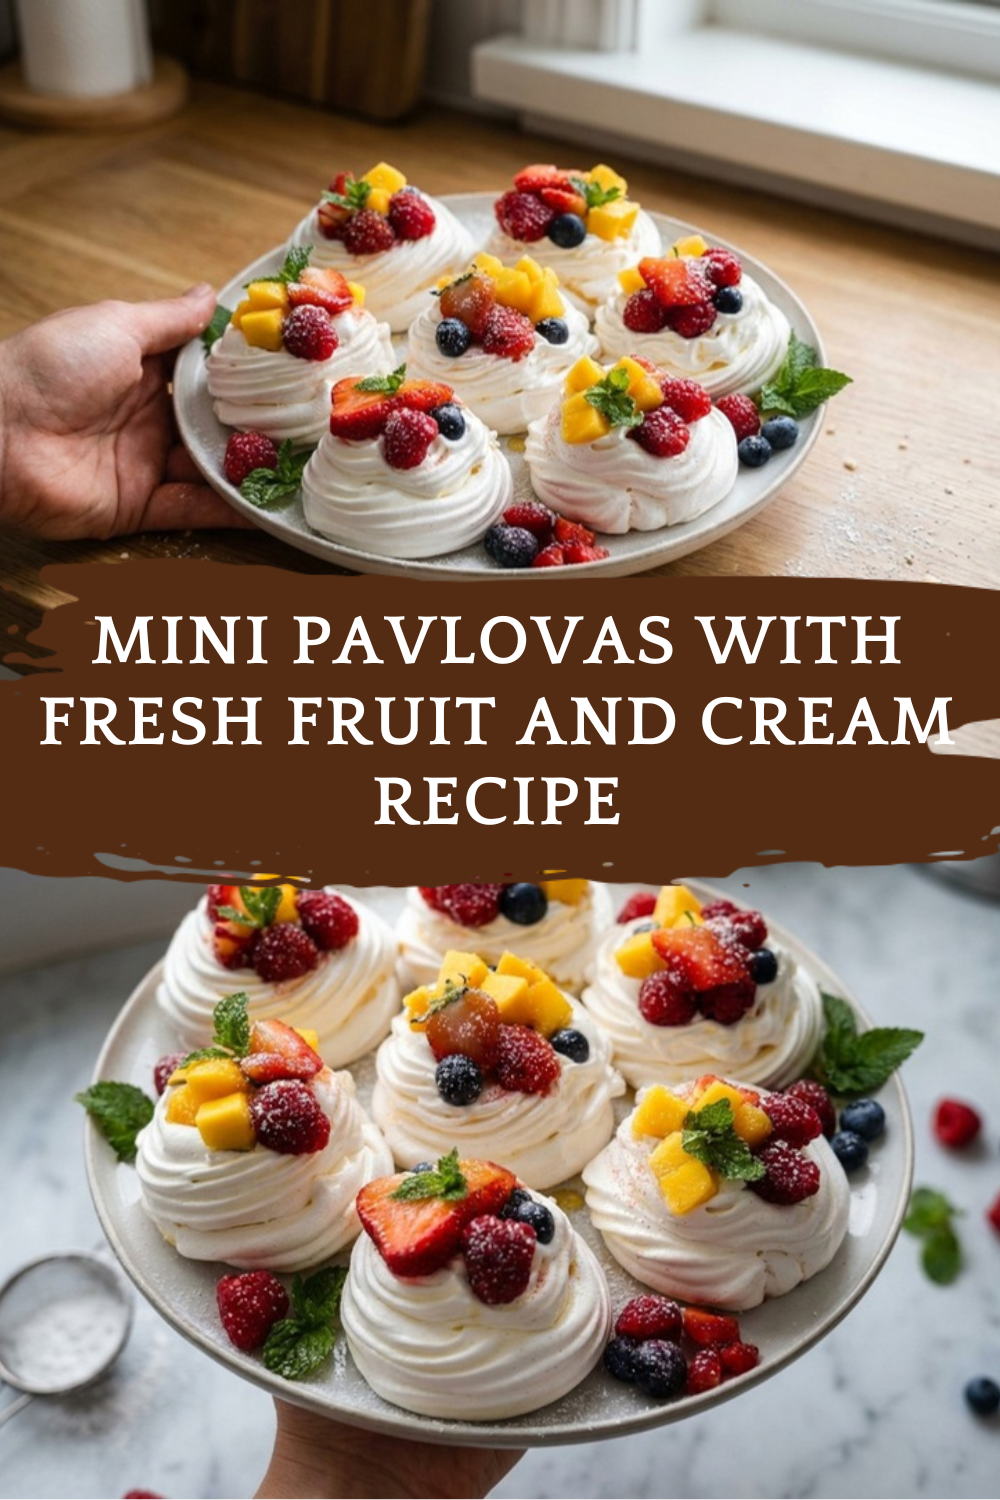
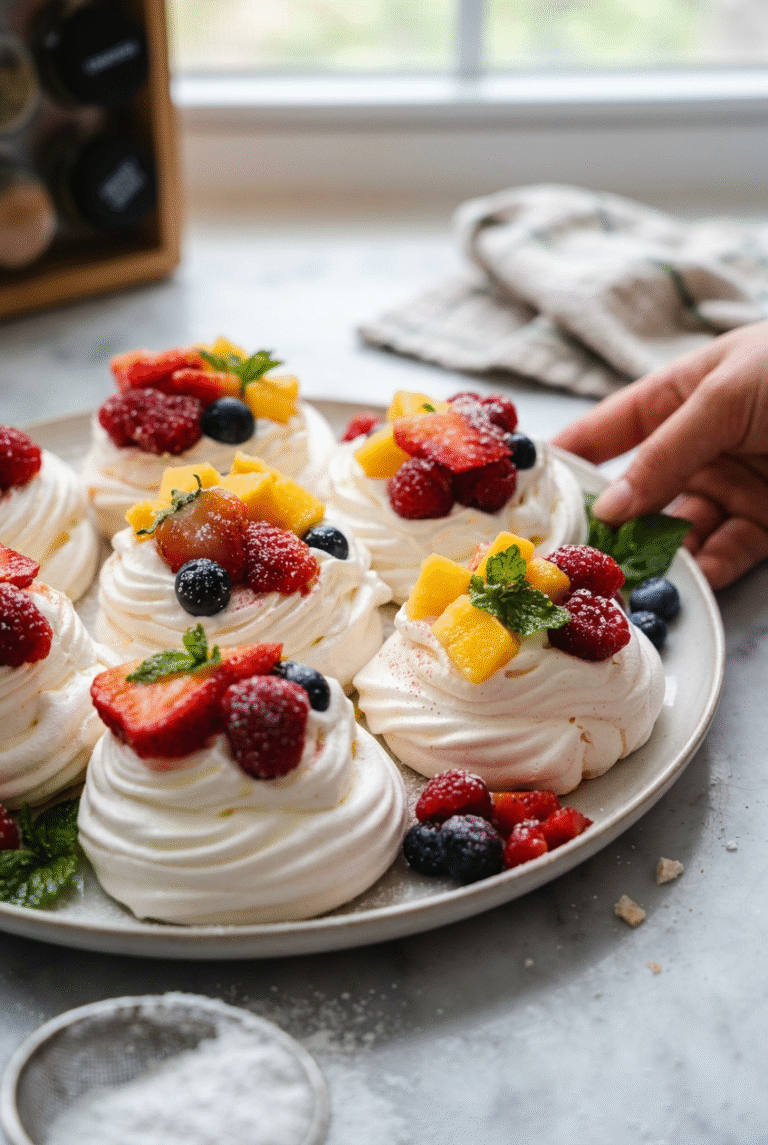
To make your mini pavlovas look extra pretty, spoon the cream into the center in a swirl and pile the fruit lightly on top. Mixing berry colors gives the dessert a bright, fresh look that stands out on a party table. A small mint leaf can add a fresh finish if you like a little green contrast.
If you are serving them at a gathering, place the shells, cream, and fruit in separate bowls and let guests build their own. That keeps the meringue crisp and gives everyone a chance to customize their plate. It also makes the dessert feel fun and relaxed.
Make-ahead options
You can bake the shells ahead and store them in a cool, dry place for up to 2 days. This is a big help when you are planning for guests or need a dessert that fits into a busy schedule. Whip the cream ahead too, but only for about an hour, then keep it chilled until serving.
For a sweet make-ahead breakfast or snack pairing, try this easy no-bake energy bites recipe. It pairs well with a day of simple meal prep and keeps things stress-free.
How to Store Mini Pavlovas With Fresh Fruit And Cream Recipe: Best Practices
Storage is all about keeping the meringue dry. Plain meringue shells can be stored in an airtight container at room temperature for up to 2 days. Keep them in a cool, dry place away from heat and moisture so they stay crisp.
Once the whipped cream and berries are added, the dessert is best eaten right away. Refrigerating assembled pavlovas is not a good idea because the meringue can soften and weep. If you need to prep ahead, store the shells, cream, and fruit separately.
Freezing is possible for the plain shells. Wrap each one individually, then store them in a freezer-safe container for up to 1 month. Thaw at room temperature before assembling.
There is no reheating step for this dessert. If the shells seem a little soft after storage, a dry room-temperature rest is better than warming them. For meal prep, make the shells a day or two ahead and top them only when you are ready to serve.
FAQs: Frequently Asked Questions About Mini Pavlovas With Fresh Fruit And Cream Recipe
How do you store mini pavlovas with fruit and cream?
Can you make mini pavlovas ahead of time?
What fresh fruits go best on mini pavlovas?
How do you get perfect meringue for mini pavlovas?
Are mini pavlovas gluten-free?
Mini Pavlovas With Fresh Fruit And Cream Recipe
☁️ Delight in crisp, melt-in-your-mouth mini meringue nests topped with fluffy cream and juicy berries—lightweight elegance in every bite!
🍓 Easy to bake ahead and assemble fresh, these bite-sized pavlovas are perfect for parties, tea time, or impressing with minimal effort.
- Total Time: 2 hours 30 minutes
- Yield: 4 servings
Ingredients
– 1 cold egg white
– 1/8 teaspoon cream of tartar
– 1/4 cup granulated sugar
– 1/4 cup cold heavy cream
– 2 tablespoons powdered sugar
– 1/4 teaspoon vanilla extract
– 1 cup mixed berries, washed and chopped
Instructions
1-First Step: Get your pan and oven ready Start by preheating the oven to 200°F. Line a baking sheet with parchment paper so the meringue pavlova shells release easily after baking. This low and slow temperature is important because it dries the meringue without browning it too quickly. If you are making this as part of a busy day, this is a good time to measure everything out before you begin. Having the sugar, cream of tartar, and toppings ready makes the process smoother and less stressful.
2-Second Step: Whip the egg white until foamy Place the cold egg white and cream of tartar in a clean bowl. Beat them until the mixture turns foamy and soft peaks form. A spotless bowl matters here because even a little grease can keep the egg white from whipping properly. This is the stage where the mini pavlova starts to take shape. Soft peaks mean the mixture will hold a little curve when the beaters are lifted. If you are skipping cream of tartar, you can still make the recipe, but you may need to beat the egg white a bit longer for the same fluffy result.
3-Third Step: Add the sugar slowly Gradually add the granulated sugar while beating on medium speed. Keep going until stiff peaks form and the mixture looks glossy and thick. This step is what gives the easy pavlova its structure, so do not rush it. Stiff peaks should stand straight when you lift the beaters. If the mixture looks grainy, keep beating a little longer so the sugar has time to dissolve. A smooth meringue gives you a better shell and a nicer bite in the end.
4-Fourth Step: Shape the mini nests Spoon or pipe the meringue into four circles on the prepared baking sheet. Shape each one into a small nest with a slight divot in the center. That little dip gives the whipped cream and berries a place to sit later. Try to keep the circles about the same size so they bake evenly. This recipe makes 4 servings, and the shape of each shell helps create a tidy, cute bite size pavlova that is easy to serve.
5-Fifth Step: Bake low and slow Bake the shells for 45 minutes at 200°F. Then turn off the oven and leave the meringues inside for 1 hour without opening the door. This gentle cooling step helps the shells dry out while staying crisp on the outside and soft in the center. It may be tempting to peek, but opening the door too soon can let in cool air and cause cracks. Patience pays off here. A slow cool gives you a better texture and keeps the shells from collapsing.
6-Sixth Step: Make the whipped cream Once the shells have cooled, beat the cold heavy cream, powdered sugar, and vanilla extract until fluffy. The cream should be soft and billowy, not runny. Stop as soon as it holds shape so it stays smooth and spoonable. If you want a vegan version, use coconut cream instead of heavy cream. For a lighter twist, you can also use less cream and let the berries do more of the work. The topping should feel fresh, not heavy.
7-Final Step: Assemble and serve Top each meringue shell with whipped cream and mixed berries right before serving. This is the best time to assemble the mini pavlovas with fresh fruit and cream recipe because the shells stay crisp and the berries stay bright. If you wait too long, the meringue can soften. Use your favorite fruit mix, such as strawberries, blueberries, raspberries, or chopped seasonal fruit. For more inspiration on simple brunch and dessert-friendly recipes, you might also enjoy these mini muffin pancake bites for another fun handheld treat.
Last Step:
Please leave a rating and comment letting us know how you liked this recipe! This helps our business to thrive and continue providing free, high-quality recipes for you.Notes
🥚 Double or triple the recipe easily since it uses just 1 egg white for 4 servings—scale up for crowds.
🏠 Store plain meringue shells in an airtight container at room temp for up to 2 days; assemble fresh to avoid sogginess.
🍓 Use seasonal berries like strawberries, blueberries, or pomegranate for variety and best flavor.
- Prep Time: 30 minutes
- Cool in Oven: 1 hour
- Cook Time: 45 minutes
- Category: Dessert
- Method: Baking
- Cuisine: Australian
- Diet: Vegetarian
Nutrition
- Serving Size: 1 pavlova
- Calories: 135 kcal
- Sugar: 19 g
- Sodium: 18 mg
- Fat: 6 g
- Saturated Fat: 3 g
- Unsaturated Fat: 2 g
- Trans Fat: 0 g
- Carbohydrates: 21 g
- Fiber: 1 g
- Protein: 2 g
- Cholesterol: 17 mg





