Ingredients
1 1/2 cups (150 g) crushed graham crackers or digestive biscuits
6 tablespoons (85 g) unsalted butter, melted
1 1/4 cups (320 g) creamy peanut butter
8 oz (225 g) cream cheese, softened
1/2 cup (60 g) powdered sugar
1 cup (240 ml) heavy cream, whipped to soft peaks
4 oz (115 g) semi-sweet chocolate (chips or chopped)
1/4 cup (60 ml) heavy cream for ganache
Instructions
1-First Step: Mise en Place and Crust Preparation
Gather your ingredients first to make things smooth this includes crushed crackers, melted butter, peanut butter, cream cheese, powdered sugar, heavy cream, chocolate, and a bit of vanilla or salt for flavor. Mix 1 1/2 cups crushed graham crackers with 6 tablespoons melted butter until it feels like wet sand. Press it into a 9-inch pie pan and chill for 15 to 20 minutes. For adaptations, swap in gluten-free crumbs or plant-based butter and follow the same steps.
This step sets the foundation, so take your time! It’s amazing how something so simple creates a sturdy base for the rest of the pie.
2-Second Step: Soften and Blend the Filling Base
Grab a bowl and beat 8 oz softened cream cheese with 1/2 cup powdered sugar and 1 1/4 cups creamy peanut butter until it’s super smooth. If you’re making a vegan version, use vegan cream cheese and your favorite sweetener instead. Don’t forget to scrape the bowl to get everything mixed evenly.
I find this step really satisfying because blending creates that creamy texture we all crave. It’s the heart of the no bake peanut butter chocolate pie!
3-Third Step: Whip the Cream to Fold In
Whip 1 cup heavy cream to soft peaks, adding 1 teaspoon vanilla and a pinch of salt for extra flavor. For dairy-free, use chilled canned coconut cream and whip the solid part. Folding this into the base keeps the filling light and airy.
This is where the magic happens lightening up the mix makes the pie feel so much more delightful!
4-Fourth Step: Combine and Flavor
Fold one-third of the whipped cream into the peanut butter mixture first, then add the rest until it’s all incorporated. Taste it and tweak with a pinch of sea salt or 1 to 2 tablespoons cocoa powder if you want. For lower-sugar options, cut back on the powdered sugar and add vanilla extract.
Adjusting flavors here lets you make it your own, which is one of the joys of cooking at home.
5-Fifth Step: Assemble the Pie
Spoon the filling into your chilled crust and smooth it out with a spatula. Tap the pan to remove any air bubbles, and maybe swirl in some melted chocolate for a fun look.
Assembling is quick and easy, and you’ll see your no bake peanut butter chocolate pie coming to life!
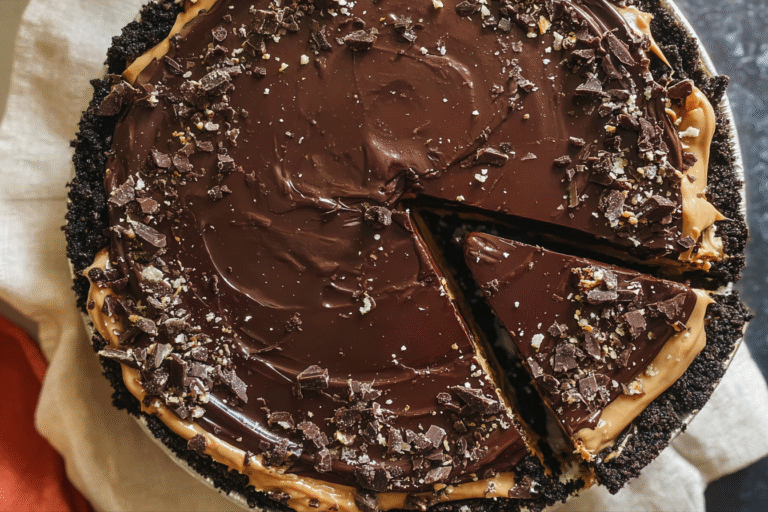
6-Sixth Step: Prepare the Ganache Topping
Heat 1/4 cup heavy cream until it’s steaming, then pour it over 4 oz chopped semi-sweet chocolate. Let it sit for a minute and stir until glossy. For vegan, use coconut milk and dairy-free chocolate.
This topping adds that shiny finish that makes the pie look irresistible.
7-Seventh Step: Top and Chill
Pour the ganache over the filling and spread it to the edges, then chill the pie for at least 4 hours. If you’re in a rush, pop it in the freezer for 45 to 60 minutes and then move it to the fridge.
Chilling helps everything set perfectly for those clean slices we love.
8-Eighth Step: Garnish and Serve
Add garnishes like chopped peanuts or shaved chocolate before serving, and let the pie sit for 5 to 10 minutes at room temperature for easier cutting.
It’s the little touches that make this pie extra special! Here, you might want to try a similar no-bake treat like our no-bake energy bites recipe for more quick ideas.
9-Ninth Step: Dietary Adaptations During Steps
For vegan, use plant-based options throughout; for gluten-free, check all ingredients; and for lower-calorie, swap in lighter alternatives.
These tweaks keep the recipe accessible for everyone.
10-Final Step: Serving and Storage Notes
Use a hot knife for clean slices and store leftovers in the fridge. This way, your no bake peanut butter chocolate pie stays fresh and tasty. For more healthy snack options, check out chocolate health benefits to see why dark chocolate is a great choice.
Last Step:
Please leave a rating and comment letting us know how you liked this recipe! This helps our business to thrive and continue providing free, high-quality recipes for you.Notes
🌡️ For the best texture, make sure all ingredients are properly chilled before whippping the cream – this will give you the lightest, fluffiest filling.
⏰ This pie tastes even better the next day, so consider making it a day ahead to allow the flavors to meld together perfectly.
🍫 When melting chocolate, use low heat and stir constantly to prevent seizing – adding a small amount of oil can help achieve a smoother consistency if needed.
- Prep Time: 30 minutes
- Chilling Time: 4 hours
- Cook Time: 0 minutes
- Category: Dessert
- Method: No Bake
- Cuisine: American
- Diet: Vegetarian
Nutrition
- Serving Size: 1 slice
- Calories: 550
- Sugar: 35g
- Sodium: 350mg
- Fat: 38g
- Saturated Fat: 18g
- Unsaturated Fat: 16g
- Trans Fat: 0g
- Carbohydrates: 45g
- Fiber: 4g
- Protein: 12g
- Cholesterol: 65mg