

Why You’ll Love This Peppermint Meringue Cookies
This peppermint meringue cookies recipe is a fantastic choice for those new to baking or looking for something quick. It’s delightfully simple with just a few basic ingredients, ready in about 2 hours and 20 minutes from start to finish. The cookies offer a light, airy texture that makes them a refreshing treat without feeling heavy.
Plus, these peppermint meringue cookies provide health benefits like aiding digestion with their natural peppermint flavor. They’re low in calories, with each cookie packing about 10 calories, 2 grams of carbohydrates, and 0.2 grams of protein for a guilt-free option. Their versatility shines through as they’re naturally gluten-free and can be adapted for vegan diets using alternatives like aquafaba.
Whether you’re a busy parent or a baking enthusiast, these cookies add a festive touch to any occasion. They fit into various dietary needs, making them ideal for students or seniors watching their intake. Imagine sharing them at holiday gatherings for memorable moments around the table.
Key Features
- Easy preparation with minimal ingredients and short cooking time.
- Light and low-calorie, perfect for diet-conscious individuals.
- Fits vegan, gluten-free, and low-calorie diets effortlessly.
- A unique peppermint flavor that brings a refreshing twist to your dessert options.
In essence, peppermint meringue cookies are about creating joy in the kitchen without the fuss, inspiring even newlyweds or working professionals to try something new.
Jump to:
- Why You’ll Love This Peppermint Meringue Cookies
- Key Features
- Essential Ingredients for Peppermint Meringue Cookies
- Main Ingredients List
- How to Prepare the Perfect Peppermint Meringue Cookies: Step-by-Step Guide
- Tips for Success
- Dietary Substitutions to Customize Your Peppermint Meringue Cookies
- Substitution Options
- Mastering Peppermint Meringue Cookies: Advanced Tips and Variations
- Presentation and Storage Ideas
- How to Store Peppermint Meringue Cookies: Best Practices
- Quick Storage Tips
- FAQs: Frequently Asked Questions About Peppermint Meringue Cookies
- How do you make peppermint meringue cookies crispy and light?
- Can I store peppermint meringue cookies, and how long do they last?
- What if my peppermint meringue cookies turn out chewy instead of crisp?
- Can I use crushed peppermint candies instead of extract in my meringue cookies?
- Are peppermint meringue cookies gluten-free and suitable for special diets?
- Peppermint Meringue Cookies
- Ingredients
- Instructions
- Last Step:
- Nutrition
- Did you make this recipe?
Essential Ingredients for Peppermint Meringue Cookies
To make these peppermint meringue cookies, you’ll need a handful of straightforward ingredients that create magic in the oven. Each one plays a key role in achieving that perfect crisp texture and refreshing taste. Let’s look at the exact items required, based on this proven recipe.
Main Ingredients List
- 4 large egg whites at room temperature – They give the meringue its light and fluffy structure.
- ¼ teaspoon cream of tartar – This helps stabilize the egg whites for sturdy peaks.
- ¾ cup granulated sugar – Adds sweetness and helps the meringue hold its shape.
- ½ teaspoon peppermint extract – Infuses the cookies with that signature refreshing flavor.
- Red gel food coloring – Used for a festive appearance by adding stripes to your cookies.
Besides these, ensure you have basic tools like a mixer, piping bag, and parchment paper on hand. For special dietary options, you can swap egg whites with aquafaba for a vegan version, making it accessible for everyone. This setup keeps things simple and effective for home cooks exploring new flavors.
Remember, using high-quality ingredients like fresh egg whites ensures your peppermint meringue cookies turn out just right. It’s all about balance to maintain that crispiness while keeping the calorie count low at around 10 per cookie. With these, you’re set for a fun baking session that fits into busy schedules.
How to Prepare the Perfect Peppermint Meringue Cookies: Step-by-Step Guide
Getting started with peppermint meringue cookies is straightforward and fun, even if you’re a beginner. First, adjust your oven racks to the upper and lower-middle positions and preheat the oven to 225°F (about 107°C) for even baking. Line two baking sheets with parchment paper to prevent sticking and make cleanup easy. This step sets the stage for cookies that are crispy and full of flavor.
Next, beat the 4 large egg whites at room temperature with ¼ teaspoon of cream of tartar until they become frothy, which takes about 2 to 3 minutes on medium speed. Gradually add the ¾ cup of granulated sugar while beating on medium-high speed until the mixture turns glossy and forms stiff peaks, roughly 4 more minutes. For the best results, keep your equipment clean and grease-free, and make sure no yolk sneaks in to ruin the texture. Once you reach those stiff peaks, reduce the mixer speed to low and mix in the ½ teaspoon of peppermint extract gently.
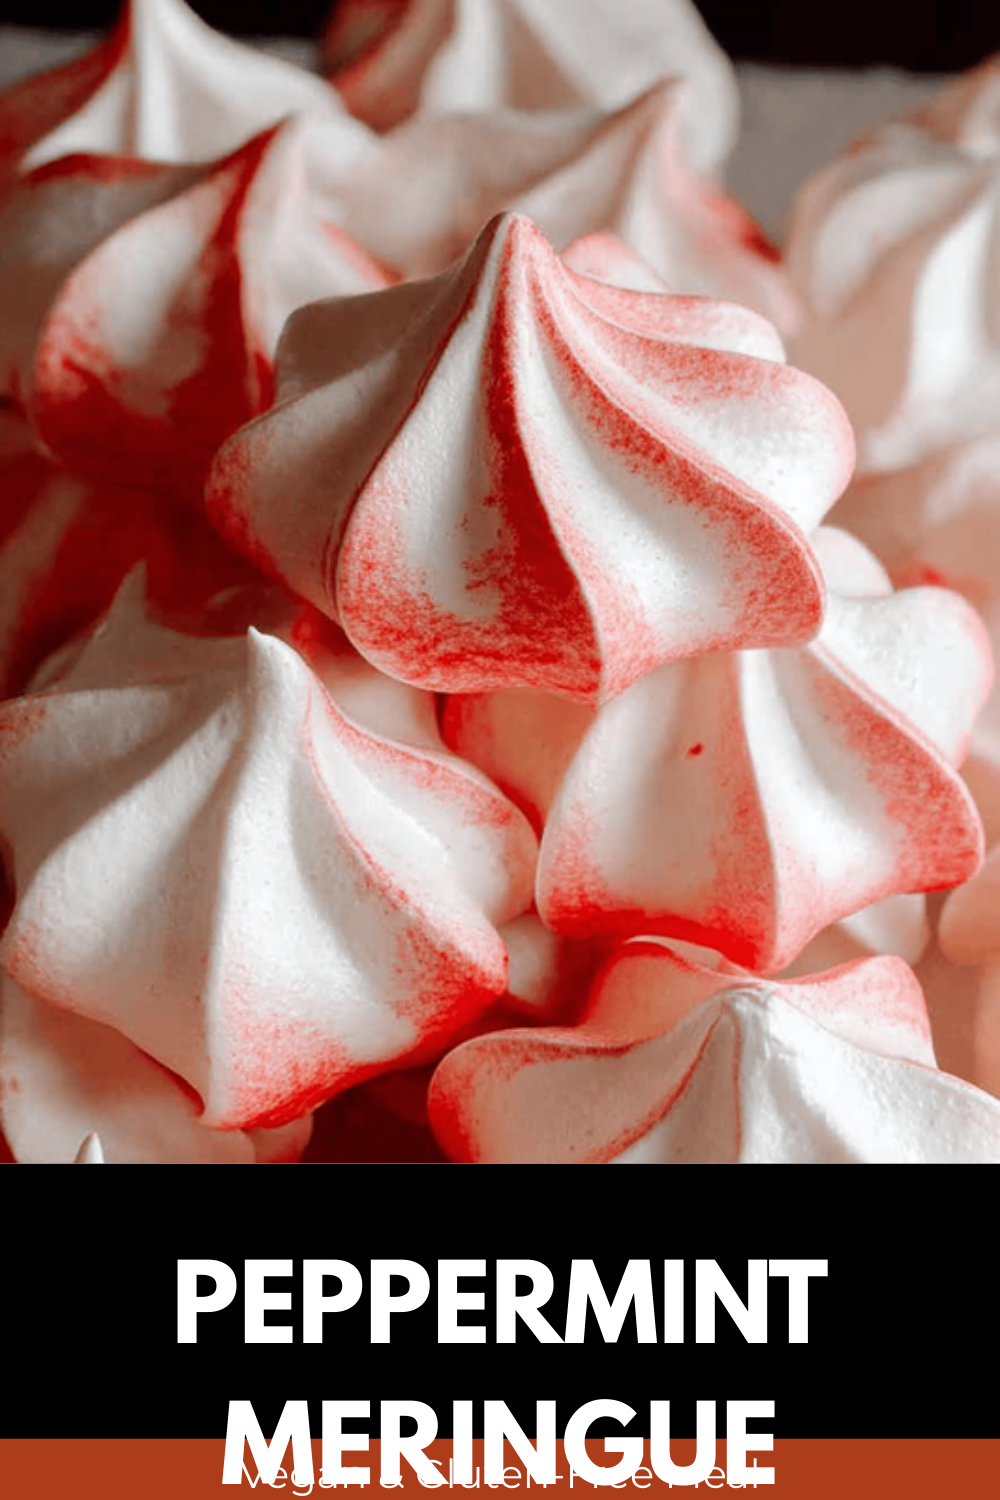
Now, add a creative touch by using red gel food coloring to paint stripes inside a piping bag fitted with a large tip. This will give your cookies that eye-catching festive look. Fill the bag with the meringue mixture and pipe it into small “kisses” on the baking sheets, spacing them 1 inch apart. Bake them for 1 hour, then turn off the oven and leave the meringues inside for another hour without opening the door to let them dry out perfectly. Total preparation and cooking time is about 2 hours and 20 minutes, making it ideal for busy parents or students.
Like our mini muffin pancake bites, these peppermint meringue cookies are simple treats that brighten your day. During baking, the low temperature ensures the cookies stay light and crisp without browning. If you’re adapting for dietary needs, remember to use aquafaba instead of egg whites for a vegan option, as mentioned in the recipe. This approach keeps the cookies low in fat and helps with their nutritional profile of about 10 calories per cookie.
Tips for Success
- Always use room-temperature egg whites for maximum volume in your meringue.
- Gently fold in the peppermint extract to avoid deflating the mixture.
- Pipe the meringue carefully to ensure even baking and perfect shapes.
After baking, let the cookies cool completely to maintain their crisp texture. For variations, you could try adding crushed candy canes for extra crunch, as inspired by other easy recipes on our site. This method not only makes peppermint meringue cookies a hit for food enthusiasts but also fits into the routines of working professionals looking for quick desserts.
To store them, keep the cookies in an airtight container, which we’ll cover later. Baking these cookies is a great way to explore flavors, much like our no-bake energy bites that offer a healthy snack option. Whether it’s for a family gathering or a solo treat, these steps ensure your peppermint meringue cookies turn out refreshing and delightful every time.

Dietary Substitutions to Customize Your Peppermint Meringue Cookies
Customizing peppermint meringue cookies for different diets is simple and keeps the fun in baking. One key swap is replacing the 4 large egg whites with aquafaba for a vegan version, which maintains that light texture without any animal products. This makes the recipe accessible for more people while preserving the crispiness and refreshing flavor.
For those watching sugar intake, you can use alternatives like erythritol instead of the ¾ cup granulated sugar to keep things low-calorie. Natural peppermint oil can stand in for the ½ teaspoon peppermint extract if you prefer a more intense flavor profile. Add natural red beet powder in place of red gel food coloring for a healthier, vibrant look that aligns with dietary preferences.
Substitution Options
| Original Ingredient | Substitution | Benefits |
|---|---|---|
| Egg whites | Aquafaba | Vegan-friendly and keeps the meringue airy |
| Granulated sugar | Erythritol | Low-calorie for diet-conscious bakers |
| Peppermint extract | Natural peppermint oil | Enhances flavor without additives |
These changes ensure your peppermint meringue cookies remain delicious and adaptable. For instance, seniors or travelers might appreciate the gluten-free nature of the base recipe. By making these tweaks, you can enjoy the cookies’ minimal fat content and digestive benefits from peppermint.
Mastering Peppermint Meringue Cookies: Advanced Tips and Variations
Once you’re comfortable with the basics of peppermint meringue cookies, it’s time to level up your skills. Ensure your mixing bowl and beaters are spotless and free of grease to get those perfect stiff peaks every time. For extra crispness, try baking the cookies a bit longer or experimenting with double baking techniques to dry them out more.
Flavor variations can make your peppermint meringue cookies even more exciting. Add white chocolate chips or crushed peppermint candy to the mixture for a fun twist that keeps the refreshing flavor intact. You could also swirl in cocoa powder for a chocolatey version that appeals to baking enthusiasts. Remember to fold these additions gently to avoid losing the airy texture.
Presentation and Storage Ideas
- Pipe the dough into stars or hearts for a festive look.
- Use edible glitter or cocoa dusting to make them visually appealing.
- Prepare shapes ahead and bake fresh to maintain quality.
Playing with these variations, like adding a hint of vanilla, can turn your peppermint meringue cookies into a personalized treat for family fun.
These tips are great for busy parents or newlyweds hosting events. By incorporating elements from recipes like our mango peach strawberry smoothie for flavor inspiration, you keep things fresh and engaging.
How to Store Peppermint Meringue Cookies: Best Practices
Proper storage keeps your peppermint meringue cookies crisp and tasty for weeks. Store them in an airtight container at room temperature to avoid moisture, which can make them soft. This method works well for the low-calorie profile of these treats, preserving their 10 calories per cookie.
For longer storage, freeze the baked cookies in a sealed container with parchment layers between them. Thaw at room temperature before serving to retain that perfect texture. Avoid reheating, as it can change the crispness you worked hard to achieve.
Quick Storage Tips
- Keep away from humidity to maintain freshness up to two weeks.
- Use silica gel packets in containers for extra protection.
- Batch bake for easy meal prep during holidays.
Cookies can be refrigerated for several weeks, but room temperature is best as per the recipe details. This ensures your peppermint meringue cookies stay enjoyable for food enthusiasts on the go.
FAQs: Frequently Asked Questions About Peppermint Meringue Cookies
How do you make peppermint meringue cookies crispy and light?
Can I store peppermint meringue cookies, and how long do they last?
What if my peppermint meringue cookies turn out chewy instead of crisp?
Can I use crushed peppermint candies instead of extract in my meringue cookies?
Are peppermint meringue cookies gluten-free and suitable for special diets?

Peppermint Meringue Cookies
🍬 Enjoy the light and crisp texture of these peppermint meringue cookies, perfectly refreshing for the holiday season.
❄️ These cookies offer a low-calorie, flavorful treat that’s both visually festive and delicious.
- Total Time: 2 hours 10 minutes
- Yield: Approximately 30 cookies
Ingredients
– 4 large egg whites at room temperature
– ¼ teaspoon cream of tartar for stabilizing egg whites
– ¾ cup granulated sugar for sweetness and structure
– ½ teaspoon peppermint extract for flavoring
– Red gel food coloring for decoration
Instructions
1-Getting started with peppermint meringue cookies: First, adjust your oven racks to the upper and lower-middle positions and preheat the oven to 225°F (about 107°C) for even baking. Line two baking sheets with parchment paper to prevent sticking and make cleanup easy. This step sets the stage for cookies that are crispy and full of flavor.
2-Next: beat the 4 large egg whites at room temperature with ¼ teaspoon of cream of tartar until they become frothy, which takes about 2 to 3 minutes on medium speed. Gradually add the ¾ cup of granulated sugar while beating on medium-high speed until the mixture turns glossy and forms stiff peaks, roughly 4 more minutes. For the best results, keep your equipment clean and grease-free, and make sure no yolk sneaks in to ruin the texture. Once you reach those stiff peaks, reduce the mixer speed to low and mix in the ½ teaspoon of peppermint extract gently.
3-Now, add a creative touch by using red gel food coloring to paint stripes inside a piping bag fitted with a large tip. This will give your cookies that eye-catching festive look. Fill the bag with the meringue mixture and pipe it into small “kisses” on the baking sheets, spacing them 1 inch apart. Bake them for 1 hour, then turn off the oven and leave the meringues inside for another hour without opening the door to let them dry out perfectly. Total preparation and cooking time is about 2 hours and 20 minutes, making it ideal for busy parents or students.
4-After baking, let the cookies cool completely to maintain their crisp texture.
5-To store them, keep the cookies in an airtight container, which we’ll cover later. Baking these cookies is a great way to explore flavors, much like our no-bake energy bites that offer a healthy snack option. Whether it’s for a family gathering or a solo treat, these steps ensure your peppermint meringue cookies turn out refreshing and delightful every time.
Last Step:
Please leave a rating and comment letting us know how you liked this recipe! This helps our business to thrive and continue providing free, high-quality recipes for you.- Prep Time: 10 minutes
- Drying time: 1 hour
- Cook Time: 1 hour
- Category: Dessert
- Method: Whipping, baking, drying
- Cuisine: American
- Diet: Gluten-Free, Low-Fat
Nutrition
- Serving Size: 1 cookie
- Calories: 10 kcal
- Sugar: 2 g
- Sodium: 0 mg
- Fat: 0 g
- Saturated Fat: 0 g
- Unsaturated Fat: 0 g
- Trans Fat: 0 g
- Carbohydrates: 2 g
- Fiber: 0 g
- Protein: 0.2 g
- Cholesterol: 0 mg





