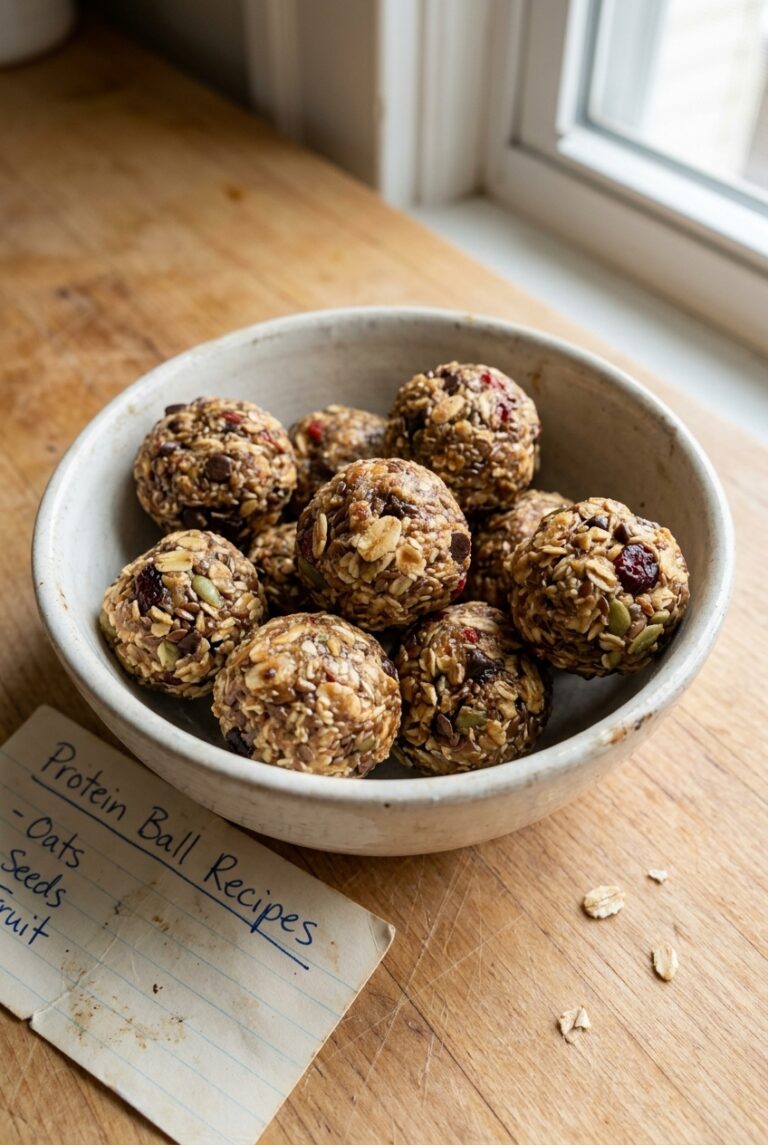
Ingredients
– 1 1/2 cups whole rolled oats for structure and a hearty texture
– 1 cup creamy natural peanut butter for holding everything together while adding rich flavor and healthy fats
– 1/4 cup ground flaxseed for fiber and a light nutty taste
– 1/4 cup honey for natural sweetness and binding
– 2 scoops protein powder for boosting protein content
– 1 teaspoon vanilla extract for warm sweet flavor
– 6 tablespoons mini chocolate chips for pops of chocolate
Instructions
1-First Step: Gather and measure everything Start by placing all your ingredients on the counter. Measure out the oats, peanut butter, flaxseed, honey, protein powder, vanilla, chocolate chips, and the pinch of unspecified ingredient. This simple prep step makes the whole process smoother and helps you move quickly from mixing to rolling. If you are making these for meal prep, line a tray or plate with parchment paper before you begin. Use a medium mixing bowl so you have enough room to stir without spilling. A sturdy spoon or spatula works well, but clean hands are usually best for the final mixing stage. Since these are no bake protein balls healthy snack style bites, there is no need to preheat the oven or wait for baking time.
2-Second Step: Mix the dry ingredients Add the rolled oats, ground flaxseed, protein powder, and the pinch of unspecified ingredient to the bowl. Stir these together first so the dry ingredients are evenly spread through the mixture. This helps keep the flavor balanced in every bite. It also prevents clumps of protein powder from sitting in one spot. If your protein powder is very fine, whisking the dry ingredients lightly can help. For a smoother texture, you can also pulse the oats in a food processor a few times before mixing. That creates a softer bite, which some people prefer in protein energy balls.
3-Third Step: Add the wet ingredients Now add the peanut butter, honey, and vanilla extract. Stir slowly at first, then switch to stronger mixing once the dry ingredients start absorbing the wet ones. The peanut butter acts as the main binder, while the honey adds sweetness and stickiness. Vanilla brings a warm flavor that keeps the bites from tasting flat. If the mixture feels too dry, add a teaspoon more honey or a small spoonful of peanut butter. If it feels too sticky, add a little more oats. The goal is a thick, scoopable dough that holds together when pressed.
4-Fourth Step: Fold in the chocolate chips Once the base is mixed, add the mini chocolate chips and stir just enough to spread them through the dough. Mini chips work especially well because they distribute more evenly than larger pieces. This is the step that gives these healthy protein snacks a fun dessert-like feel without making them complicated. If you want to make the recipe more flexible, you can swap the mini chocolate chips for chopped dried fruit, crushed nuts, or cacao nibs. Keep the total mix-ins about the same so the texture stays easy to shape.
5-Fifth Step: Chill the mixture briefly Let the dough rest in the refrigerator for about 15 to 20 minutes. This makes the mixture firmer and easier to roll. Chilling is especially helpful if your kitchen is warm or your peanut butter is very soft. It can also make the protein ball recipes less sticky on your hands. If you are short on time, you can skip this step, but the balls may be a little harder to shape. Even a short chill can make a big difference in texture.
6-Sixth Step: Roll into bite-size balls Use a spoon or small cookie scoop to portion the mixture. Roll each portion between your palms until it forms a ball. Aim for even sizes so they chill at the same rate and look nice on a plate. Most people like them around 1 inch wide, but you can make them smaller for kids or larger for a more filling snack. If the mixture sticks to your hands, lightly dampen your palms with water. That small trick helps a lot when shaping no bake protein balls. If the dough starts to crumble, press it together firmly before rolling.
7-Final Step: Chill and serve Place the rolled balls on the prepared tray and chill them again for at least 20 minutes. Once set, transfer them to a container and keep them cold until ready to eat. These bites are great for lunchboxes, road trips, post-workout snacks, or a quick grab-and-go treat. For extra serving appeal, arrange them in a small bowl or stack them in a clear container for the fridge. They also pair nicely with fruit, yogurt, or a smoothie like this mango peach strawberry smoothie for a balanced snack.
Last Step:
Please leave a rating and comment letting us know how you liked this recipe! This helps our business to thrive and continue providing free, high-quality recipes for you.Notes
❄️ Refrigerate the balls for at least 30 minutes to help them firm up and hold their shape.
🥄 Use a cookie scoop for uniform-sized balls that are easy to portion.
🔄 Customize by adding nuts, seeds, or dried fruit for extra flavor and nutrition.
- Prep Time: 15 minutes
- Chill Time: 30 minutes
- Category: Snacks
- Method: No Bake
- Cuisine: American
- Diet: High Protein, Vegetarian
Nutrition
- Serving Size: 1 ball
- Calories: 120 calories
- Sugar: 6g
- Sodium: 50mg
- Fat: 7g
- Saturated Fat: 2g
- Unsaturated Fat: 5g
- Trans Fat: 0g
- Carbohydrates: 12g
- Fiber: 2g
- Protein: 6g
- Cholesterol: 0mg