

Why You’ll Love This Raspberry Mousse
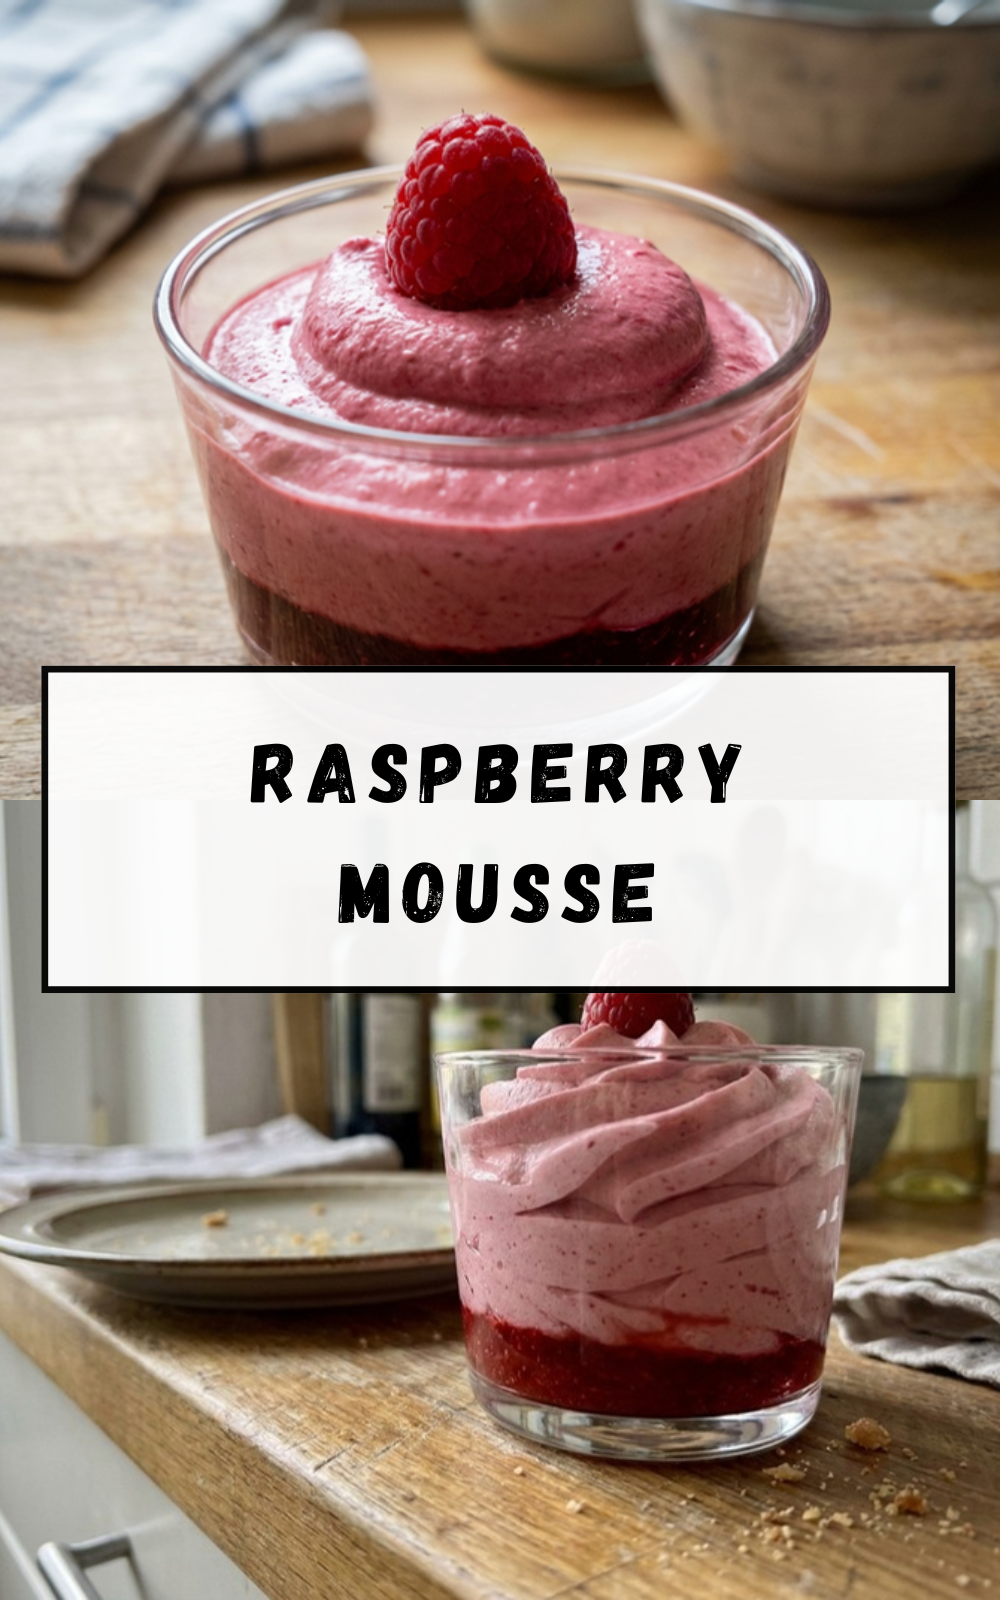
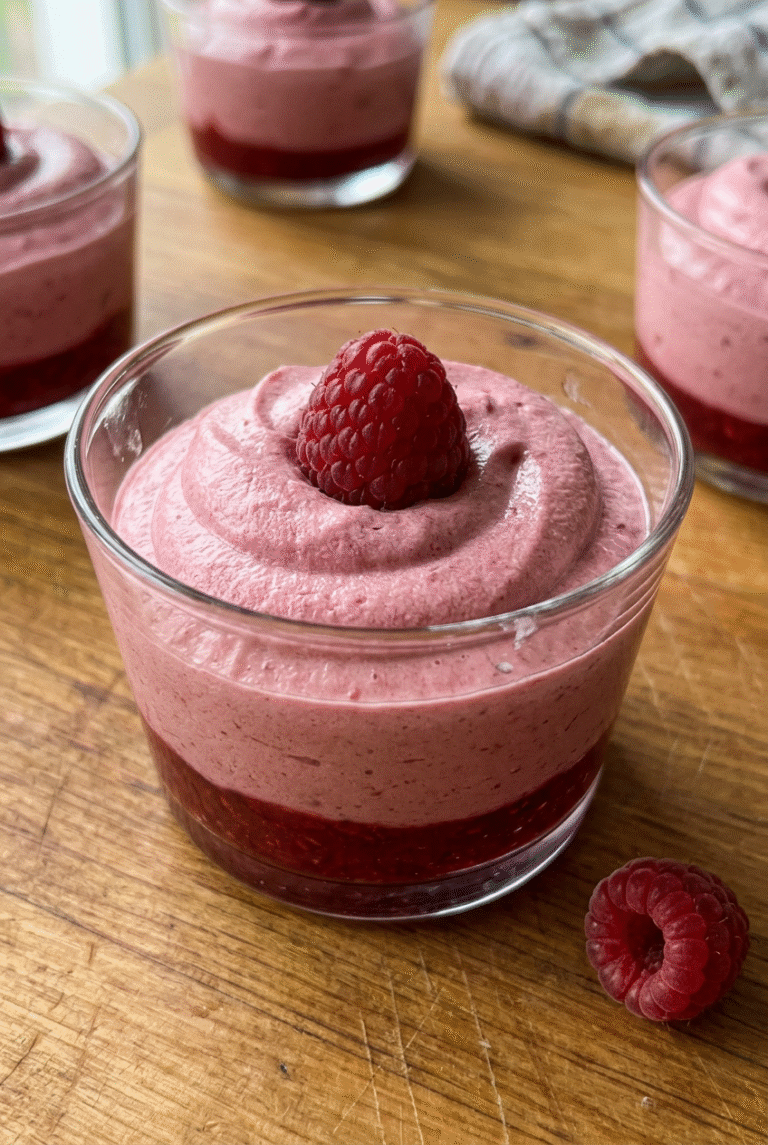
This Raspberry Mousse is the kind of dessert that feels fancy but comes together with very little fuss. If you want a sweet treat that looks beautiful in a glass and tastes like pure berry bliss, this one is a winner. It is light, creamy, and full of bright raspberry flavor, making it a lovely choice for almost any occasion.
- Easy to make: This easy raspberry mousse uses simple steps, a short cook time, and basic kitchen tools. You simmer the berries, whip the cream, and fold everything together. That means you can make a pretty dessert without spending all day in the kitchen.
- Great for different eating styles: This raspberry dessert is naturally gluten-free, and it can be adjusted with a zero-calorie sweetener like stevia if you want a lighter option. It also works well for busy parents, students, and working professionals who want something quick yet special.
- Lovely flavor and texture: The tangy berries balance the rich whipped cream so each bite tastes fresh, creamy, and not too heavy. If you love a simple raspberry mousse recipe with a silky finish, this one hits the mark.
- Flexible for serving: You can spoon it into dessert cups, pipe it into elegant glasses, or use it as a filling for cakes, tarts, and eclairs. That makes this raspberry mousse recipe useful for both everyday treats and holiday desserts.
Tip: If you want a dessert that feels special but still fits into a busy week, this easy raspberry mousse recipe is a smart pick.
For more fruity drink ideas that pair nicely with a light dessert, you might also like this fresh mango peach strawberry smoothie recipe. If you enjoy learning about berry nutrition, this helpful article from WebMD on the health benefits of raspberries is worth a look.
Jump to:
- Why You’ll Love This Raspberry Mousse
- Essential Ingredients for Raspberry Mousse
- Main Ingredients
- Special Dietary Options
- How to Prepare the Perfect Raspberry Mousse: Step-by-Step Guide
- First Step: Soften the gelatin
- Second Step: Cook the raspberry mixture
- Third Step: Puree the berries
- Fourth Step: Add the softened gelatin
- Fifth Step: Whip the cream
- Sixth Step: Fold the mixtures together
- Seventh Step: Portion and chill
- Helpful timing and texture notes
- Dietary Substitutions to Customize Your Raspberry Mousse
- Protein and Main Component Alternatives
- Vegetable, Sauce, and Seasoning Modifications
- Mastering Raspberry Mousse: Advanced Tips and Variations
- How to Store Raspberry Mousse: Best Practices
- FAQs: Frequently Asked Questions About Raspberry Mousse
- How do you make raspberry mousse at home?
- What ingredients do I need for raspberry mousse?
- Can you make vegan raspberry mousse?
- How long does raspberry mousse last in the fridge?
- Why is my raspberry mousse not setting?
- Raspberry Mousse
- Ingredients
- Instructions
- Last Step:
- Notes
- Nutrition
- Did you make this recipe?
Essential Ingredients for Raspberry Mousse
Here is the full ingredient list for this no bake raspberry mousse. Every item below plays an important role in the texture, flavor, or final set.
Main Ingredients
- 12 oz fresh or frozen raspberries – These give the mousse its bright color, tangy taste, and fruity base.
- 2/3 cup sugar – This balances the tart raspberries and adds sweetness to the dessert.
- 1/4 cup water – This helps the raspberries cook down smoothly in the saucepan.
- 1 1/2 cups heavy whipping cream, cold – This creates the creamy, airy texture that makes the mousse so light.
- 1 package unflavored gelatin or 2 1/4 teaspoons – This helps the mousse set firmly enough to hold its shape.
- 1/4 cup water – This is used to soften the gelatin before it is added to the berry mixture.
Special Dietary Options
- Vegan: Swap the heavy whipping cream for chilled coconut cream and replace gelatin with agar-agar.
- Gluten-free: This recipe is naturally gluten-free as written, so no extra changes are needed.
- Low-calorie: Replace the sugar with a zero-calorie sweetener like stevia for a lighter version.
If you like easy recipes with a short ingredient list, you may also enjoy these no bake energy bites for quick snacks.
How to Prepare the Perfect Raspberry Mousse: Step-by-Step Guide
First Step: Soften the gelatin
Start by stirring the unflavored gelatin into 1/4 cup cold water. Let it sit while you move on to the berries. This step is called blooming, and it helps the gelatin dissolve evenly later. If you are making a simple raspberry mousse recipe for the first time, do not skip this part because it helps the mousse set properly.
Second Step: Cook the raspberry mixture
Place the raspberries, sugar, and 1/4 cup water into a saucepan. Warm everything over medium heat until the berries soften and begin to break down. Stir often so the sugar dissolves and the fruit does not stick to the pan. The mixture should smell sweet and look glossy as the berries release their juices.
Third Step: Puree the berries
Transfer the warm berry mixture to a blender and puree until smooth. If you want a smoother raspberry mousse, strain the puree through a fine mesh sieve to remove the seeds. This extra step takes a minute or two, but it gives the dessert a more polished finish. If you like a bit of texture, you can skip straining.
Fourth Step: Add the softened gelatin
Return the puree to the saucepan and add the softened gelatin. Bring the mixture to a boil while stirring for 1 minute. This helps the gelatin fully dissolve and blend into the fruit. Then take the pan off the heat and let the mixture cool to room temperature, about 70 to 80 degrees F. It should be cool before you fold it into the cream, or the whipped cream may lose its fluffy texture.
Fifth Step: Whip the cream
In a separate bowl, whip the cold heavy cream until stiff peaks form. A cold bowl and cold cream will help the process move faster. Heavy whipping cream works best because it gives the mousse more body and stability. If you are making this for piping later, chilling the bowl first can make a big difference.
Sixth Step: Fold the mixtures together
Once the berry mixture has cooled, gently fold it into the whipped cream. Use a spatula and work in slow, sweeping motions so you do not deflate the air in the cream. This is where the dessert turns into a silky, cloud-like easy raspberry mousse. Fold until the color looks even, but stop as soon as the mixture is blended.
Seventh Step: Portion and chill
Spoon or pour the mousse into serving dishes right away, before it begins to set too much. This gives it a smooth and elegant look. Chill the dessert for at least 4 hours, or up to 24 hours, before serving. The mousse needs time in the fridge to firm up fully, so this is a great dessert to make ahead for dinner parties, holidays, or weekend treats.
Best tip: If you want a cleaner finish for piping or layering, chill the mousse for about 30 minutes before you use it in other desserts.
Helpful timing and texture notes
| Step | Time | What to look for |
|---|---|---|
| Bloom gelatin | 5 minutes | Gelatin softens in cold water |
| Cook berries | 3 to 5 minutes | Berries break down and look juicy |
| Cool mixture | 15 to 20 minutes | Mixture reaches room temperature |
| Chill mousse | 4 to 24 hours | Set and spoonable texture |

Dietary Substitutions to Customize Your Raspberry Mousse
Protein and Main Component Alternatives
If you want a different texture or need a dairy-free option, there are a few easy swaps for this raspberry mousse recipe. For a vegan version, use chilled coconut cream instead of heavy whipping cream and agar-agar instead of gelatin. The result will still feel light and spoonable, though the flavor will have a mild coconut note.
You can also swap in stevia or another zero-calorie sweetener if you want a sugar-free version. Start with a small amount, taste the berry mixture, and add more only if needed. Because raspberries can vary in tartness, a little adjustment goes a long way.
Vegetable, Sauce, and Seasoning Modifications
While this dessert does not use vegetables, it does leave room for fun flavor changes. A splash of vanilla extract can soften the tart berry flavor, and a little lemon juice can brighten it even more. If you like a richer dessert, a few shavings of white chocolate on top work beautifully.
You can also mix the raspberry puree with other berries if you want a mixed fruit version. Strawberries, blackberries, or a little mango can change the flavor while still keeping the same creamy structure. This makes the no bake raspberry mousse easy to adapt for different seasons and tastes.
Mastering Raspberry Mousse: Advanced Tips and Variations
Once you have the basic method down, a few small tricks can make your easy raspberry mousse even better. Use a cold bowl and cold cream if you want faster whipping. Cold dairy holds air more easily, which gives you a fluffier final texture. Also, choose heavy whipping cream instead of lighter cream because it gives the mousse more stability.
For the smoothest finish, pour the mousse into serving dishes before it fully sets. That way, the tops look neat and ready to serve. If you want to pipe the mousse into cups or onto a cake, chill it for about 30 minutes first so it firms up slightly. This gives you more control without making it too stiff.
Here are a few fun ways to serve it:
- Layer it with crushed cookies in parfait glasses
- Pipe it into tart shells for a pretty dessert
- Use it as a filling for eclairs or cake layers
- Top it with fresh berries and mint leaves
If you are making dessert for a crowd, this recipe is easy to double. It also works well when made the day before, which is helpful for holidays, birthdays, and busy weekends.
How to Store Raspberry Mousse: Best Practices
Store leftover Raspberry Mousse in the refrigerator in a covered bowl or airtight container. It keeps well for 3 to 5 days, though the texture is best in the first couple of days. If you served it in individual glasses, simply cover each glass tightly with plastic wrap.
Freezing is possible, but the texture may change a bit after thawing. If you freeze it, place portions in freezer-safe containers and thaw them overnight in the fridge. This works best for mousse used in layered desserts rather than for a smooth spoon dessert.
Reheating is not recommended because it will melt the whipped cream and ruin the airy texture. Instead, keep it chilled until serving time. For meal prep, make the berry base ahead of time and whip the cream closer to serving if you want the freshest texture.
Quick storage tip: Add fresh berries on top right before serving so they stay bright and juicy.
FAQs: Frequently Asked Questions About Raspberry Mousse
How do you make raspberry mousse at home?
What ingredients do I need for raspberry mousse?
Can you make vegan raspberry mousse?
How long does raspberry mousse last in the fridge?
Why is my raspberry mousse not setting?
Raspberry Mousse
🍓 Indulge in a light, airy raspberry mousse bursting with fresh berry flavor – a guilt-free dessert that’s elegant yet effortless.
🥄 Perfect for quick entertaining or weeknight treats, this no-bake delight chills to perfection for creamy satisfaction.
- Total Time: 1 hour 15 minutes
- Yield: 4 servings
Ingredients
– 12 oz fresh or frozen raspberries for bright color, tangy taste, and fruity base
– 2/3 cup sugar for balancing the tart raspberries and adding sweetness
– 1/4 cup water for helping the raspberries cook down smoothly
– 1 1/2 cups heavy whipping cream, cold for creating the creamy, airy texture
– 1 package unflavored gelatin or 2 1/4 teaspoons for helping the mousse set firmly
– 1/4 cup water for softening the gelatin
Instructions
1-First Step: Soften the gelatin Start by stirring the unflavored gelatin into 1/4 cup cold water. Let it sit while you move on to the berries. This step is called blooming, and it helps the gelatin dissolve evenly later. If you are making a simple raspberry mousse recipe for the first time, do not skip this part because it helps the mousse set properly.
2-Second Step: Cook the raspberry mixture Place the raspberries, sugar, and 1/4 cup water into a saucepan. Warm everything over medium heat until the berries soften and begin to break down. Stir often so the sugar dissolves and the fruit does not stick to the pan. The mixture should smell sweet and look glossy as the berries release their juices.
3-Third Step: Puree the berries Transfer the warm berry mixture to a blender and puree until smooth. If you want a smoother raspberry mousse, strain the puree through a fine mesh sieve to remove the seeds. This extra step takes a minute or two, but it gives the dessert a more polished finish. If you like a bit of texture, you can skip straining.
4-Fourth Step: Add the softened gelatin Return the puree to the saucepan and add the softened gelatin. Bring the mixture to a boil while stirring for 1 minute. This helps the gelatin fully dissolve and blend into the fruit. Then take the pan off the heat and let the mixture cool to room temperature, about 70 to 80 degrees F. It should be cool before you fold it into the cream, or the whipped cream may lose its fluffy texture.
5-Fifth Step: Whip the cream In a separate bowl, whip the cold heavy cream until stiff peaks form. A cold bowl and cold cream will help the process move faster. Heavy whipping cream works best because it gives the mousse more body and stability. If you are making this for piping later, chilling the bowl first can make a big difference.
6-Sixth Step: Fold the mixtures together Once the berry mixture has cooled, gently fold it into the whipped cream. Use a spatula and work in slow, sweeping motions so you do not deflate the air in the cream. This is where the dessert turns into a silky, cloud-like easy raspberry mousse. Fold until the color looks even, but stop as soon as the mixture is blended.
7-Seventh Step: Portion and chill Spoon or pour the mousse into serving dishes right away, before it begins to set too much. This gives it a smooth and elegant look. Chill the dessert for at least 4 hours, or up to 24 hours, before serving. The mousse needs time in the fridge to firm up fully, so this is a great dessert to make ahead for dinner parties, holidays, or weekend treats.
Last Step:
Please leave a rating and comment letting us know how you liked this recipe! This helps our business to thrive and continue providing free, high-quality recipes for you.Notes
❄️ Chill your mixing bowl and use cold heavy cream for faster, stiffer whipped cream peaks.
🥛 Choose heavy whipping cream over regular for superior texture and stability in the mousse.
⏳ Pour into dishes before the mixture sets fully for the most elegant presentation.
- Prep Time: 10 minutes
- Chill: 1 hour
- Cook Time: 5 minutes
- Category: Dessert
- Method: No Bake
- Diet: Vegetarian
Nutrition
- Serving Size: About 1/2 cup
- Calories: 273 kcal
- Sugar: 23g
- Sodium: 15mg
- Fat: 19g
- Saturated Fat: 12g
- Unsaturated Fat: 6g
- Trans Fat: 1g
- Carbohydrates: 26g
- Fiber: 3g
- Protein: 2g
- Cholesterol: 58mg





