

Why You’ll Love This Raspberry Pie
This raspberry pie is a hit for anyone looking for a simple treat that’s packed with flavor and easy to make at home. Imagine pulling a golden-crusted pie out of the oven after just a short time of prep, and knowing it’s full of juicy raspberries that make every bite worthwhile. You’ll appreciate how it brings people together, whether for a quick family dessert or a special event.
One reason this pie stands out is its ease of preparation, perfect for both beginners and pros in the kitchen. It uses straightforward ingredients and steps, so you can whip it up without spending all day baking. Plus, the health benefits from fresh raspberries add a nice touch, offering antioxidants, vitamins, and fiber that make it a smarter choice for your daily meals.
It’s also incredibly versatile, fitting into all sorts of diets and occasions. You can tweak it for vegan or gluten-free needs, and that distinctive flavor from the sweet-tart raspberries paired with a flaky crust will make it your go-to dessert. Whether you’re cooking for a crowd or just yourself, this pie delivers memorable tastes that keep everyone coming back for more.
Jump to:
- Why You’ll Love This Raspberry Pie
- Essential Ingredients for Raspberry Pie
- How to Prepare the Perfect Raspberry Pie: Step-by-Step Guide
- Gathering and Mixing
- Dietary Substitutions to Customize Your Raspberry Pie
- Mastering Raspberry Pie: Advanced Tips and Variations
- Flavor and Presentation Ideas
- How to Store Raspberry Pie: Best Practices
- FAQs: Frequently Asked Questions About Raspberry Pie
- How can I make raspberry pie filling thicker?
- Why does my raspberry pie filling turn out runny?
- What ingredients help prevent the raspberry pie crust from getting soggy?
- Can I use frozen raspberries for raspberry pie, and how does it affect the filling?
- How long should I let raspberry pie cool before serving?
- Raspberry Pie
- Ingredients
- Instructions
- Last Step:
- Notes
- Nutrition
- Did you make this recipe?
Essential Ingredients for Raspberry Pie
Gathering the right ingredients is key to making a delicious raspberry pie, and this recipe keeps things simple yet effective. Below is a complete list of everything you’ll need, based on the fresh details for a classic homemade version. Each item is measured out clearly to help you get it just right.
- 5 cups fresh or frozen raspberries
- 3/4 cup granulated sugar
- 1/3 cup all-purpose flour
- 1 tablespoon lemon juice
- A pinch of nutmeg
- 1 large egg whisked with 1 tablespoon of water (for the egg wash on the crust)
These ingredients form the heart of the filling and crust, creating that perfect balance of sweet and tart. For special dietary options, you can make adjustments to suit your needs, like using a vegan alternative for the egg wash or swapping flour for cornstarch to thicken things up.
Here’s a quick table to compare how these ingredients contribute to the pie’s texture and flavor:
| Ingredient | Role in Recipe | Dietary Notes |
|---|---|---|
| 5 cups fresh or frozen raspberries | Provides the main fruity flavor and moisture | Use as is for low-calorie options |
| 3/4 cup granulated sugar | Sweetens and balances the tartness | Swap with stevia for low-sugar diets |
| 1/3 cup all-purpose flour | Thickens the filling | Replace with 3 tablespoons cornstarch for gluten-free |
| 1 tablespoon lemon juice | Adds brightness and enhances flavor | Naturally vegan and low-calorie |
| A pinch of nutmeg | Brings warm spice notes | Works in most diets without changes |
| 1 large egg whisked with 1 tablespoon of water | Creates a shiny crust finish | Use a plant-based egg substitute for vegan versions |
This setup makes it easy to see how everything fits together, helping you adapt as needed for your family’s preferences.
How to Prepare the Perfect Raspberry Pie: Step-by-Step Guide
Getting started with this raspberry pie is straightforward and fun, beginning with preheating your oven to 425°F (220°C). This high heat helps kick off the baking process just right, setting you up for a pie that looks and tastes amazing. Once your oven is ready, you’ll mix the ingredients in a large bowl to create that luscious filling.
Gathering and Mixing
In a large bowl, gently combine 5 cups of fresh or frozen raspberries with 3/4 cup granulated sugar, 1/3 cup all-purpose flour, 1 tablespoon lemon juice, and a pinch of nutmeg. Stir carefully to coat the berries without breaking them apart, ensuring an even mix that will bake into a perfect filling. For best results, don’t thaw frozen raspberries as they’ll hold their shape better during baking.
- Roll out half of your pastry dough and fit it into a 9-inch pie plate, trimming any excess around the edges.
- Add the raspberry mixture into the crust, spreading it out evenly.
- Wet the edges of the crust lightly with water, then cover with the second half of the pastry or arrange it into 1-inch strips for a lattice top.
- Seal the edges by crimping them together, and if you’re using a full crust, cut a few slits to let steam escape.
- Brush the top with the egg wash made from 1 large egg whisked with 1 tablespoon of water, and sprinkle on a bit of extra sugar for a sweet crunch.
Place the pie on a baking sheet to catch any overflow during cooking. If you’re new to baking, check out similar easy recipes for more tips. Bake at 425°F (220°C) for 15 minutes, then lower the temperature to 375°F (190°C) and continue for 35-40 minutes until the crust turns golden and the filling bubbles.
If the crust starts browning too fast, cover it with foil to protect it. Let the pie cool completely before slicing so the filling sets properly this step is crucial for that perfect slice. The recipe makes 8 servings, each with about 215 calories, 5 grams of fat, 40 grams of carbohydrates, 6 grams of fiber, 25 grams of sugar, and 4 grams of protein, making it a balanced treat for any day.

Dietary Substitutions to Customize Your Raspberry Pie
One of the best parts about this raspberry pie is how you can tweak it to fit different diets without losing that delicious taste. For instance, if you’re watching calories, swap out granulated sugar for something lighter while keeping the core flavors intact. It’s all about making the pie work for you, whether you’re cooking for a group or just yourself.
For protein and main component alternatives, try using coconut oil instead of butter in the crust if you’re avoiding dairy. A gluten-free crust from almond flour can give the same crisp texture, and lighter options like vegetable oils help cut calories. In the filling, you might add complementary fruits like blueberries for extra nutrition and variety.
As for vegetable, sauce, and seasoning modifications, natural sweeteners such as honey can replace sugar for a refined flavor. Spices like cinnamon or nutmeg add warmth, and these changes keep the pie adaptable to seasonal ingredients. Remember, experimenting with flavors can lead to fun variations, just like in other simple recipes.
This approach ensures everyone at the table can enjoy a slice, no matter their preferences.
Mastering Raspberry Pie: Advanced Tips and Variations
Once you’re comfortable with the basics, you can take this raspberry pie to the next level with some pro techniques. For example, chilling the dough before baking makes for a flakier crust, and using cold ingredients helps everything come together smoothly. Blind baking the crust for about 10 minutes can prevent it from getting soggy under the juicy filling.
Flavor and Presentation Ideas
Flavor variations are endless try adding fresh mint or basil to the filling for a fresh twist, or a splash of balsamic vinegar to highlight the raspberries’ tartness. When it comes to presentation, a light dusting of powdered sugar or some whipped cream can make your pie look as good as it tastes. For make-ahead options, prepare the filling ahead and store it in the fridge, then assemble and bake fresh.
These strategies offer plenty of room for creativity, helping you turn a simple recipe into something special. If you enjoy mixing things up, linking to sites like health benefits of raspberries can provide more ideas on how to boost nutrition.
How to Store Raspberry Pie: Best Practices
Keeping your raspberry pie fresh is simple if you follow a few key steps right after baking. Start by letting it cool completely, which helps the filling set and makes storage easier. This way, you’ll maintain that wonderful texture for days to come.
For refrigeration, place the pie in an airtight container and keep it in the fridge for up to 3 days. Freezing works well too just wrap it tightly in plastic wrap and foil, and it can last up to 2 months. When reheating, use a conventional oven at 300°F (150°C) for 10-15 minutes to keep the crust crisp, and avoid the microwave to prevent sogginess.
Meal prep is a breeze with this pie; store individual slices in separate containers for quick grabs. This method keeps everything tasting great and ready for busy days.
FAQs: Frequently Asked Questions About Raspberry Pie
How can I make raspberry pie filling thicker?
Why does my raspberry pie filling turn out runny?
What ingredients help prevent the raspberry pie crust from getting soggy?
Can I use frozen raspberries for raspberry pie, and how does it affect the filling?
How long should I let raspberry pie cool before serving?
Raspberry Pie
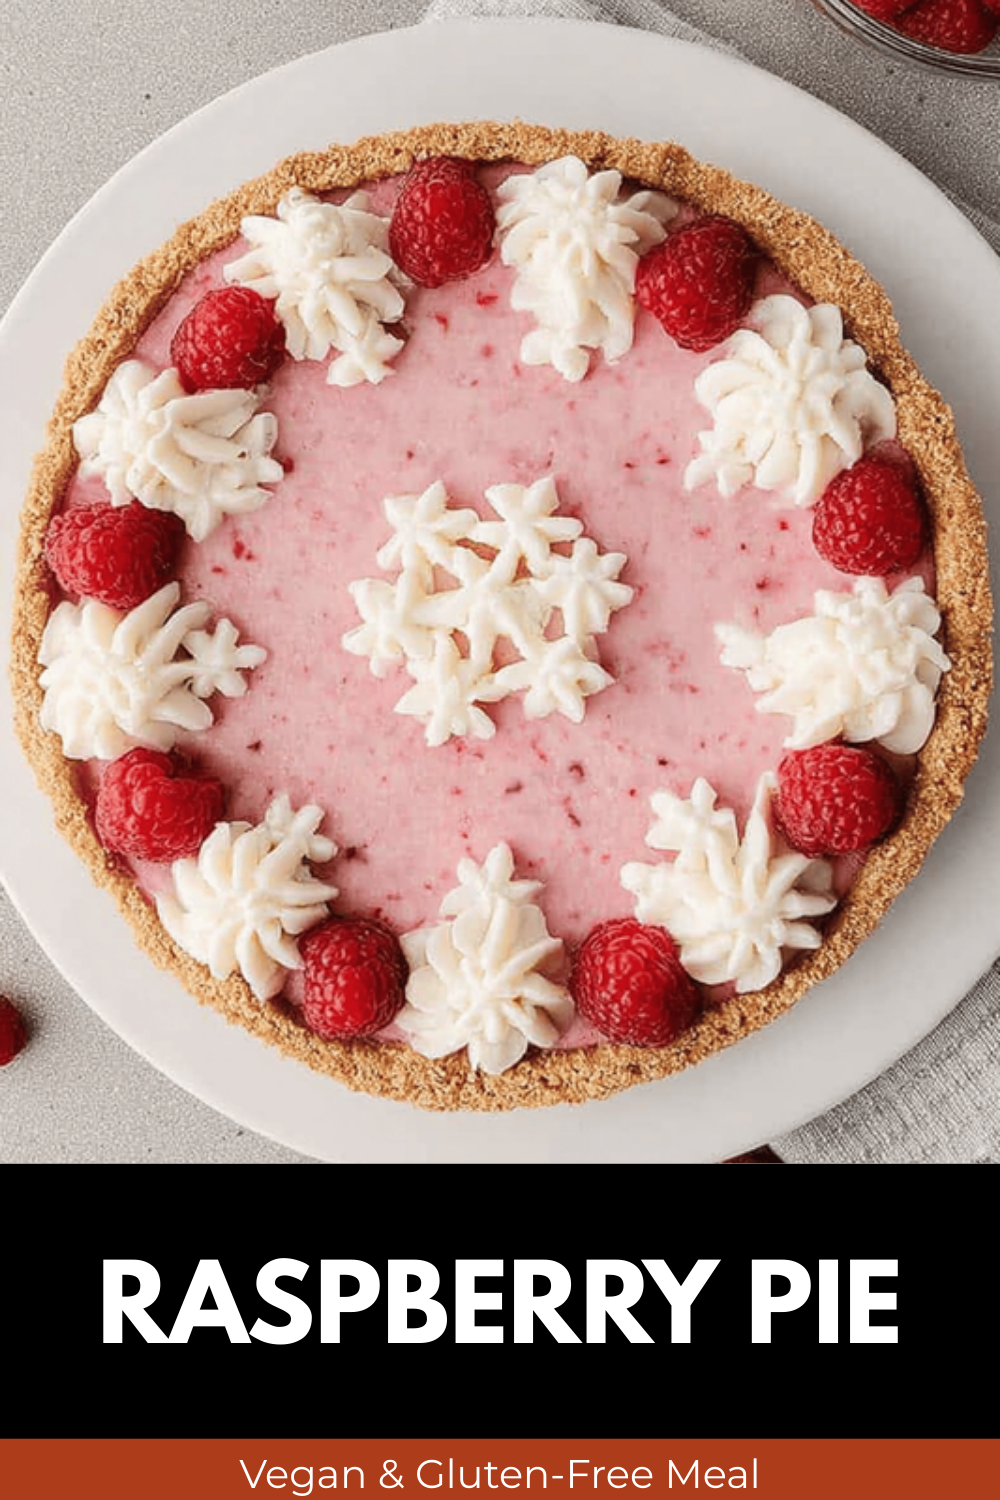
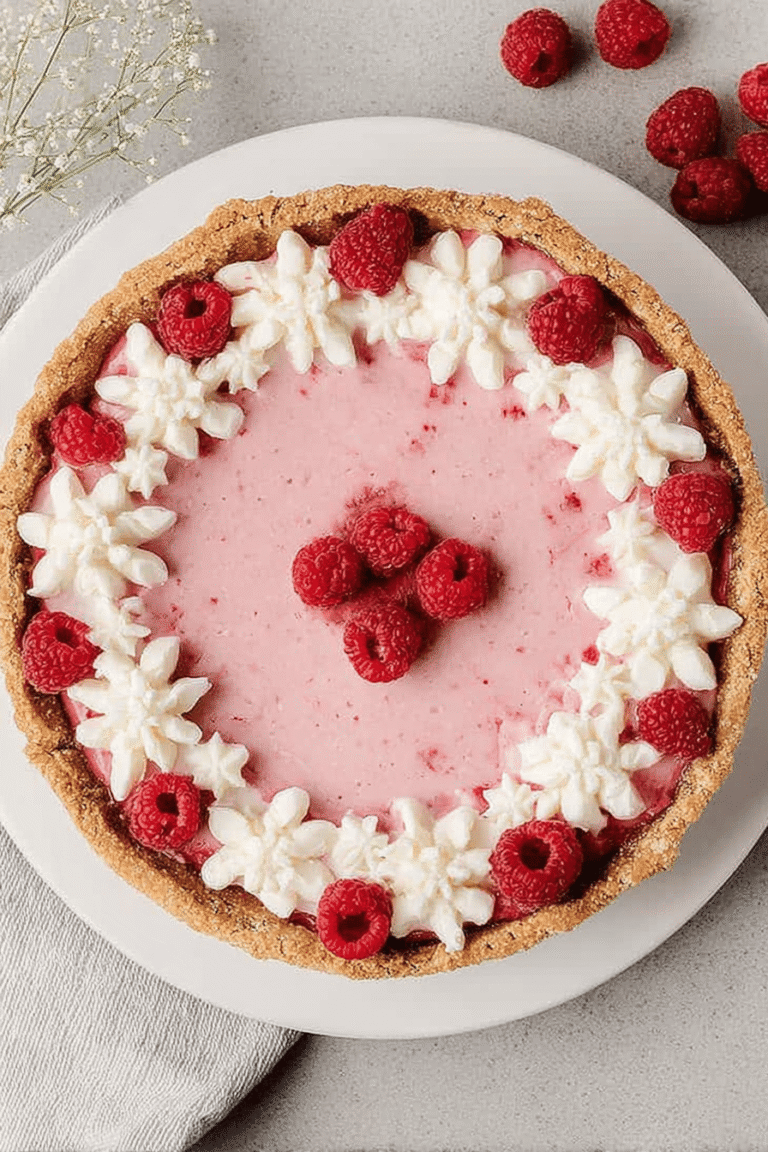
🥧 This Raspberry Pie recipe offers a fresh and flavorful dessert that is perfect for any occasion, featuring juicy raspberries and a buttery crust.
🍓 The mixture of sweet and tart flavors paired with a golden lattice or full crust makes it a timeless treat everyone will enjoy.
- Total Time: 2 hours 10 minutes
- Yield: 8 servings
Ingredients
– 5 cups fresh or frozen raspberries Provides the main fruity flavor and moisture
– 3/4 cup granulated sugar Sweetens and balances the tartness
– 1/3 cup all-purpose flour Thickens the filling
– 1 tablespoon lemon juice Adds brightness and enhances flavor
– A pinch of nutmeg Brings warm spice notes
– 1 large egg whisked with 1 tablespoon of water Creates a shiny crust finish
Instructions
1-Preheat your oven: Getting started with this raspberry pie is straightforward and fun, beginning with preheating your oven to 425°F (220°C). This high heat helps kick off the baking process just right, setting you up for a pie that looks and tastes amazing.
2-Mix Ingredients: Once your oven is ready, you’ll mix the ingredients in a large bowl to create that luscious filling.
3-Gathering and Mixing: In a large bowl, gently combine 5 cups of fresh or frozen raspberries with 3/4 cup granulated sugar, 1/3 cup all-purpose flour, 1 tablespoon lemon juice, and a pinch of nutmeg. Stir carefully to coat the berries without breaking them apart, ensuring an even mix that will bake into a perfect filling. For best results, don’t thaw frozen raspberries as they’ll hold their shape better during baking.
4-Roll out half of your pastry dough and fit it into a 9-inch pie plate, trimming any excess around the edges.
5-Add the raspberry mixture into the crust, spreading it out evenly.
6-Wet the edges of the crust lightly with water, then cover with the second half of the pastry or arrange it into 1-inch strips for a lattice top.
7-Seal the edges by crimping them together, and if you’re using a full crust, cut a few slits to let steam escape.
8-Brush the top with the egg wash made from 1 large egg whisked with 1 tablespoon of water, and sprinkle on a bit of extra sugar for a sweet crunch.
9-Place the pie on a baking sheet to catch any overflow during cooking. Bake at 425°F (220°C) for 15 minutes, then lower the temperature to 375°F (190°C) and continue for 35-40 minutes until the crust turns golden and the filling bubbles.
10-Protect the crust if necessary: If the crust starts browning too fast, cover it with foil to protect it.
11-Let the pie cool completely before slicing so the filling sets properly this step is crucial for that perfect slice.
Last Step:
Please leave a rating and comment letting us know how you liked this recipe! This helps our business to thrive and continue providing free, high-quality recipes for you.Notes
🍇 Do not thaw frozen raspberries before baking to maintain texture.
🌽 Use about 3 tablespoons of cornstarch instead of flour for a thicker filling.
🥧 Cover pie edges with foil if browning too fast to avoid burning.
- Prep Time: 15 minutes
- Cooling time: 1 hour
- Cook Time: 55 minutes
- Category: Dessert
- Method: Mixing, baking
- Cuisine: American
- Diet: Vegetarian
Nutrition
- Serving Size: 1 slice
- Calories: 215 kcal
- Sugar: 25 g
- Sodium: 30 mg
- Fat: 5 g
- Saturated Fat: 3 g
- Unsaturated Fat: 2 g
- Trans Fat: 0 g
- Carbohydrates: 40 g
- Fiber: 6 g
- Protein: 4 g
- Cholesterol: 50 mg





