

Why You’ll Love This Red Velvet Cake
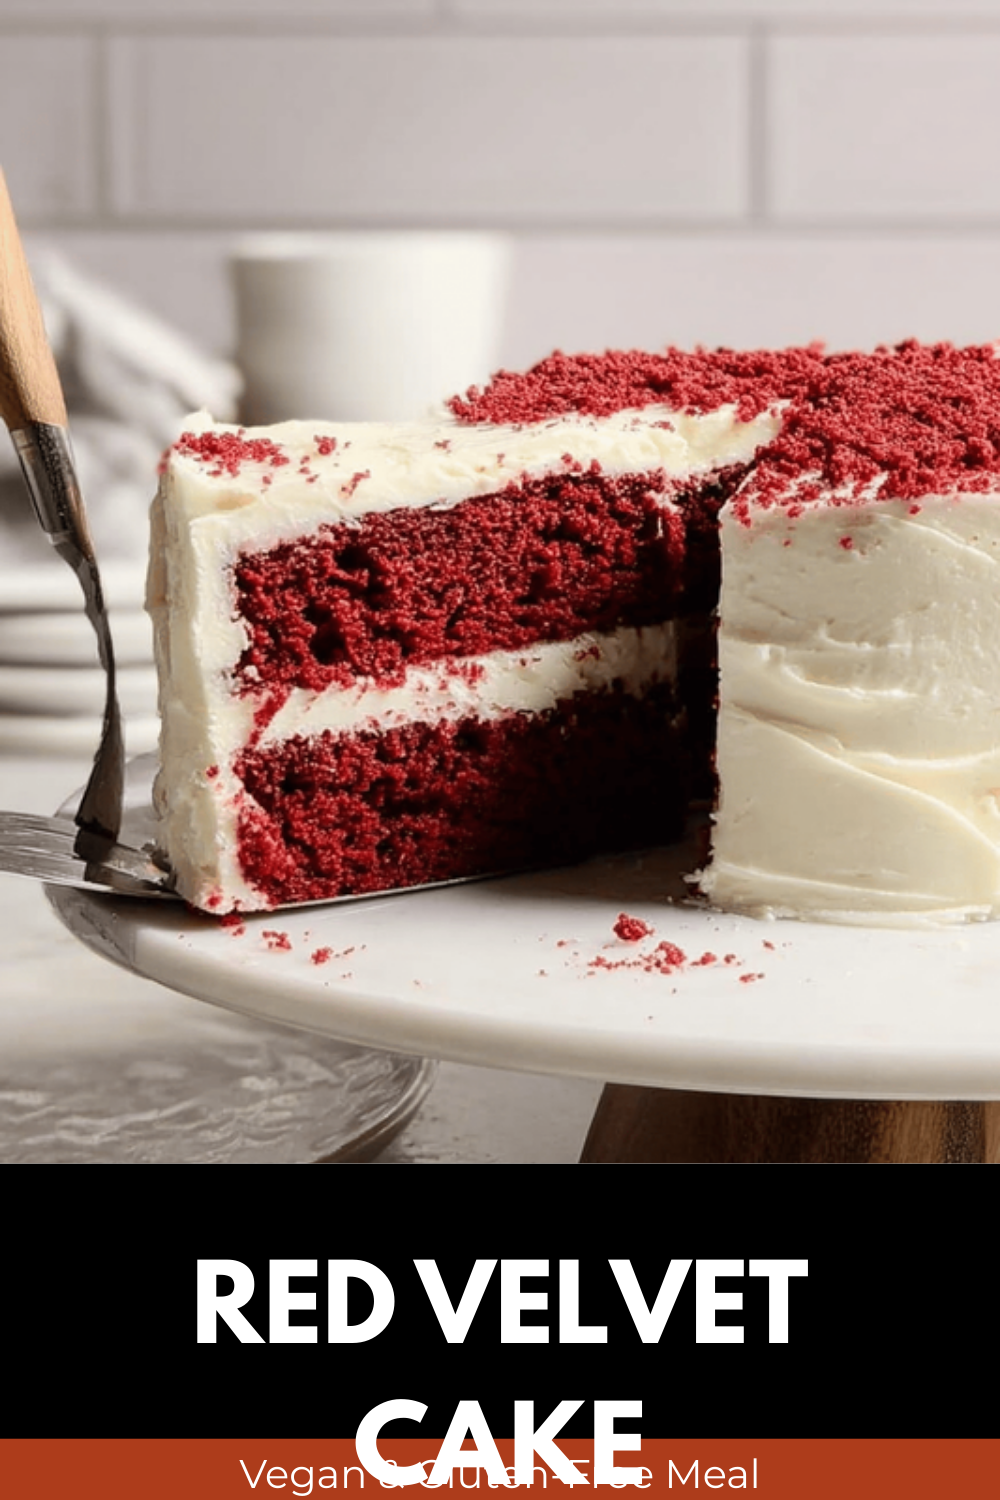
This recipe for red velvet cake is a timeless favorite that brings a touch of elegance to any dessert table, and it’s easier to make than you might think. You’ll appreciate how the cake’s vibrant red color and subtle cocoa flavor create a perfect balance of tangy and sweet notes, thanks to ingredients like buttermilk and vinegar. Whether you’re baking for a special occasion or a casual gathering, this red velvet cake will impress your family and friends with its moist texture and rich taste.
One of the best parts is the ease of preparation, which makes it ideal for home bakers of all skill levels. The steps are straightforward, allowing you to whip up this treat without spending hours in the kitchen. Plus, the health benefits from ingredients such as natural cocoa powder add a nutritious twist, providing antioxidants that can support your well-being even as you enjoy a indulgent dessert.
The versatility of this red velvet cake shines through, as it adapts to various dietary preferences without losing its charm. You can tweak it for vegan or gluten-free options, ensuring everyone at your table can savor the distinctive flavor that sets it apart from ordinary cakes. Imagine sharing slices of this moist delight, creating joyful moments that linger long after the last bite.
Key Features That Make It Special
- Simple steps for quick baking, perfect for busy parents and working professionals.
- Nutrient-rich elements like buttermilk for added moisture and vitamins.
- Easy adaptations for dietary needs, appealing to students, seniors, and food enthusiasts alike.
- A classic taste with a fun twist, inspiring newlyweds and travelers to try new flavors.
Jump to:
- Why You’ll Love This Red Velvet Cake
- Key Features That Make It Special
- Essential Ingredients for Red Velvet Cake
- For the Cake
- For the Cream Cheese Frosting
- How to Prepare the Perfect Red Velvet Cake: Step-by-Step Guide
- Dietary Substitutions to Customize Your Red Velvet Cake
- Mastering Red Velvet Cake: Advanced Tips and Variations
- How to Store Red Velvet Cake: Best Practices
- FAQs: Frequently Asked Questions About Red Velvet Cake
- What is red velvet cake made of?
- How do I make a moist red velvet cake?
- What kind of frosting pairs best with red velvet cake?
- Can you make red velvet cake without red food coloring?
- How should I store red velvet cake to keep it fresh?
- Red Velvet Cake
- Ingredients
- Instructions
- Last Step:
- Notes
- Nutrition
- Did you make this recipe?
Essential Ingredients for Red Velvet Cake
Gathering the right ingredients is the first step to creating a delicious red velvet cake, and this recipe focuses on fresh, quality items that come together beautifully. By using cake flour and other key elements, you’ll achieve that signature light and airy crumb. Let’s break down the ingredients you’ll need, ensuring your baking adventure starts off smooth and exciting.
Below is a comprehensive list of all the ingredients required for this classic red velvet cake with cream cheese frosting. I’ve formatted it clearly so you can easily follow along and measure everything out precisely.
For the Cake
- 3 cups cake flour
- 1 teaspoon baking soda
- 2 tablespoons unsweetened natural cocoa powder
- 1/2 teaspoon salt
- 1/2 cup unsalted butter, softened to room temperature
- 2 cups granulated sugar
- 1 cup canola or vegetable oil
- 4 large eggs, separated and at room temperature
- 1 tablespoon pure vanilla extract
- 1 teaspoon distilled white vinegar
- Red food coloring to taste
- 1 cup buttermilk at room temperature
For the Cream Cheese Frosting
- 16 ounces full-fat brick cream cheese, softened to room temperature
- 3/4 cup unsalted butter, softened to room temperature
- 5 cups confectioners’ sugar
- 1 1/2 teaspoons pure vanilla extract
- Pinch of salt to taste
Remember, using room temperature ingredients helps everything mix better, leading to a smoother batter and creamier frosting. If you’re new to baking, think of this list as your trusty roadmap to a picture-perfect red velvet cake.
How to Prepare the Perfect Red Velvet Cake: Step-by-Step Guide
Now that you have your ingredients ready, let’s dive into making this red velvet cake step by step it’s like following a fun adventure in your kitchen. Preheat your oven and get those pans prepped, and soon you’ll have a moist, flavorful cake that’s sure to wow everyone. This guide keeps things simple, so even if you’re just starting out, you can feel like a pro.
First, preheat your oven to 350°F (175°C) and grease two 9-inch cake pans with parchment paper for easy removal. In a bowl, whisk together the cake flour, baking soda, cocoa powder, and salt to blend the dry ingredients perfectly. In a separate large bowl, beat the butter and sugar until they’re nicely combined, then mix in the oil, egg yolks, vanilla extract, and vinegar for about 2 minutes until smooth and creamy.
Next, alternately add the dry ingredients and buttermilk to the wet mixture on low speed, taking care not to overmix for that perfect texture. Stir in the red food coloring until you reach your desired shade, then whip the egg whites to fluffy peaks and gently fold them into the batter to keep it light. Divide the batter evenly between the two pans and bake for 30-32 minutes, or until a toothpick comes out clean. Let the cakes cool completely before frosting.
For the frosting, beat the cream cheese and butter until smooth, then gradually add the confectioners’ sugar, vanilla extract, and a pinch of salt until it’s creamy and spreadable. Level the cooled cakes, spread frosting between the layers, and cover the top and sides. Pop the assembled cake in the fridge for 30 to 60 minutes before slicing to set everything nicely. If you want to try something quick and easy for breakfast, check out our baked Denver omelet recipe for a savory start to your day.
| Step | Description | Time Estimate |
|---|---|---|
| Prepping Ingredients | Gather and measure all items | 10 minutes |
| Mixing Batter | Combine wet and dry ingredients | 15 minutes |
| Baking | Bake the cakes | 30-32 minutes |
| Cooling and Frosting | Cool and apply frosting | 1-2 hours |
Preparation time for this recipe is about prep: 30 minutes, cook: 30 minutes, and total: approximately 3 hours including cooling and chilling. Following these steps will help you create a red velvet cake that’s moist and full of flavor every time.

Dietary Substitutions to Customize Your Red Velvet Cake
Making this red velvet cake your own is a breeze, especially with simple swaps for different dietary needs. Whether you’re looking for vegan options or ways to lighten it up, you can keep that classic taste while adjusting for your lifestyle. It’s all about having fun and making the recipe work for you, so don’t hesitate to experiment.
For protein alternatives, replace eggs with flaxseed meal mixed with water or mashed bananas to keep things binding nicely. Swap buttermilk with plant-based milk like almond milk mixed with a bit of lemon juice to mimic that acidity. As for vegetable oil, try coconut or avocado oil for a healthier twist that adds a subtle richness to the cake.
You can also use beet juice powder instead of red food coloring for a natural hue, and adjust vanilla extract amounts to play with flavors. These changes ensure your red velvet cake stays delicious and inclusive, perfect for busy parents or diet-conscious individuals looking to enjoy their treats.
Adapting recipes like this one shows how baking can be flexible and exciting it’s a great way to build confidence in the kitchen!
Mastering Red Velvet Cake: Advanced Tips and Variations
Once you’re comfortable with the basics, take your red velvet cake to the next level with these handy tips and creative ideas. Sifting the dry ingredients ensures a lighter crumb, while using room temperature items makes mixing a dream. Adding buttermilk slowly helps avoid lumps, and checking your oven temperature keeps baking even and reliable.
For flavor fun, toss in a bit of espresso powder to boost the cocoa taste or add citrus zest for a bright pop. You might swap the cream cheese frosting for whipped coconut cream if you want something different. And if you’re into make-ahead meals, bake the cakes ahead and freeze them for up to a month just thaw and frost when ready.
Presentation is key, so try decorating with fresh berries or piping the frosting for a fancy look. For more quick baking ideas that fit into your routine, explore our no-bake energy bites, which are perfect for on-the-go snacks. Remember, tips like chilling the frosting before use help it hold shape, and you can even mix in up to 1 cup of nuts without changing the texture much.
- Use cake flour for that lighter feel we all love.
- Whip egg whites separately to get a smooth, even crumb.
- If buttermilk is out, mix milk with lemon juice as a quick stand-in.
- Adjust food coloring to match your color vibe.
- This recipe works great for cupcakes or sheet cakes with a few time tweaks.
How to Store Red Velvet Cake: Best Practices
Keeping your red velvet cake fresh means storing it the right way, so it stays moist and tasty for as long as possible. After frosting, cover it up and pop it in the fridge to lock in that flavor. This simple step helps you enjoy leftovers without any disappointment.
Store the cake in an airtight container or wrapped in plastic in the refrigerator for up to 5 days. For longer keeps, wrap it tightly and freeze for up to 3 months thaw it overnight in the fridge before serving. If you want to reheat, let it sit at room temperature or warm gently in the microwave to keep it soft.
Meal prep pros will love portioning slices for easy grabs, maintaining that perfect texture for busy days. With these practices, your red velvet cake stays as delightful as the day you baked it.
To learn more about the history of this beloved dessert, visit the history behind red velvet cake. For health insights, check out cocoa powder’s benefits.
FAQs: Frequently Asked Questions About Red Velvet Cake
What is red velvet cake made of?
How do I make a moist red velvet cake?
What kind of frosting pairs best with red velvet cake?
Can you make red velvet cake without red food coloring?
How should I store red velvet cake to keep it fresh?
Red Velvet Cake
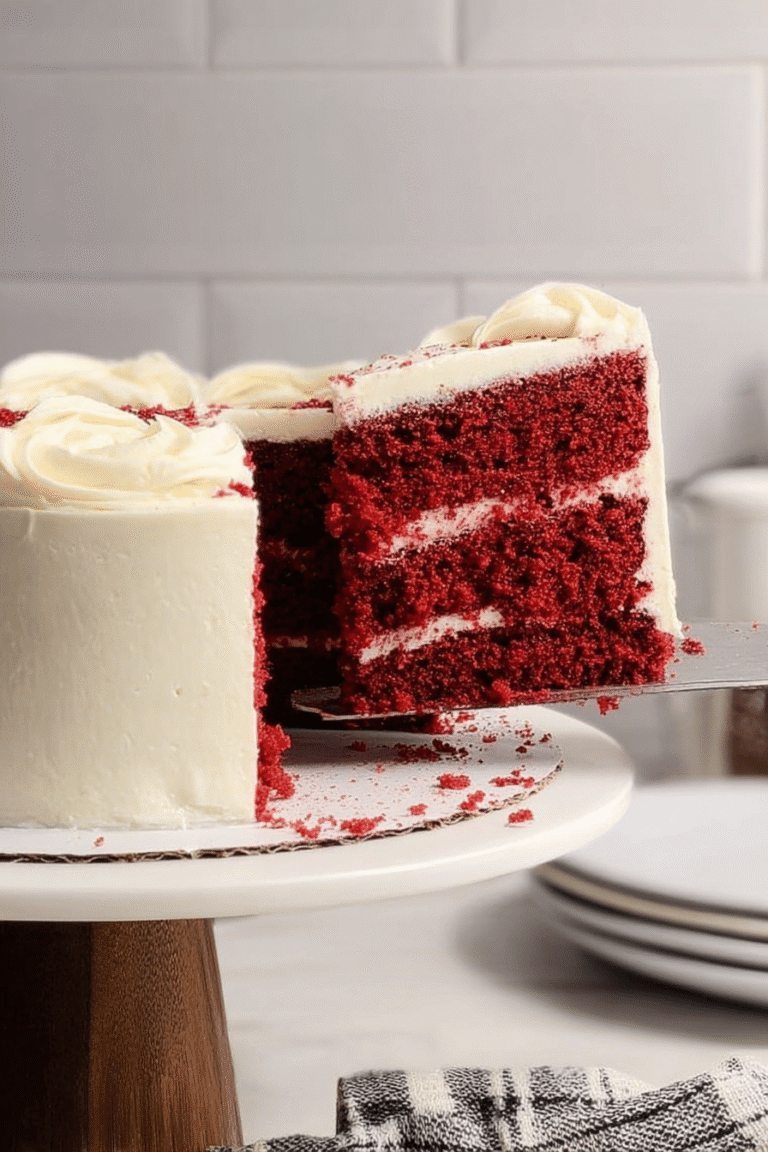
🍰 Indulge in a moist and rich red velvet cake layered with smooth cream cheese frosting.
❤️ This classic dessert is perfect for celebrations and offers a delicious balance of flavors and texture.
- Total Time: 3 hours
- Yield: 12 servings 1x
Ingredients
3 cups cake flour
1 teaspoon baking soda
2 tablespoons unsweetened natural cocoa powder
1/2 teaspoon salt
1/2 cup unsalted butter, softened to room temperature
2 cups granulated sugar
1 cup canola or vegetable oil
4 large eggs, separated and at room temperature
1 tablespoon pure vanilla extract
1 teaspoon distilled white vinegar
Red food coloring to taste
1 cup buttermilk at room temperature
16 ounces full-fat brick cream cheese, softened to room temperature
3/4 cup unsalted butter, softened to room temperature
5 cups confectioners’ sugar
1 1/2 teaspoons pure vanilla extract
Pinch of salt to taste
Instructions
1-First, preheat your oven to 350°F (175°C) and grease two 9-inch cake pans with parchment paper for easy removal. In a bowl, whisk together the cake flour, baking soda, cocoa powder, and salt to blend the dry ingredients perfectly.
2-In a separate large bowl, beat the butter and sugar until they’re nicely combined, then mix in the oil, egg yolks, vanilla extract, and vinegar for about 2 minutes until smooth and creamy.
3-Next, alternately add the dry ingredients and buttermilk to the wet mixture on low speed, taking care not to overmix for that perfect texture. Stir in the red food coloring until you reach your desired shade, then whip the egg whites to fluffy peaks and gently fold them into the batter to keep it light. Divide the batter evenly between the two pans and bake for 30-32 minutes, or until a toothpick comes out clean. Let the cakes cool completely before frosting.
4-For the frosting, beat the cream cheese and butter until smooth, then gradually add the confectioners’ sugar, vanilla extract, and a pinch of salt until it’s creamy and spreadable. Level the cooled cakes, spread frosting between the layers, and cover the top and sides. Pop the assembled cake in the fridge for 30 to 60 minutes before slicing to set everything nicely.
Last Step:
Please leave a rating and comment letting us know how you liked this recipe! This helps our business to thrive and continue providing free, high-quality recipes for you.Notes
🎂 Use cake flour for a lighter, tender texture.
🥚 Whip egg whites separately to achieve a smooth crumb.
🌡️ Ensure all ingredients are at room temperature for better mixing.
- Prep Time: 30 minutes
- Cooling and chilling time: 1 hour 30 minutes
- Cook Time: 30 minutes
- Category: Dessert
- Method: Baking
- Cuisine: American
- Diet: Vegetarian
Nutrition
- Serving Size: 1 slice





