

Why You’ll Love This Red Velvet Cheesecake
Imagine sinking your fork into a slice of red velvet cheesecake that combines the classic creamy texture of cheesecake with the bold, chocolatey twist of red velvet. This red velvet cheesecake stands out as a favorite for home bakers, offering a simple yet impressive dessert that delights everyone from busy parents to baking enthusiasts. With its vibrant color and rich flavor, it’s not just a treat for the taste buds but also a showstopper for any gathering, making it a go-to recipe in my collection of accessible recipes.
The ease of preparation is one key reason you’ll adore this recipe. It’s straightforward, with step-by-step instructions that guide you through the process, requiring minimal ingredients that you likely have on hand. Health benefits come into play too, as options for lighter versions help balance indulgence with better choices for diet-conscious individuals. This flexibility means you can adapt it to fit various lifestyles without losing that distinctive flavor profile.
Beyond its taste, the versatility of red velvet cheesecake lets you tweak it for different dietary needs, much like how a simple smoothie can be adjusted for a quick meal. For instance, you can explore no-bake energy bites for a simpler alternative when time is short. Whether you’re hosting a family dinner or craving a solo treat, this dessert brings joy and creates memorable moments around the table.
Key Features That Make It Special
This red velvet cheesecake recipe emphasizes simple steps to ensure success for all skill levels. It uses everyday ingredients to deliver a dessert that feels luxurious yet approachable, perfect for students or working professionals looking for quick wins in the kitchen. I’ve tested it myself, and the results are always crowd-pleasers, inspiring you to experiment and enjoy cooking with joy.
Adding to its appeal, the recipe supports wellness by allowing substitutions that reduce sugar or use healthier fats, aligning with goals for diet-conscious eaters. This balance of fun and functionality is why it’s become a staple in my blog, much like other easy recipes that spark creativity in the kitchen.
Jump to:
- Why You’ll Love This Red Velvet Cheesecake
- Key Features That Make It Special
- Essential Ingredients for Red Velvet Cheesecake
- Why These Ingredients Work
- How to Prepare the Perfect Red Velvet Cheesecake: Step-by-Step Guide
- Tips for Success
- Dietary Substitutions to Customize Your Red Velvet Cheesecake
- Exploring Variations
- Mastering Red Velvet Cheesecake: Advanced Tips and Variations
- How to Store Red Velvet Cheesecake: Best Practices
- FAQs: Frequently Asked Questions About Red Velvet Cheesecake
- What is red velvet cheesecake and how is it different from regular cheesecake?
- How do I make red velvet cheesecake at home?
- Can I make red velvet cheesecake without red food coloring?
- How should I store red velvet cheesecake to keep it fresh?
- Is red velvet cheesecake suitable for guests with dietary restrictions?
- Red Velvet Cheesecake
- Ingredients
- Instructions
- Last Step:
- Notes
- Nutrition
- Did you make this recipe?
Essential Ingredients for Red Velvet Cheesecake
Gathering the right ingredients is the first step to creating a mouthwatering red velvet cheesecake. This section breaks down everything you need, focusing on precise measurements to make your baking experience smooth and successful. By using fresh, quality items, you’ll achieve that perfect balance of creamy texture and rich flavor that defines this dessert.
- 24 cookies (2 cups or 268g crumbs) for the cookie crust
- 4 tablespoons (56g) melted butter for the cookie crust
- 24 ounces cream cheese at room temperature for the red velvet cheesecake filling
- 1 cup (207g) sugar for the red velvet cheesecake filling
- 3 tablespoons (21g) natural unsweetened cocoa powder for the red velvet cheesecake filling
- 1 cup (230g) sour cream for the red velvet cheesecake filling
- 1/4 cup (60ml) buttermilk for the red velvet cheesecake filling
- 4 large eggs for the red velvet cheesecake filling
- 2 teaspoons white vinegar for the red velvet cheesecake filling
- 2 teaspoons vanilla extract for the red velvet cheesecake filling
- 2 ounces red food coloring for the red velvet cheesecake filling
- 4 ounces cream cheese at room temperature for the cream cheese whipped cream topping
- 1 cup (240ml) cold heavy whipping cream for the cream cheese whipped cream topping
- 1/2 cup (58g) powdered sugar for the cream cheese whipped cream topping
- 1/2 teaspoon vanilla extract for the cream cheese whipped cream topping
These ingredients form the foundation of your red velvet cheesecake, ensuring each component contributes to the overall texture and taste. Remember, using room temperature cream cheese helps for easy mixing, as it blends seamlessly without lumps. This list covers everything required, making it simple to shop and prepare.
Why These Ingredients Work
Each ingredient plays a vital role in the final product. For example, the cocoa powder adds that subtle chocolate note, while the red food coloring brings the iconic hue that makes red velvet cheesecake so visually appealing. Fresh ingredients lead to the best results, helping you create a dessert that’s not only delicious but also aligns with tips for minimizing cracks and ensuring a creamy finish.
How to Prepare the Perfect Red Velvet Cheesecake: Step-by-Step Guide
Creating red velvet cheesecake at home is an exciting process that yields impressive results with a bit of patience. Start by preheating your oven, as this sets the stage for even baking and a smooth texture. Follow these steps closely to avoid common pitfalls and enjoy a dessert that’s rich in flavor and easy to master.
Begin with the preparation: Preheat the oven to 325°F (163°C). Line a 9-inch springform pan with parchment paper and grease the sides for easy removal. Combine the cookie crumbs and melted butter, then press firmly into the pan to form the crust, and bake for 10 minutes before cooling.
- Lower the oven temperature to 300°F (149°C). In a large bowl, beat the cream cheese, sugar, and cocoa powder on low speed until smooth and creamy.
- Add the sour cream and buttermilk, mixing until fully combined for that tangy base.
- Incorporate the eggs one at a time, beating gently to avoid overmixing, then stir in the white vinegar, vanilla extract, and red food coloring until the batter is uniform.
- Pour the batter over the prepared crust in the springform pan. Place this pan inside a larger one, and add warm water halfway up the sides to create a water bath, which helps prevent cracks.
- Bake for 1 hour and 45 minutes, then turn off the oven and let the cheesecake rest inside with the door closed for 30 minutes. Crack the door and let it rest for another 20-30 minutes to cool gradually.
- Refrigerate the cheesecake for 5-6 hours or overnight to set properly, enhancing its texture and flavor.
- For the topping, beat 4 ounces of cream cheese until smooth, then whip the cold heavy cream, powdered sugar, and 1/2 teaspoon vanilla extract until stiff peaks form. Fold this into the cream cheese and spread evenly over the chilled cheesecake.
Preparation time includes about 1 hour for prep, 1 hour and 55 minutes for cooking, and a total of around 3 hours including cooling. This step-by-step guide ensures your red velvet cheesecake turns out perfectly every time.
Tips for Success
To minimize cracks, always beat ingredients on low speed and use a water bath as described. If any cracks appear, the topping can cover them nicely, keeping your dessert looking professional. This method not only builds confidence but also makes baking fun for all, from newlyweds to seniors.

Dietary Substitutions to Customize Your Red Velvet Cheesecake
Making red velvet cheesecake adaptable means everyone can enjoy it, regardless of their dietary preferences. Start by swapping cream cheese with vegan alternatives for plant-based diets, which keep the creamy texture intact. These changes allow you to tailor the recipe without compromising on taste, making it ideal for food enthusiasts and travelers alike.
For protein alternatives, use silken tofu or vegan cream cheese in place of traditional options. Eggs can be replaced with flax eggs or chia seeds, while buttermilk might be swapped for almond milk mixed with vinegar. On the vegetable and seasoning side, try carob powder instead of cocoa for a milder flavor, or use natural sweeteners like maple syrup to adjust sweetness levels.
Exploring Variations
Adding spices such as cinnamon can bring warmth to the mix, enhancing the overall appeal for busy parents or working professionals. These substitutions not only cater to specific needs but also encourage creativity in the kitchen, aligning with my blog’s goal of making cooking accessible and exciting.
Mastering Red Velvet Cheesecake: Advanced Tips and Variations
Once you’re comfortable with the basics, advanced tips can take your red velvet cheesecake to the next level. Using a water bath is essential for a creamy texture and to prevent cracks, while slow mixing reduces air bubbles for a smoother finish. Experiment with flavors like orange zest or espresso powder to add a sophisticated twist that surprises your guests.
| Tips | Benefits |
|---|---|
| Use room temperature ingredients | Ensures even mixing and prevents lumps |
| Add a water bath | Creates a moist environment to avoid cracks |
| Layer with cream cheese mousse | Enhances richness and presentation |
For presentation, garnish with fresh berries or a drizzle of chocolate for a wow factor. Make-ahead options include preparing the cheesecake a day in advance or freezing portions for busy weeks, much like how mini-muffin pancake bites offer quick breakfast ideas.
How to Store Red Velvet Cheesecake: Best Practices
Proper storage keeps your red velvet cheesecake fresh and delicious for longer. Refrigerate it covered in plastic wrap or an airtight container for up to 5 days to maintain its creamy texture. Freezing is another great option, wrapping it tightly and storing for up to 3 months before thawing overnight in the fridge.
Avoid reheating to preserve the dessert’s quality, and consider portioning slices for easy meal prep. These practices ensure you can enjoy leftovers without any loss of flavor, making it practical for everyday life.
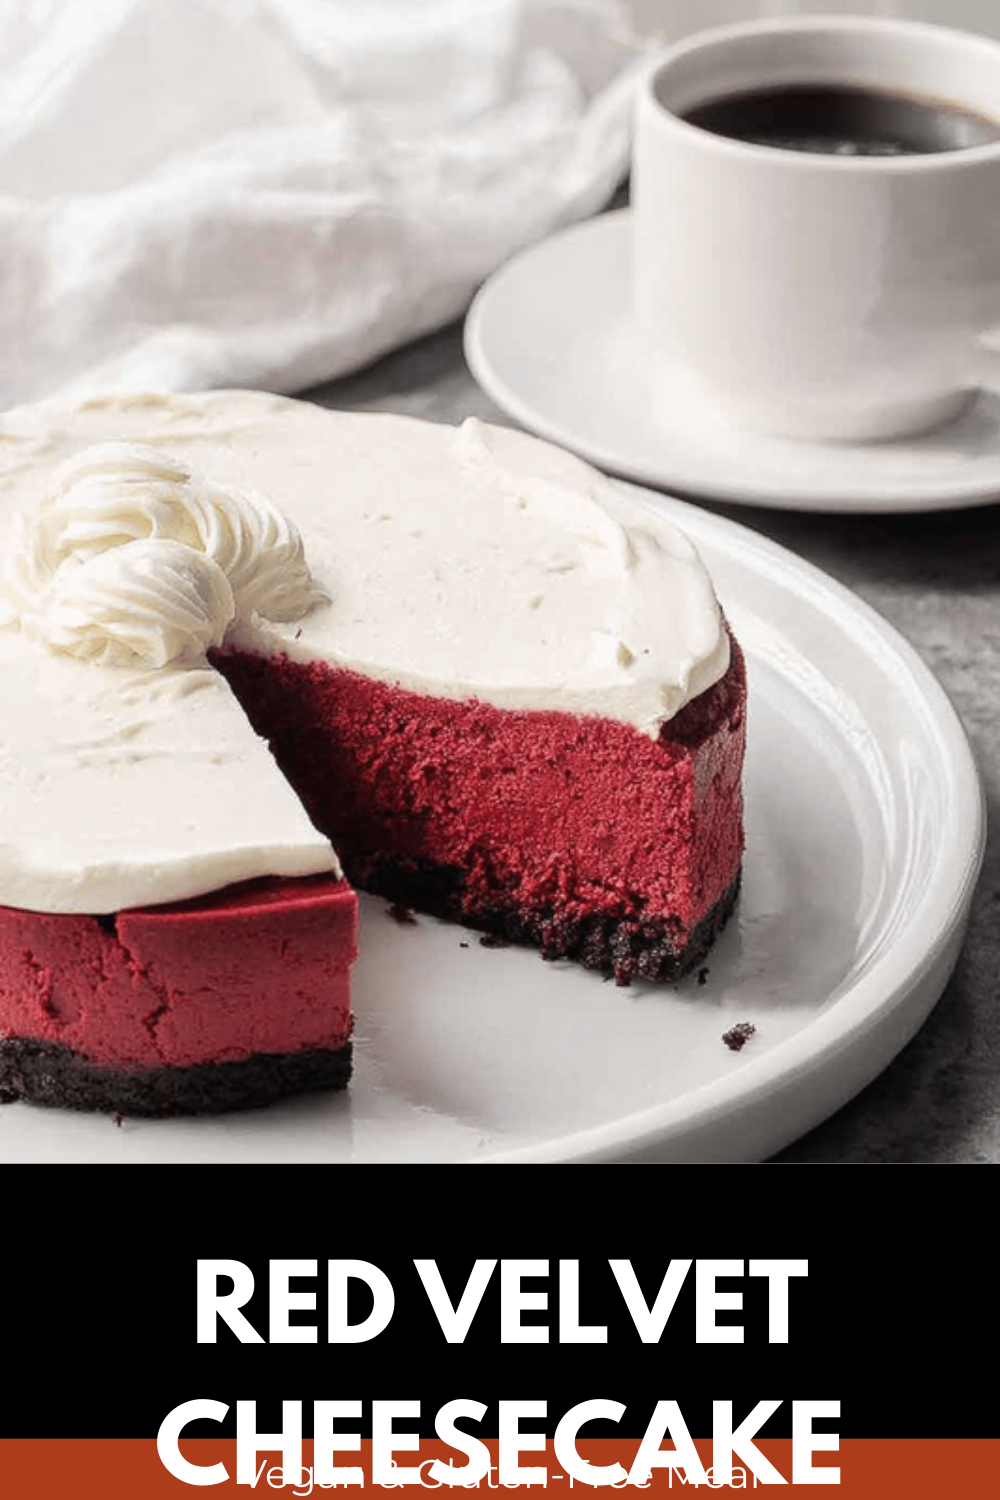
FAQs: Frequently Asked Questions About Red Velvet Cheesecake
What is red velvet cheesecake and how is it different from regular cheesecake?
How do I make red velvet cheesecake at home?
Can I make red velvet cheesecake without red food coloring?
How should I store red velvet cheesecake to keep it fresh?
Is red velvet cheesecake suitable for guests with dietary restrictions?
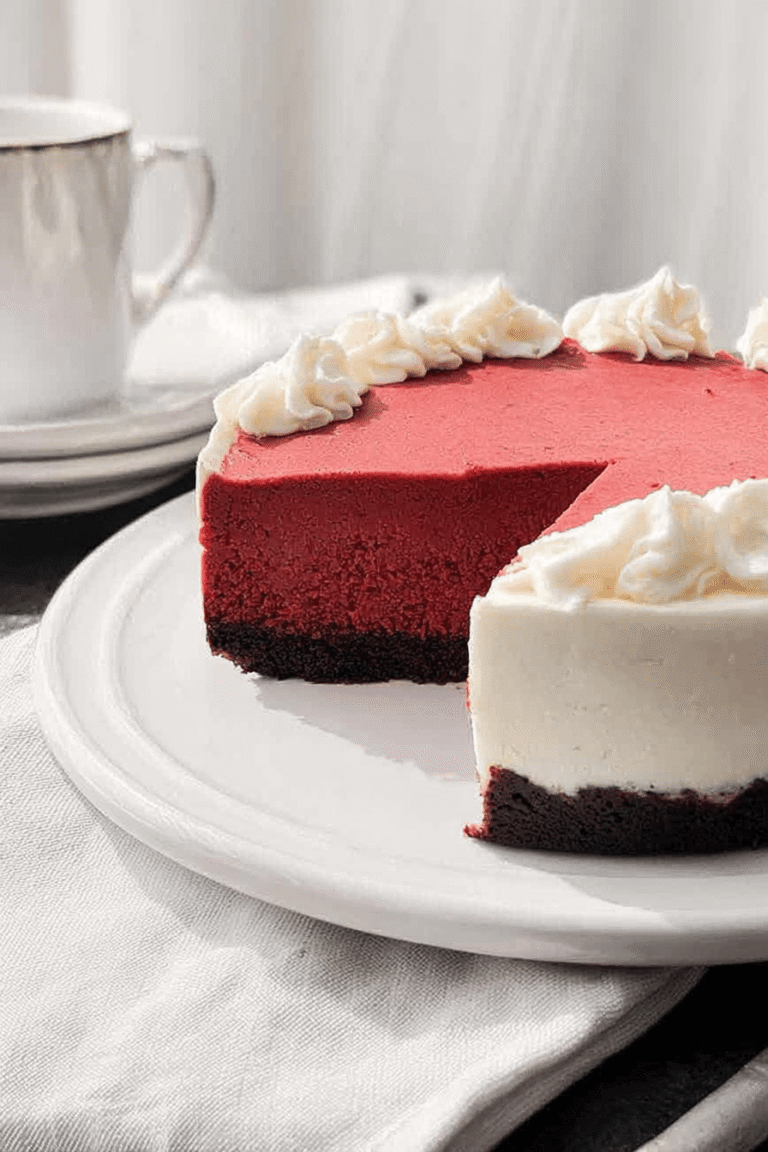
Red Velvet Cheesecake
🍰 This Red Velvet Cheesecake blends the classic rich red velvet flavor with creamy, smooth cheesecake for an indulgent dessert.
🎨 The luscious cream cheese whipped topping adds a delicate swirl that perfectly complements the moist, chocolatey layers.
- Total Time: 8 hours 55 minutes
- Yield: 12 servings
Ingredients
– 24 cookies (2 cups or 268g crumbs) for the cookie crust
– 4 tablespoons (56g) melted butter for the cookie crust
– 24 ounces cream cheese at room temperature for the red velvet cheesecake filling
– 1 cup (207g) sugar for the red velvet cheesecake filling
– 3 tablespoons (21g) natural unsweetened cocoa powder for the red velvet cheesecake filling
– 1 cup (230g) sour cream for the red velvet cheesecake filling
– 1/4 cup (60ml) buttermilk for the red velvet cheesecake filling
– 4 large eggs for the red velvet cheesecake filling
– 2 teaspoons white vinegar for the red velvet cheesecake filling
– 2 teaspoons vanilla extract for the red velvet cheesecake filling
– 2 ounces red food coloring for the red velvet cheesecake filling
– 4 ounces cream cheese at room temperature for the cream cheese whipped cream topping
– 1 cup (240ml) cold heavy whipping cream for the cream cheese whipped cream topping
– 1/2 cup (58g) powdered sugar for the cream cheese whipped cream topping
– 1/2 teaspoon vanilla extract for the cream cheese whipped cream topping
Instructions
Begin with the preparation: Preheat the oven to 325°F (163°C). Line a 9-inch springform pan with parchment paper and grease the sides for easy removal. Combine the cookie crumbs and melted butter, then press firmly into the pan to form the crust, and bake for 10 minutes before cooling.
1-Lower the oven temperature to 300°F (149°C). In a large bowl, beat the cream cheese, sugar, and cocoa powder on low speed until smooth and creamy.
2-Add the sour cream and buttermilk, mixing until fully combined for that tangy base.
3-Incorporate the eggs one at a time, beating gently to avoid overmixing, then stir in the white vinegar, vanilla extract, and red food coloring until the batter is uniform.
4-Pour the batter over the prepared crust in the springform pan. Place this pan inside a larger one, and add warm water halfway up the sides to create a water bath, which helps prevent cracks.
5-Bake for 1 hour and 45 minutes, then turn off the oven and let the cheesecake rest inside with the door closed for 30 minutes. Crack the door and let it rest for another 20-30 minutes to cool gradually.
6-Refrigerate the cheesecake for 5-6 hours or overnight to set properly, enhancing its texture and flavor.
7-For the topping, beat 4 ounces of cream cheese until smooth, then whip the cold heavy cream, powdered sugar, and 1/2 teaspoon vanilla extract until stiff peaks form. Fold this into the cream cheese and spread evenly over the chilled cheesecake.
Last Step:
Please leave a rating and comment letting us know how you liked this recipe! This helps our business to thrive and continue providing free, high-quality recipes for you.Notes
🧀 Use room temperature cream cheese for easy mixing and smooth batter.
🎛 Beat filling ingredients on low speed to minimize cracks in the cheesecake.
💧 Ensure the water bath does not overflow the springform edges to prevent leaks and soggy crust.
❄️ Cool the cheesecake gradually with oven resting steps to prevent cracks; cover any cracks with the topping if needed.
- Prep Time: 1 hour
- Cooling and chilling time: 6 hours
- Cook Time: 1 hour 55 minutes
- Category: Dessert
- Method: Mixing, baking, water bath, chilling
- Cuisine: American
- Diet: Vegetarian
Nutrition
- Serving Size: 1 slice
- Calories: 458 kcal
- Sugar: 29.6 g
- Sodium: 259 mg
- Fat: 32.5 g
- Saturated Fat: 22 g
- Unsaturated Fat: 8 g
- Trans Fat: 0 g
- Carbohydrates: 36.4 g
- Fiber: 1 g
- Protein: 7.3 g
- Cholesterol: 132 mg





