

Why You’ll Love This Hot Honey Fried Shrimp
If you’re looking for a crowd-pleasing appetizer that brings together the perfect balance of sweet and spicy, hot honey fried shrimp is sure to become your new favorite recipe. This dish combines the satisfying crunch of perfectly fried seafood with a sticky, spicy-sweet glaze that keeps you coming back for more.
- Ease of preparation: This hot honey fried shrimp recipe comes together in just 30 minutes, making it perfect for busy weeknight dinners or last-minute entertaining. The simple batter requires minimal ingredients, and the hot honey sauce can be prepared while the shrimp fries. Even novice cooks can achieve restaurant-quality results with this straightforward approach.
- Health benefits: Shrimp is an excellent source of lean protein, providing essential nutrients without excessive calories. When cooked properly and enjoyed in moderation, this dish can be part of a balanced diet. Shrimp contains omega-3 fatty acids, selenium, and vitamin B12, supporting heart health and providing energy. The honey adds natural sweetness while providing antioxidants, and the chili flakes may boost metabolism.
- Versatility: This crispy shrimp recipe adapts beautifully to various dietary needs and preferences. Whether you’re looking for a gluten-free version, want to air-fry instead of deep-fry, or need to adjust the spice level, this recipe accommodates all changes without losing its delicious character. Serve it as an appetizer, main course, or even as a topping for salads and tacos.
- Distinctive flavor: What sets this dish apart is the unique combination of textures and tastes. The crispy coating contrasts perfectly with the tender shrimp inside, while the hot honey creates an addictive sweet-heat balance. This flavor profile has made it a popular menu item in restaurants and food trucks across the country, and now you can recreate it at home with simple ingredients.
Jump to:
- Why You’ll Love This Hot Honey Fried Shrimp
- Essential Ingredients for Hot Honey Fried Shrimp
- Main Ingredients:
- Special Dietary Options:
- How to Prepare the Perfect Hot Honey Fried Shrimp: Step-by-Step Guide
- First Step: Preparation and Mise en Place
- Second Step: Creating the Perfect Batter
- Third Step: Frying to Perfection
- Fourth Step: Preparing the Hot Honey Glaze
- Final Step: Assembly and Serving
- Dietary Substitutions to Customize Your Hot Honey Fried Shrimp
- Protein and Main Component Alternatives
- Vegetable, Sauce, and Seasoning Modifications
- Mastering Hot Honey Fried Shrimp: Advanced Tips and Variations
- Pro Cooking Techniques
- Flavor Variations
- Presentation Tips
- Make-Ahead Options
- How to Store Hot Honey Fried Shrimp: Best Practices
- Refrigeration
- Freezing
- Reheating
- Meal Prep Considerations
- FAQs: Frequently Asked Questions About Hot Honey Fried Shrimp
- What is hot honey fried shrimp?
- How do you make hot honey fried shrimp at home?
- Can you air fry hot honey fried shrimp instead of deep frying?
- What’s the best hot honey recipe for fried shrimp?
- How do you store and reheat leftover hot honey fried shrimp?
- Hot Honey Fried Shrimp
- Ingredients
- Instructions
- Last Step:
- Notes
- Nutrition
- Did you make this recipe?
Essential Ingredients for Hot Honey Fried Shrimp
The magic of this recipe lies in its straightforward ingredients that come together to create something extraordinary. Each component plays a crucial role in achieving the perfect balance of crispy texture and spicy-sweet flavor.
Main Ingredients:
- 1 lb shrimp, peeled and deveined – The star of the dish, providing tender protein and a delicate seafood flavor
- Salt and pepper to taste – Essential seasonings that enhance the natural flavor of the shrimp
- 1/2 cup all-purpose flour – Creates the base of the crispy coating
- 1/4 cup cornstarch – Adds extra crispiness and lightness to the batter
- 1 teaspoon baking powder – Helps create air bubbles in the batter for a lighter texture
- 1/2 cup cold soda water – The carbonation creates an exceptionally light and crispy batter
- Oil for frying – Provides the medium for achieving golden, crispy results
- 1/2 cup honey – The foundation of the spicy-sweet glaze
- 1-2 tablespoons chili flakes – Adjustable heat element in the hot honey sauce
- 1 tablespoon apple cider vinegar – Balances the sweetness with a touch of acidity
- 1 teaspoon garlic powder – Adds savory depth to complement the sweet and spicy flavors
Special Dietary Options:
For those with specific dietary requirements, this recipe can be easily adapted:
- Vegan: Substitute the shrimp with cauliflower florets or oyster mushrooms. Use plant-based milk instead of soda water in the batter if needed. Ensure all ingredients, including the honey (consider maple syrup for strict vegans), align with vegan guidelines.
- Gluten-free: Replace the all-purpose flour with a 1:1 gluten-free flour blend. Verify that all other ingredients, particularly baking powder and any condiments, are certified gluten-free. The texture will remain equally crispy.
- Low-calorie: Consider air frying instead of deep frying to significantly reduce the calorie count. You can also reduce the amount of honey in the sauce or use a natural sweetener with fewer calories. Using less oil when frying or opting for a light spray oil can also cut calories.
How to Prepare the Perfect Hot Honey Fried Shrimp: Step-by-Step Guide
Creating restaurant-quality hot honey fried shrimp at home is easier than you might think. Follow this detailed guide to achieve perfectly crispy shrimp with just the right amount of sticky, spicy-sweet glaze.
First Step: Preparation and Mise en Place
Begin by preparing your shrimp. Peel and devein 1 pound of medium-sized shrimp, leaving the tails on if you prefer an attractive presentation. Pat them thoroughly dry with paper towels excess moisture will prevent the batter from adhering properly. Season the shrimp generously with salt and pepper on both sides. This initial seasoning ensures flavor throughout the entire dish, not just on the surface.
While the shrimp are resting, prepare your batter station. In a medium bowl, whisk together 1/2 cup of flour, 1/4 cup of cornstarch, and 1 teaspoon of baking powder until well combined. This dry mixture creates the foundation for a light, crispy coating that won’t weigh down the delicate shrimp.
Set up your frying station next. If using a deep fryer, preheat it to 350°F (175°C). If frying in a Dutch oven or heavy skillet, pour in about 2 inches of oil and heat until it reaches the same temperature. Using a kitchen thermometer ensures accuracy and prevents under or overcooking. Line a baking sheet with paper towels or a wire cooling rack for draining the fried shrimp.
Second Step: Creating the Perfect Batter
Just before you’re ready to fry, add 1/2 cup of cold soda water to your flour mixture. Whisk gently just until combined do not overmix as this can develop gluten and make the batter tough. The batter should have the consistency of thick pancake batter. The carbonation in the soda water creates tiny air bubbles that result in an exceptionally light and crispy texture.
For best results, keep the soda water as cold as possible until mixing. The temperature difference helps create a stronger reaction with the baking powder, leading to more puffiness in the coating. If you prefer a thicker coating, you can decrease the soda water slightly, but remember that a thinner batter generally crisps up better.
Third Step: Frying to Perfection
Dip each seasoned shrimp into the batter, allowing excess to drip off. Carefully place them in the preheated oil, working in batches to avoid overcrowding the pan. Crowding lowers the oil temperature and results in soggy, greasy shrimp. Fry for approximately 2-3 minutes, turning once midway through, until golden brown and crispy.
Maintain the oil temperature throughout the frying process. If the oil gets too hot, the exterior will burn before the interior cooks through. If it’s too cool, the shrimp will absorb excess oil and become greasy. The ideal temperature range is between 350°F and 375°F (175-190°C).
As the shrimp finish cooking, use a slotted spoon or spider strainer to transfer them to the prepared paper towels or wire rack. Season immediately with a light sprinkle of salt while still hot this is when the seasoning will best adhere to the crispy surface.
Fourth Step: Preparing the Hot Honey Glaze
While the shrimp are frying or cooling, prepare the signature hot honey sauce. In a small saucepan over low heat, combine 1/2 cup of honey, 1-2 tablespoons of chili flakes (adjust based on your spice preference), 1 tablespoon of apple cider vinegar, and 1 teaspoon of garlic powder. Simmer gently for 5-7 minutes, stirring occasionally to prevent burning.
The honey should become fragrant and slightly thinner, but be careful not to boil it as this can alter the flavor profile. The vinegar adds a welcome acidity that balances the sweetness, while the garlic powder provides savory depth. If you prefer a smoother sauce, you can strain out the chili flakes after cooking, but leaving them in creates a more textured appearance and additional heat.
Remove from heat and let the sauce cool slightly it will thicken as it cools. This homemade hot honey can be made ahead of time and stored in the refrigerator for up to two weeks, allowing the flavors to develop further.
Final Step: Assembly and Serving
Transfer the fried shrimp to a large bowl or serving platter. Drizzle or toss with the hot honey sauce according to your preference. Tossing coats each shrimp evenly but may slightly soften the crispest edges. Drizzling preserves maximum crunch while still delivering plenty of flavor.
Serve immediately while hot and crispy. Garnish with additional chili flakes, sliced green onions, or a squeeze of fresh lime juice to brighten the flavors. These spicy shrimp make an excellent appetizer or main course paired with fresh strawberry trifles for a sweet finish to balance the heat.
For a complete meal, consider serving with cooling sides like coleslaw, cucumber salad, or creamy remoulade sauce to tame the heat. The dish also pairs wonderfully with simple steamed rice or crusty bread to soak up the extra sauce.

Dietary Substitutions to Customize Your Hot Honey Fried Shrimp
Protein and Main Component Alternatives
While shrimp creates the classic version of this dish, several alternatives work wonderfully with the hot honey glaze. For a similar seafood experience, try scallops or cubes of firm white fish like cod or halibut. Adjust cooking times accordingly scallops typically need 2-3 minutes per side, while fish cubes may require slightly longer depending on thickness.
Chicken wings or tenders make an excellent protein substitution. Cut boneless, skinless chicken into bite-sized pieces and follow the same battering and frying process, increasing the cooking time to ensure the chicken reaches an internal temperature of 165°F (74°C). The sweet and spicy profile complements chicken particularly well.
For vegetarians and vegans, cauliflower florets or oyster mushrooms provide substantial texture that holds up well to frying. Cut vegetables into generous florets or pieces, ensuring they’re dry before battering. These alternatives absorb the flavors beautifully while offering a satisfying meaty texture.
Tofu cubes can also work, especially if you use extra-firm tofu pressed thoroughly to remove excess moisture. Coat the tofu in cornstarch before dipping in batter for extra crunch. These plant-based alternatives make the dish accessible to everyone at your table while maintaining the delicious flavor profile.
Vegetable, Sauce, and Seasoning Modifications
The hot honey sauce itself welcomes endless variations. For those sensitive to spice, reduce the chili flakes or substitute with milder options like paprika or a pinch of cayenne. Conversely, heat lovers can increase the chili flakes or add a dash of hot sauce to amp up the fire. Consider adding other aromatics like minced fresh ginger or grated orange peel for complexity.
Experiment with different vinegars in the sauce rice vinegar offers a milder acidity, while balsamic adds depth and color. Bourbon or a splash of whiskey creates a sophisticated version perfect for adult gatherings. maple syrup can replace part or all of the honey for a different sweet profile with woodier notes.
Enhance the batter with seasonings like Old Bay, Cajun seasoning, or smoked paprika for additional flavor dimensions. Adding herbs like chopped cilantro or green onions to the finished dish brings freshness that balances the richness. A sprinkle of toasted sesame seeds or crushed peanuts adds both texture and visual appeal.
For those avoiding refined sugars, try using raw honey or agave nectar. These alternatives still provide the necessary sticky consistency while offering different flavor nuances and potentially lower glycemic impact. Coconut aminos can replace the vinegar for a soy-sauce-like umami element without the gluten.
Mastering Hot Honey Fried Shrimp: Advanced Tips and Variations
Once you’ve mastered the basic recipe, these professional techniques and creative variations will help you take your hot honey fried shrimp to the next level. These insights from restaurant kitchens will elevate your home cooking and impress even the most discerning guests.
Pro Cooking Techniques
For the crispiest results, double-batter your shrimp. After the first dip in batter and a quick fry, let the shrimp cool slightly, then dip in batter again and fry a second time. This technique creates an exceptionally crunchy exterior that stays crispy longer, even after being tossed with the sauce.
Temperature control is crucial for perfect frying. Use a high-quality instant-read thermometer to monitor your oil temperature throughout the cooking process. Allow the oil to return to the proper temperature between batches adding cold food to hot oil drops the temperature significantly. This attention to detail ensures consistent results.
For a lighter version without sacrificing texture, consider using cornstarch as the primary coating rather than a wet batter. Dredge the seasoned shrimp in cornstarch, shaking off excess, then fry immediately. This creates a delicate, shatteringly crisp crust that highlights the natural sweetness of the shrimp.
Flavor Variations
Experiment with different heat sources in your hot honey. Korean gochugaru (chili flakes) offers a complex, slightly smoky heat, while Aleppo pepper provides a moderate spice with fruity notes. Harissa paste adds depth and complexity beyond simple heat, creating a more nuanced glaze.
Incorporate citrus by adding lime, lemon, or orange zest to the honey mixture. The bright notes cut through the richness and add sophistication. Bourbon or rum can be added to the sauce for a boozy variation that’s perfect for adult gatherings just be sure to cook off the alcohol properly.
For an Asian-inspired twist, add five-spice powder or star anise to the sauce. Alternatively, create a Southern version by incorporating a splash of apple cider vinegar and a pinch of smoked paprika. These regional variations showcase the versatility of the basic hot honey concept.
Presentation Tips
Transform this simple dish into an impressive presentation with thoughtful plating. Serve the shrimp in individual bamboo baskets lined with banana leaves or on slate boards for a rustic feel. Arrange them in a circular pattern on a platter, tails pointing outward, with a small bowl of extra hot honey in the center for dipping.
Garnish generously with contrasting elements like thinly sliced radishes, fresh herbs, or edible flowers. A final sprinkle of flaky sea salt adds both visual appeal and flavor contrast. Serve with lime wedges on the side the bright acidity helps balance the rich, sweet elements.
For cocktail parties, consider serving as sliders on miniature buns with a quick slaw. The contrasting textures and temperatures create an exciting bite-sized presentation. These appetizers pair beautifully with decadent milkshakes for a sweet-savory combination.
Make-Ahead Options
Though this dish is best enjoyed fresh, several components can be prepared in advance to streamline your cooking process. The hot honey sauce can be made up to two weeks ahead and stored in an airtight container in the refrigerator. In fact, the flavors often improve with a little time to meld.
Clean and season your shrimp earlier in the day, storing them in the refrigerator until ready to use. The dry ingredients for the batter can be combined ahead, but add the soda water just before frying for the crispiest results. If hosting a party, set up a station with all your components prepped for efficient cooking during your gathering.
How to Store Hot Honey Fried Shrimp: Best Practices
While hot honey fried shrimp is best enjoyed immediately after cooking, proper storage techniques can help maintain quality if you have leftovers or want to prepare components in advance. Following these guidelines will ensure your shrimp remains safe to eat and retains as much texture and flavor as possible.
Refrigeration
Store cooled fried shrimp in an airtight container in the refrigerator for up to 2 days. For best results, keep the sauce separate and toss the shrimp immediately before serving. This prevents the crispy coating from becoming soggy from the moisture in the honey. Place a paper towel in the container to absorb excess moisture.
When refrigerating, allow the shrimp to cool completely before sealing the container. Trapping heat creates condensation which accelerates sogginess. If possible, store the shrimp in a single layer rather than stacking them, as this preserves the texture better.
Freezing
For longer storage, freeze uncoated fried shrimp for up to 1 month. Arrange the cooled shrimp in a single layer on a baking sheet and place in the freezer until firm. Transfer to a freezer bag, removing as much air as possible to prevent freezer burn. Label with the date for easy identification.
Alternatively, you can freeze the raw, breaded shrimp before frying. Arrange them on a baking sheet as before, freeze until firm, then transfer to freezer bags. When ready to eat, fry from frozen, adding an extra minute or two to the cooking time. This method yields the crispiest results.
Reheating
The best method for reheating fried shrimp is in a 375°F (190°C) oven or air fryer for 5-7 minutes. This method helps restore some of the lost crispiness while heating the shrimp through. Arrange in a single layer on a baking sheet or in the air fryer basket for even heating.
Avoid microwaving leftover shrimp, as this method creates steam that makes the coating soggy and can unevenly heat the shrimp. If microwaving is your only option, use a lower power setting and heat in shorter intervals, checking frequently to prevent overcooking.
Always toss the reheated shrimp with fresh hot honey just before serving. The sauce will have thickened in the refrigerator and may need to be gently warmed to reach a pourable consistency again.
Meal Prep Considerations
For efficient meal planning, prep your components in batches. Clean and devein shrimp when you bring them home from the store, storing them properly until ready to use. Make a larger batch of hot honey sauce it keeps well and can be used for other dishes like roasted vegetables or grilled chicken.
Portion your shrimp appropriately before freezing to avoid thawing more than needed. This approach reduces food waste and makes weeknight meals faster to prepare. Label containers clearly with contents and dates for easy identification in your freezer or refrigerator.
FAQs: Frequently Asked Questions About Hot Honey Fried Shrimp
What is hot honey fried shrimp?
How do you make hot honey fried shrimp at home?
Can you air fry hot honey fried shrimp instead of deep frying?
What’s the best hot honey recipe for fried shrimp?
How do you store and reheat leftover hot honey fried shrimp?
Hot Honey Fried Shrimp
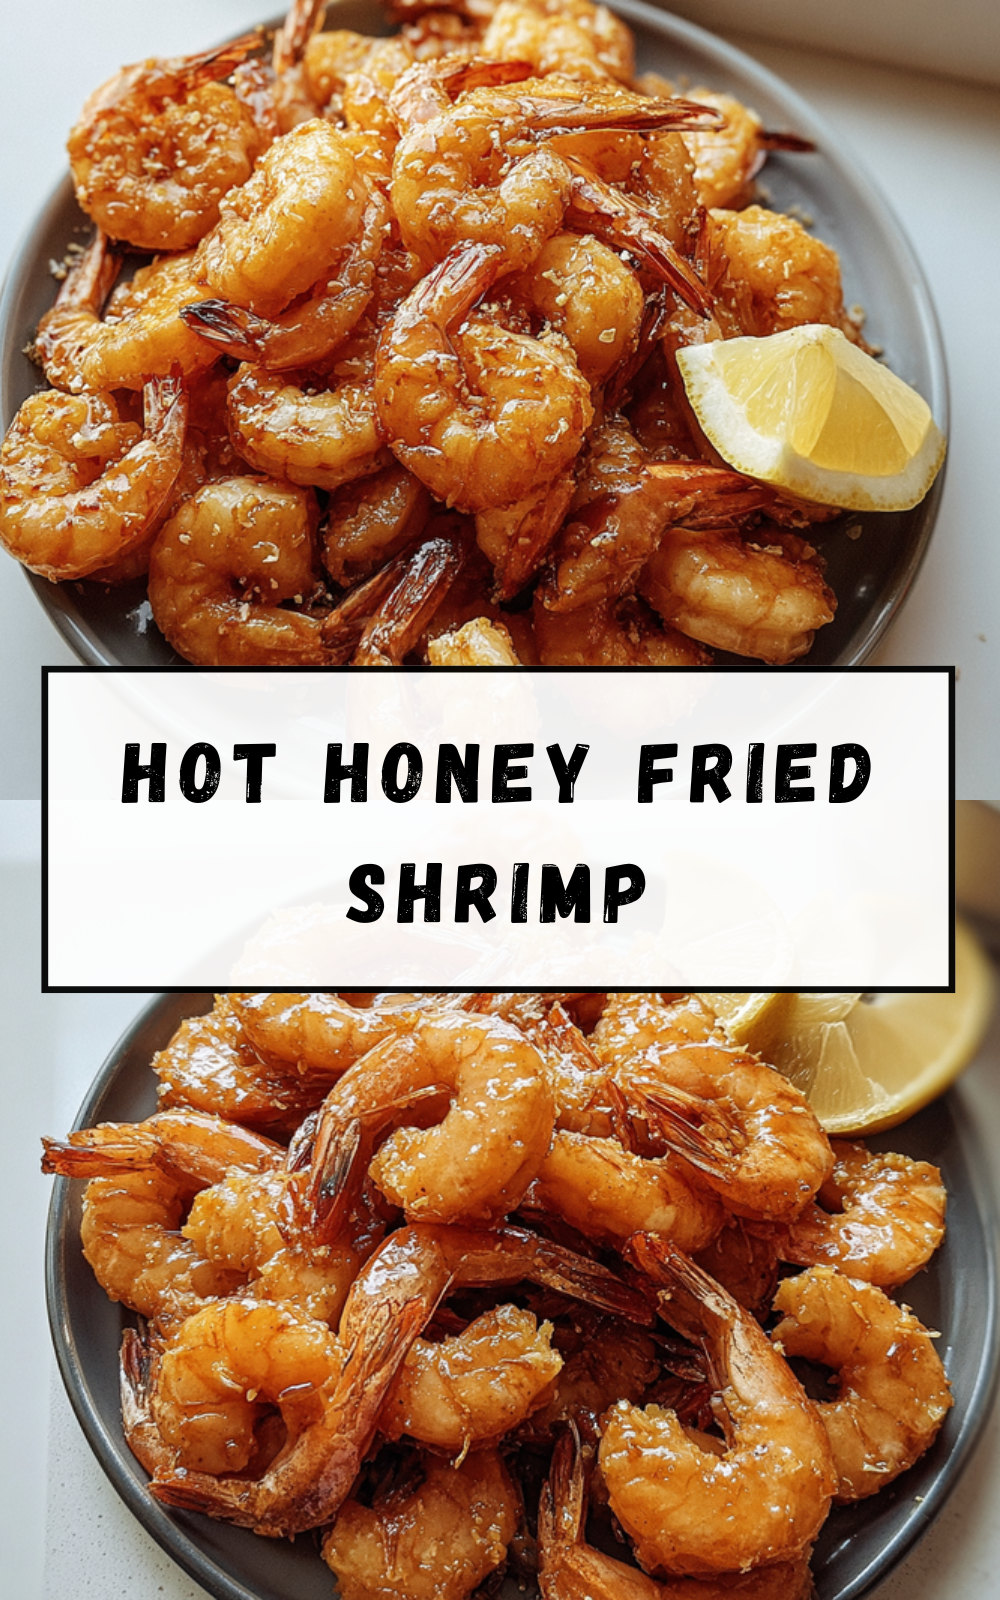
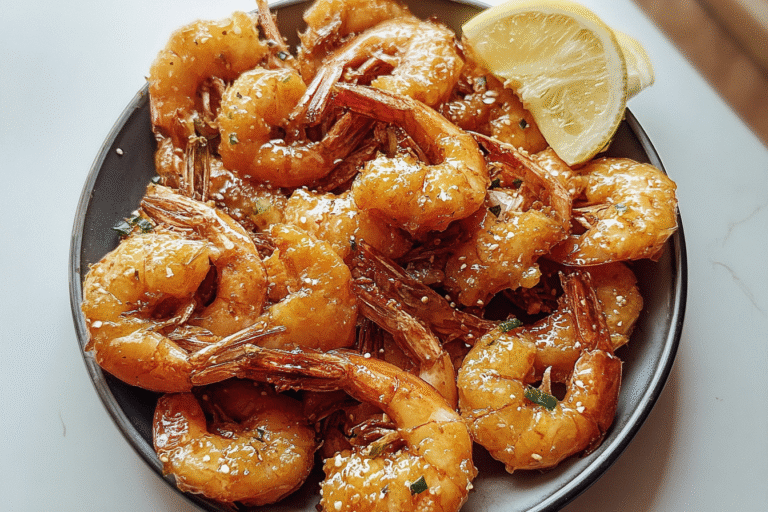
🔥🦐 Crispy breaded shrimp doused in addictive sweet-spicy hot honey—irresistible crunch with fiery kick elevates any meal.
🍯 25-minute seafood sensation shines as app or main; healthier air-fry option for guilt-free indulgence!
- Total Time: 25 minutes
- Yield: 4 servings
Ingredients
– 1 lb shrimp, peeled and deveined
– Salt and pepper to taste
– 1/2 cup all-purpose flour
– 1/4 cup cornstarch
– 1 teaspoon baking powder
– 1/2 cup cold soda water
– Oil for frying
– 1/2 cup honey
– 1-2 tablespoons chili flakes
– 1 tablespoon apple cider vinegar
– 1 teaspoon garlic powder
Instructions
1-First Step: Preparation and Mise en Place Begin by preparing your shrimp. Peel and devein 1 pound of medium-sized shrimp, leaving the tails on if you prefer an attractive presentation. Pat them thoroughly dry with paper towels excess moisture will prevent the batter from adhering properly. Season the shrimp generously with salt and pepper on both sides. This initial seasoning ensures flavor throughout the entire dish, not just on the surface. While the shrimp are resting, prepare your batter station. In a medium bowl, whisk together 1/2 cup of flour, 1/4 cup of cornstarch, and 1 teaspoon of baking powder until well combined. This dry mixture creates the foundation for a light, crispy coating that won’t weigh down the delicate shrimp. Set up your frying station next. If using a deep fryer, preheat it to 350°F (175°C). If frying in a Dutch oven or heavy skillet, pour in about 2 inches of oil and heat until it reaches the same temperature. Using a kitchen thermometer ensures accuracy and prevents under or overcooking. Line a baking sheet with paper towels or a wire cooling rack for draining the fried shrimp.
2-Second Step: Creating the Perfect Batter Just before you’re ready to fry, add 1/2 cup of cold soda water to your flour mixture. Whisk gently just until combined do not overmix as this can develop gluten and make the batter tough. The batter should have the consistency of thick pancake batter. The carbonation in the soda water creates tiny air bubbles that result in an exceptionally light and crispy texture. For best results, keep the soda water as cold as possible until mixing. The temperature difference helps create a stronger reaction with the baking powder, leading to more puffiness in the coating. If you prefer a thicker coating, you can decrease the soda water slightly, but remember that a thinner batter generally crisps up better.
3-Third Step: Frying to Perfection Dip each seasoned shrimp into the batter, allowing excess to drip off. Carefully place them in the preheated oil, working in batches to avoid overcrowding the pan. Crowding lowers the oil temperature and results in soggy, greasy shrimp. Fry for approximately 2-3 minutes, turning once midway through, until golden brown and crispy. Maintain the oil temperature throughout the frying process. If the oil gets too hot, the exterior will burn before the interior cooks through. If it’s too cool, the shrimp will absorb excess oil and become greasy. The ideal temperature range is between 350°F and 375°F (175-190°C). As the shrimp finish cooking, use a slotted spoon or spider strainer to transfer them to the prepared paper towels or wire rack. Season immediately with a light sprinkle of salt while still hot this is when the seasoning will best adhere to the crispy surface.
4-Fourth Step: Preparing the Hot Honey Glaze While the shrimp are frying or cooling, prepare the signature hot honey sauce. In a small saucepan over low heat, combine 1/2 cup of honey, 1-2 tablespoons of chili flakes (adjust based on your spice preference), 1 tablespoon of apple cider vinegar, and 1 teaspoon of garlic powder. Simmer gently for 5-7 minutes, stirring occasionally to prevent burning. The honey should become fragrant and slightly thinner, but be careful not to boil it as this can alter the flavor profile. The vinegar adds a welcome acidity that balances the sweetness, while the garlic powder provides savory depth. If you prefer a smoother sauce, you can strain out the chili flakes after cooking, but leaving them in creates a more textured appearance and additional heat. Remove from heat and let the sauce cool slightly it will thicken as it cools. This homemade hot honey can be made ahead of time and stored in the refrigerator for up to two weeks, allowing the flavors to develop further.
5-Final Step: Assembly and Serving Transfer the fried shrimp to a large bowl or serving platter. Drizzle or toss with the hot honey sauce according to your preference. Tossing coats each shrimp evenly but may slightly soften the crispest edges. Drizzling preserves maximum crunch while still delivering plenty of flavor. Serve immediately while hot and crispy. Garnish with additional chili flakes, sliced green onions, or a squeeze of fresh lime juice to brighten the flavors. These spicy shrimp make an excellent appetizer or main course paired with fresh strawberry trifles for a sweet finish to balance the heat. For a complete meal, consider serving with cooling sides like coleslaw, cucumber salad, or creamy remoulade sauce to tame the heat. The dish also pairs wonderfully with simple steamed rice or crusty bread to soak up the extra sauce.
Last Step:
Please leave a rating and comment letting us know how you liked this recipe! This helps our business to thrive and continue providing free, high-quality recipes for you.Notes
🦐 Pat shrimp completely dry—key to ultra-crispy coating.
🔥 Test oil temp with one shrimp; too low = soggy, too hot = burnt.
🍯 Make hot honey ahead; stores 2 weeks refrigerated for multiple uses.
- Prep Time: 15 minutes
- Cook Time: 10 minutes
- Category: Appetizer
- Method: Deep Frying
- Cuisine: American
- Diet: Pescatarian
Nutrition
- Serving Size: 1/4 pound
- Calories: 420 kcal
- Sugar: 25g
- Sodium: 850mg
- Fat: 18g
- Saturated Fat: 3g
- Unsaturated Fat: 14g
- Trans Fat: 0g
- Carbohydrates: 42g
- Fiber: 2g
- Protein: 28g
- Cholesterol: 220mg





