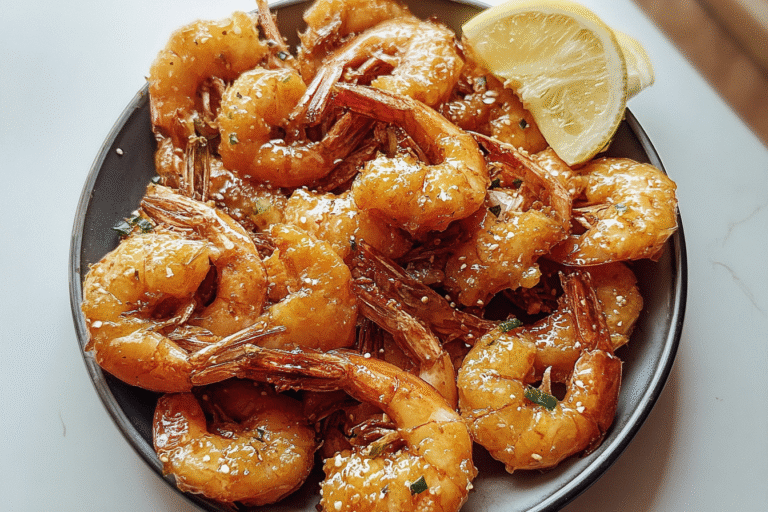
Ingredients
– 1 lb shrimp, peeled and deveined
– Salt and pepper to taste
– 1/2 cup all-purpose flour
– 1/4 cup cornstarch
– 1 teaspoon baking powder
– 1/2 cup cold soda water
– Oil for frying
– 1/2 cup honey
– 1-2 tablespoons chili flakes
– 1 tablespoon apple cider vinegar
– 1 teaspoon garlic powder
Instructions
1-First Step: Preparation and Mise en Place Begin by preparing your shrimp. Peel and devein 1 pound of medium-sized shrimp, leaving the tails on if you prefer an attractive presentation. Pat them thoroughly dry with paper towels excess moisture will prevent the batter from adhering properly. Season the shrimp generously with salt and pepper on both sides. This initial seasoning ensures flavor throughout the entire dish, not just on the surface. While the shrimp are resting, prepare your batter station. In a medium bowl, whisk together 1/2 cup of flour, 1/4 cup of cornstarch, and 1 teaspoon of baking powder until well combined. This dry mixture creates the foundation for a light, crispy coating that won’t weigh down the delicate shrimp. Set up your frying station next. If using a deep fryer, preheat it to 350°F (175°C). If frying in a Dutch oven or heavy skillet, pour in about 2 inches of oil and heat until it reaches the same temperature. Using a kitchen thermometer ensures accuracy and prevents under or overcooking. Line a baking sheet with paper towels or a wire cooling rack for draining the fried shrimp.
2-Second Step: Creating the Perfect Batter Just before you’re ready to fry, add 1/2 cup of cold soda water to your flour mixture. Whisk gently just until combined do not overmix as this can develop gluten and make the batter tough. The batter should have the consistency of thick pancake batter. The carbonation in the soda water creates tiny air bubbles that result in an exceptionally light and crispy texture. For best results, keep the soda water as cold as possible until mixing. The temperature difference helps create a stronger reaction with the baking powder, leading to more puffiness in the coating. If you prefer a thicker coating, you can decrease the soda water slightly, but remember that a thinner batter generally crisps up better.
3-Third Step: Frying to Perfection Dip each seasoned shrimp into the batter, allowing excess to drip off. Carefully place them in the preheated oil, working in batches to avoid overcrowding the pan. Crowding lowers the oil temperature and results in soggy, greasy shrimp. Fry for approximately 2-3 minutes, turning once midway through, until golden brown and crispy. Maintain the oil temperature throughout the frying process. If the oil gets too hot, the exterior will burn before the interior cooks through. If it’s too cool, the shrimp will absorb excess oil and become greasy. The ideal temperature range is between 350°F and 375°F (175-190°C). As the shrimp finish cooking, use a slotted spoon or spider strainer to transfer them to the prepared paper towels or wire rack. Season immediately with a light sprinkle of salt while still hot this is when the seasoning will best adhere to the crispy surface.
4-Fourth Step: Preparing the Hot Honey Glaze While the shrimp are frying or cooling, prepare the signature hot honey sauce. In a small saucepan over low heat, combine 1/2 cup of honey, 1-2 tablespoons of chili flakes (adjust based on your spice preference), 1 tablespoon of apple cider vinegar, and 1 teaspoon of garlic powder. Simmer gently for 5-7 minutes, stirring occasionally to prevent burning. The honey should become fragrant and slightly thinner, but be careful not to boil it as this can alter the flavor profile. The vinegar adds a welcome acidity that balances the sweetness, while the garlic powder provides savory depth. If you prefer a smoother sauce, you can strain out the chili flakes after cooking, but leaving them in creates a more textured appearance and additional heat. Remove from heat and let the sauce cool slightly it will thicken as it cools. This homemade hot honey can be made ahead of time and stored in the refrigerator for up to two weeks, allowing the flavors to develop further.
5-Final Step: Assembly and Serving Transfer the fried shrimp to a large bowl or serving platter. Drizzle or toss with the hot honey sauce according to your preference. Tossing coats each shrimp evenly but may slightly soften the crispest edges. Drizzling preserves maximum crunch while still delivering plenty of flavor. Serve immediately while hot and crispy. Garnish with additional chili flakes, sliced green onions, or a squeeze of fresh lime juice to brighten the flavors. These spicy shrimp make an excellent appetizer or main course paired with fresh strawberry trifles for a sweet finish to balance the heat. For a complete meal, consider serving with cooling sides like coleslaw, cucumber salad, or creamy remoulade sauce to tame the heat. The dish also pairs wonderfully with simple steamed rice or crusty bread to soak up the extra sauce.
Last Step:
Please leave a rating and comment letting us know how you liked this recipe! This helps our business to thrive and continue providing free, high-quality recipes for you.Notes
🦐 Pat shrimp completely dry—key to ultra-crispy coating.
🔥 Test oil temp with one shrimp; too low = soggy, too hot = burnt.
🍯 Make hot honey ahead; stores 2 weeks refrigerated for multiple uses.
- Prep Time: 15 minutes
- Cook Time: 10 minutes
- Category: Appetizer
- Method: Deep Frying
- Cuisine: American
- Diet: Pescatarian
Nutrition
- Serving Size: 1/4 pound
- Calories: 420 kcal
- Sugar: 25g
- Sodium: 850mg
- Fat: 18g
- Saturated Fat: 3g
- Unsaturated Fat: 14g
- Trans Fat: 0g
- Carbohydrates: 42g
- Fiber: 2g
- Protein: 28g
- Cholesterol: 220mg